Set Case Property Using Activity or WSDL
By: Nia Christian
Date: 12/3/18
- In the App Explorer, select your specific application, right-click-> Create -> Technical-> Activity
 2. Name your activity and Create and Open
3. On the Security tab, check the box to “Allow direct invocation from the client or a service”
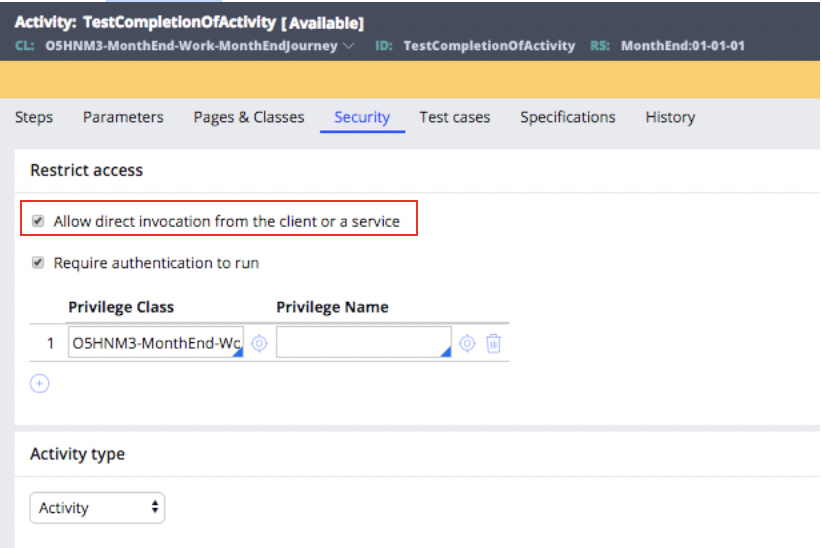 4. On the Parameters tab create two parameters, one titled “ID”, make it required. The second parameter “Other” does not have to be required, but it should be set to type “Out”.
 5. On the Steps page, add your first step, the Method should be set to “Obj-Open-By-Handle”. Set the “InstanceHandle” = Param.ID. Be sure to check the “Lock” checkbox as well as the “ReleaseOnCommit” checkbox.
 6. Add your second step. Set the Method to “Property-Set”. The PropertiesName value should be set to a value on your application page that you would like to be updated, in my case it is “Primary.AdjustPayrollComments”. The “PropertiesValue” property should be set to whatever value you would like your property to be updated to. In my case, “Adjust Payroll”.
 7. Add your third step, the Method is “Obj-Save”, this is going to commit your property updates to the DB so that the changes will be reflected on the Clipboard page. Set the “Step Page” to Primary. Under the “Method Parameters”, check the “WriteNow” checkbox.

8. The final step that we are going to add is the response that will be returned once the property has been successfully set and updated in the DB. The Method should be “Property-Set”. The “PropertiesName” is set to Param.Other. The “PropertiesValue” should be set to whatever value you would like to be displayed once the property is set and saved, in my case, “Property was successfully set”
 9. Save your activity and let’s run a test to see our values that are being set. In order to do this, open an instance of your application.
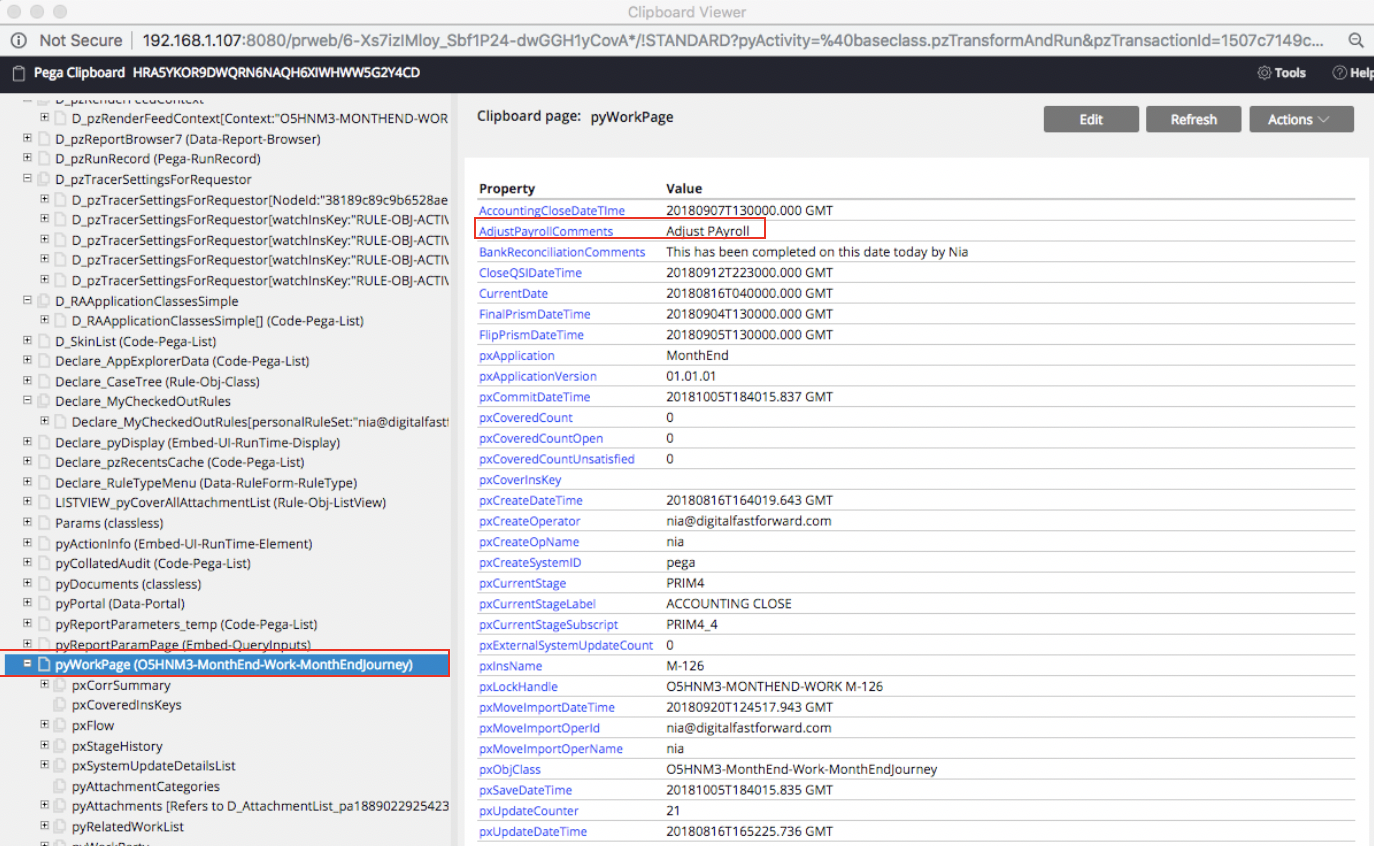
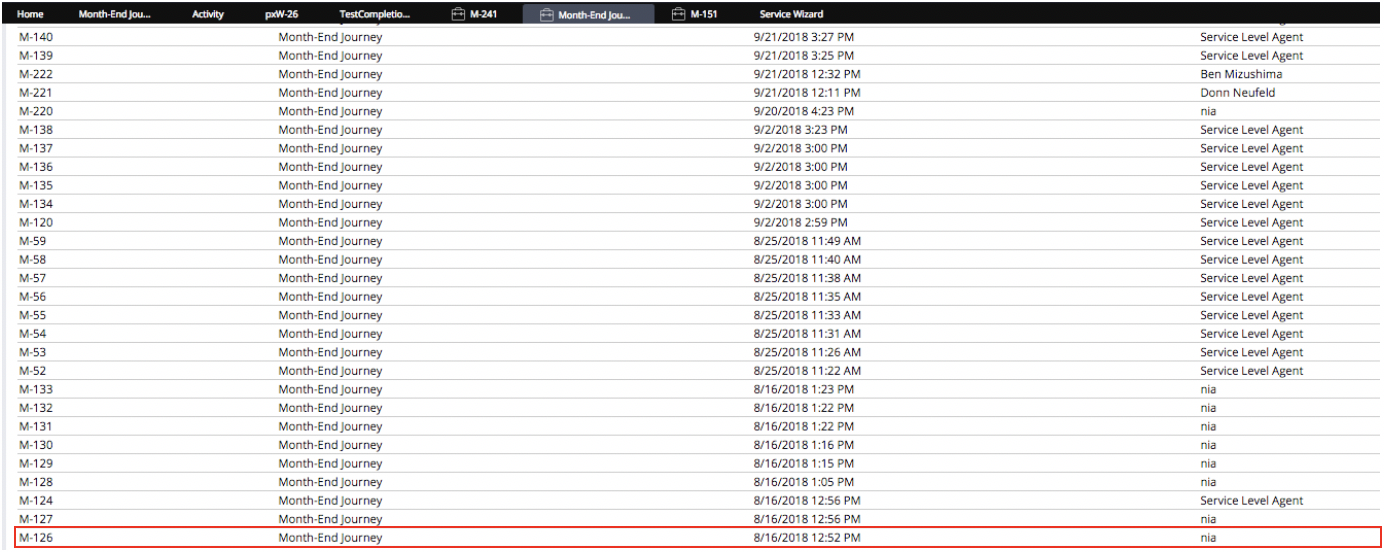 10. Open the instance. And open it’s clipboard. Next, find the pyWorkPage and open it. Notice that the property that we want to update, “AdjustPayrollComments” is not present on this page.
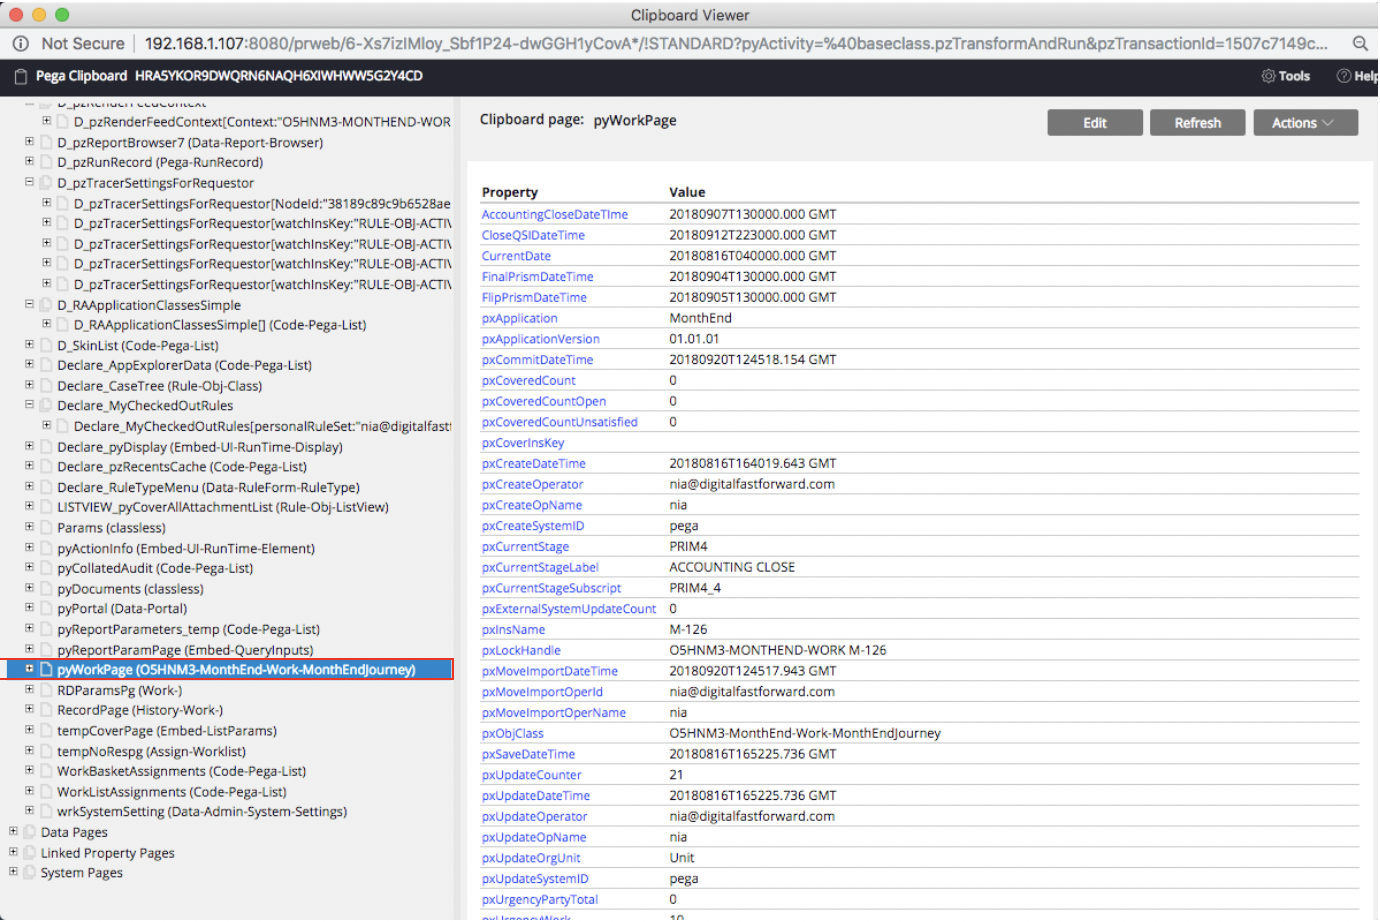
11.Now, run your activity that you created and in the ID, set it to your selected instance in this format: “O5HNM3-MONTHEND-WORK M-126”
 12. Your activity should run successfully.
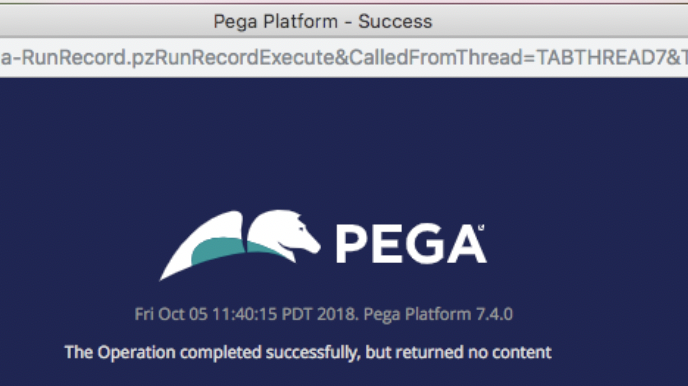
13. Now, refresh the instance that you selected to update.
 14. Open the Clipboard of your instance and click on the pyWorkPage. You should see the property “AdjustPayrollComments” now listed on the Clipboard page and set to the value that you decided on in your activity.
 Testing your Activity to Set Properties Using SOAP UI
1. In order to test your activity by using a WSDL with SOAP UI, you first need to download SOAP UI.
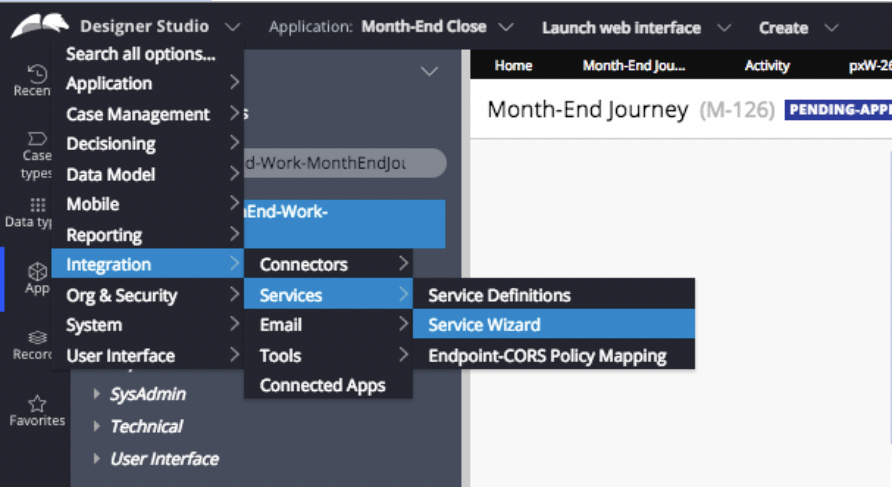
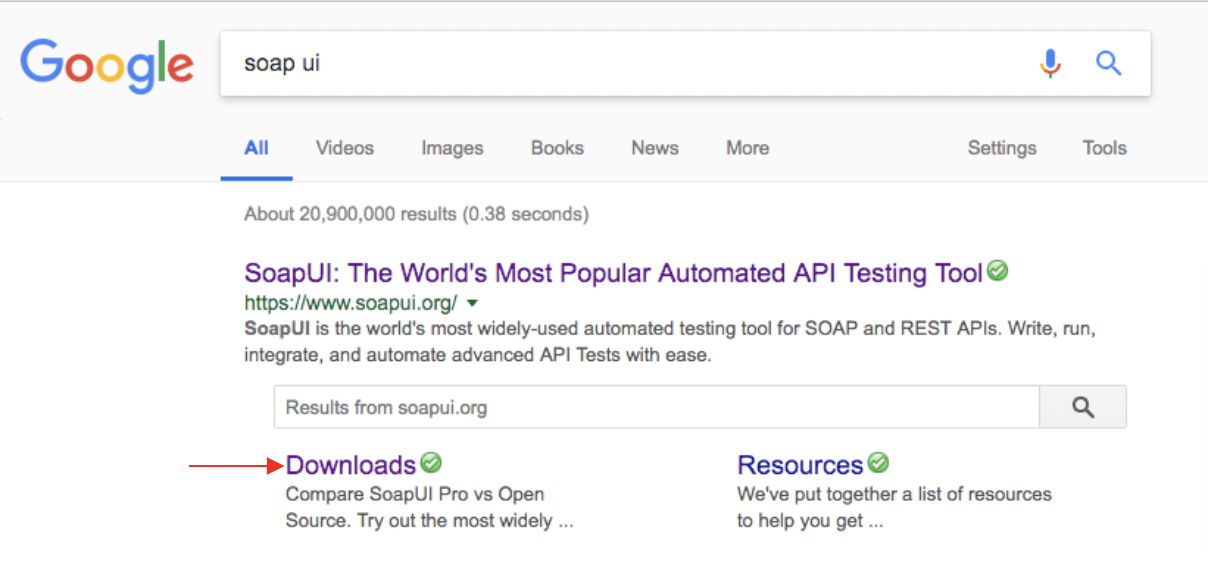 2. Now we need to create a WSDL that the SOAP UI will use to run the activity and update your property as well as save it to the DB. In Pega, go to Designer Studio -> Integration-> Services -> Service Wizard
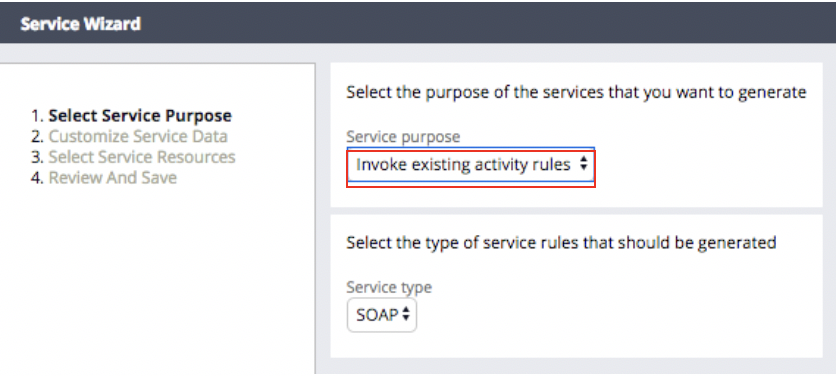
 3. Set the “Service Purpose” to “Invoke existing activity rules”
 4. Click “Next”, set the activity class to the class that your previous activity from earlier was saved to
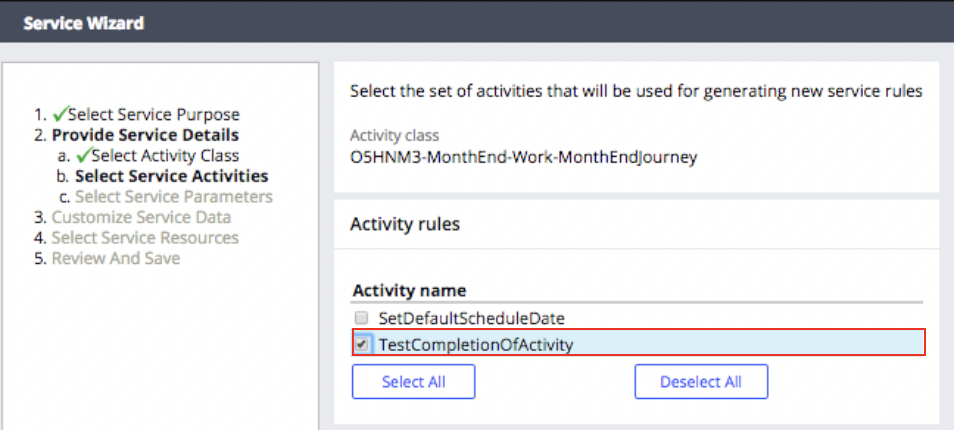
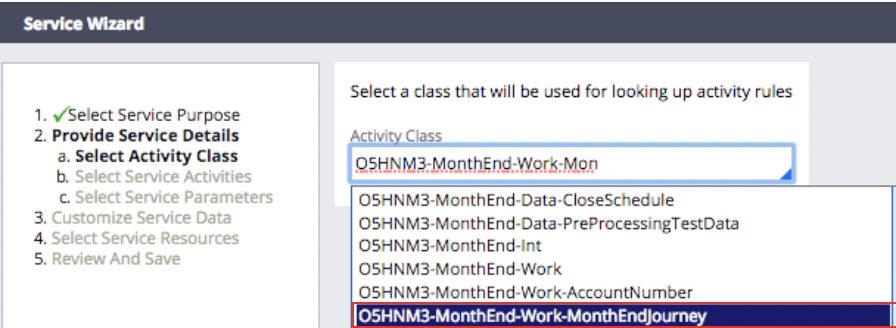 5. Click “Next”. Select the activity that you completed earlier in this document.
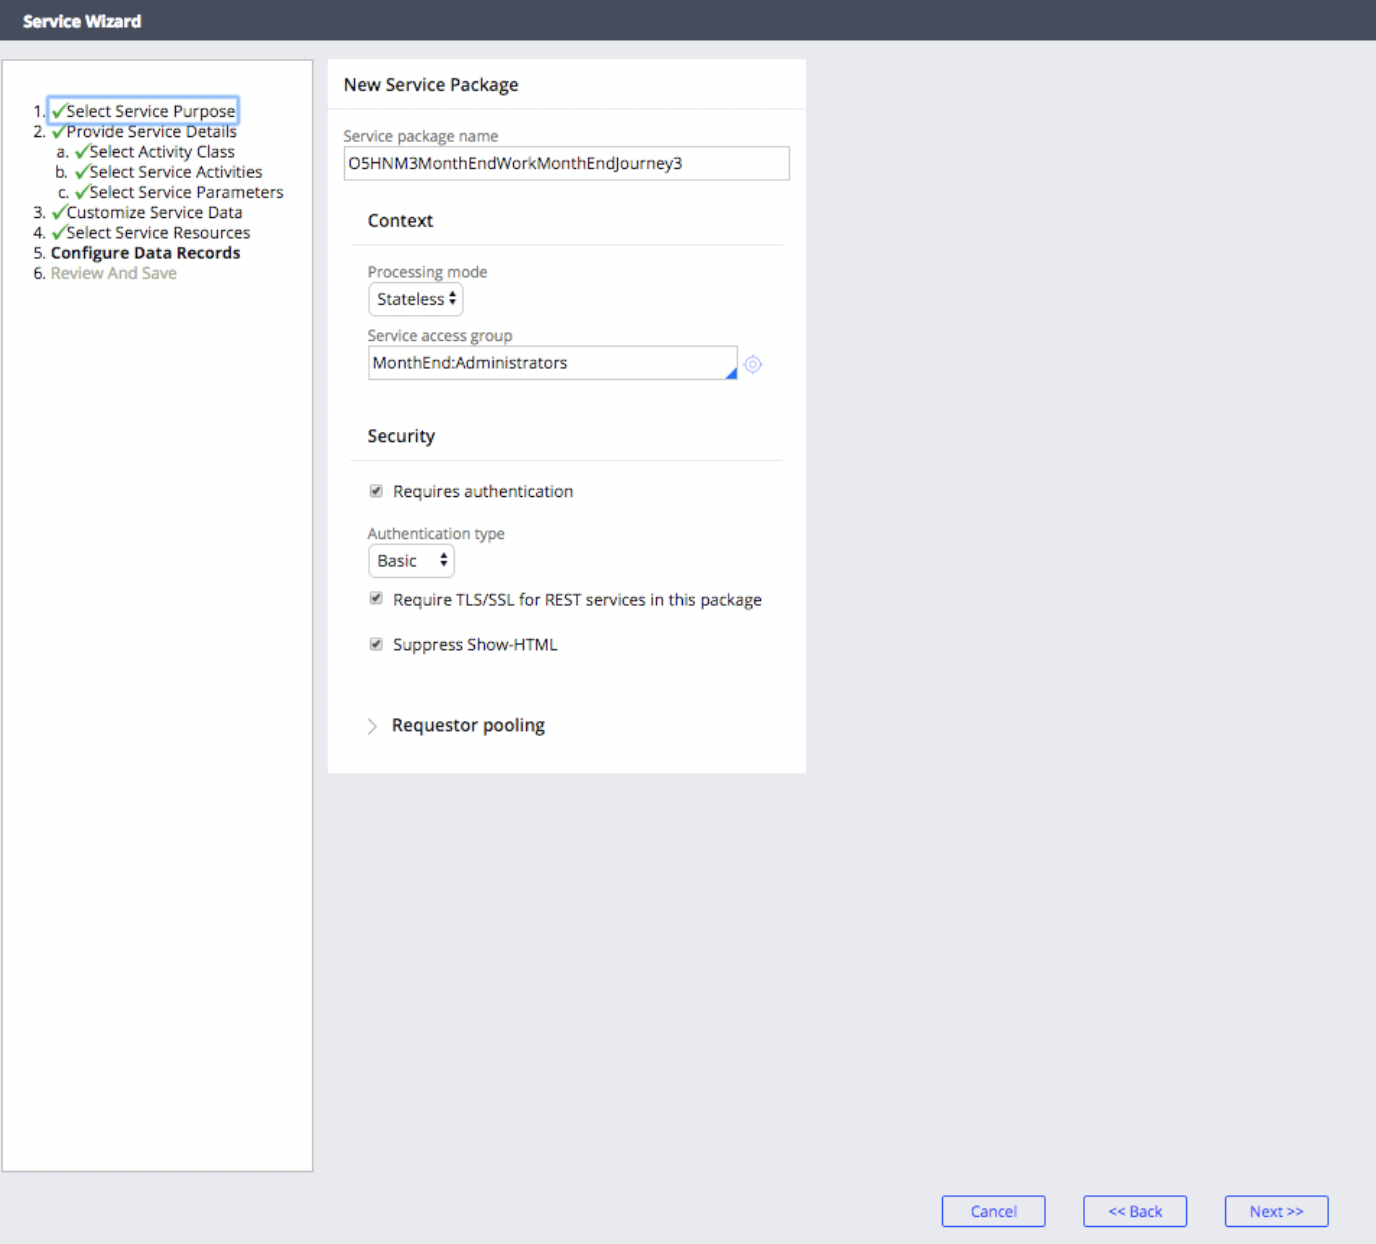
 6. Click “Next’, click “Next” again, click “Next” again, Click “Next”. You should a page similar to the one below to allow you to confirm your specifications. If everything looks good, click “Next”
 7. Finally, click “Finish”. You should see this page:
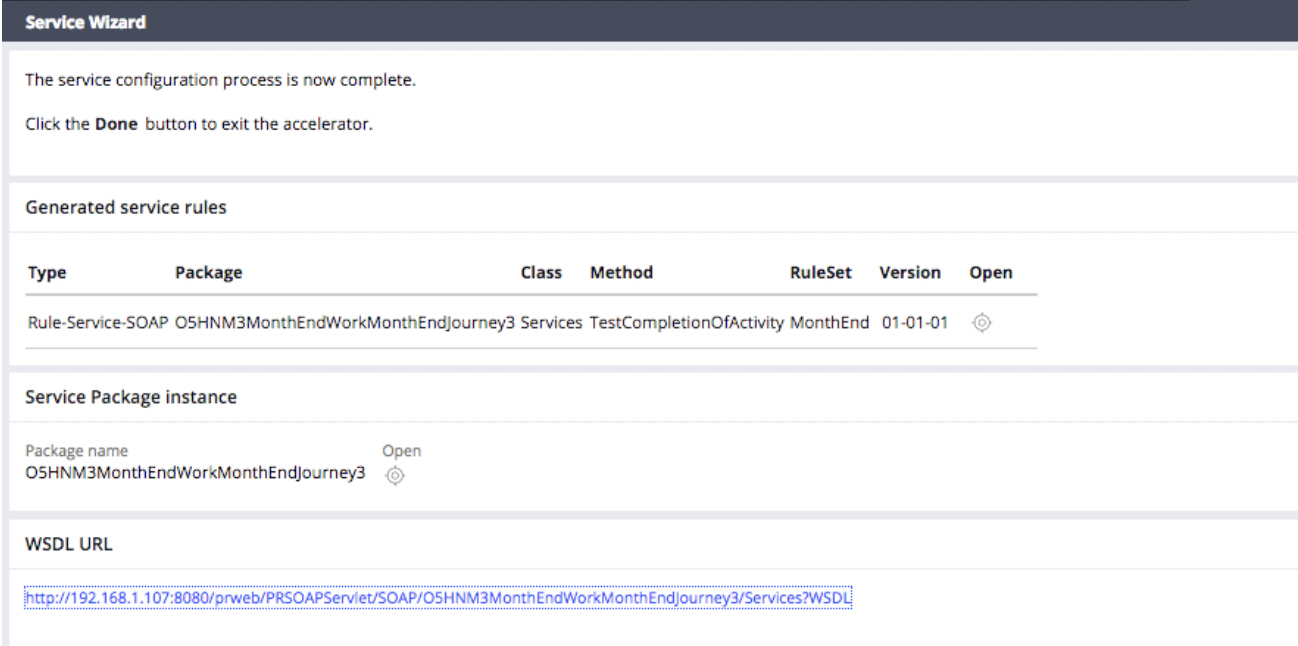 8. Copy the WSDL URL and open the SOAP UI application that you downloaded to your computer. Click on SOAP to create a new SOAP project. Give it a Project Name and paste the WSDL URL that you copied from the ServiceWizard.
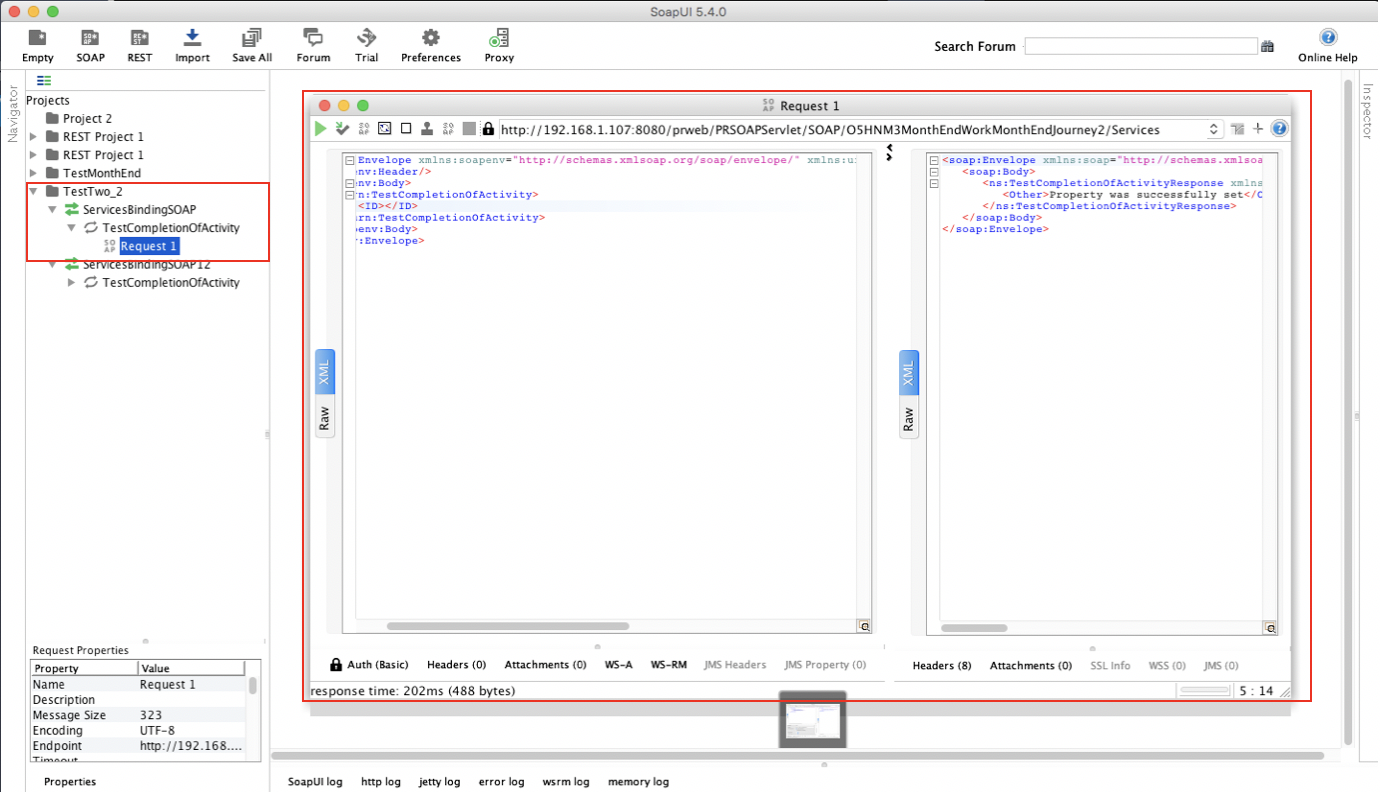
 9. Click OK. From your project, click the dropdown arrow on “ServicesBinfingSOAP” and then click the dropdown on “TestCompletionOfActivity”. Click on the “Request 1” that is displayed. You should see a screen that looks like the image below:
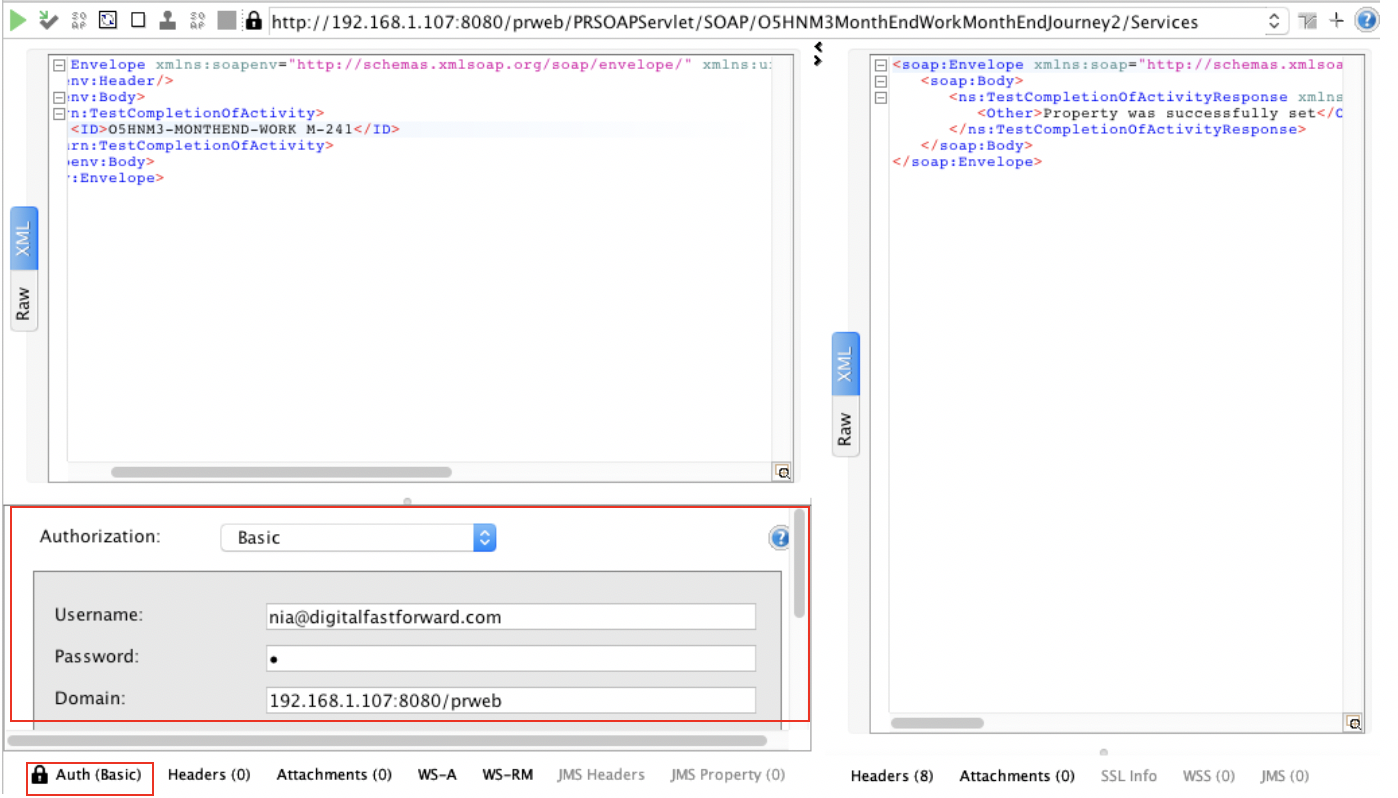
10. In the window of the “Request 1”, at the bottom of the screen, click Auth, click Add New, type Basic. In the username and Password enter your Pega platform credentials. Set the domain = to http://localhost:8080/prweb
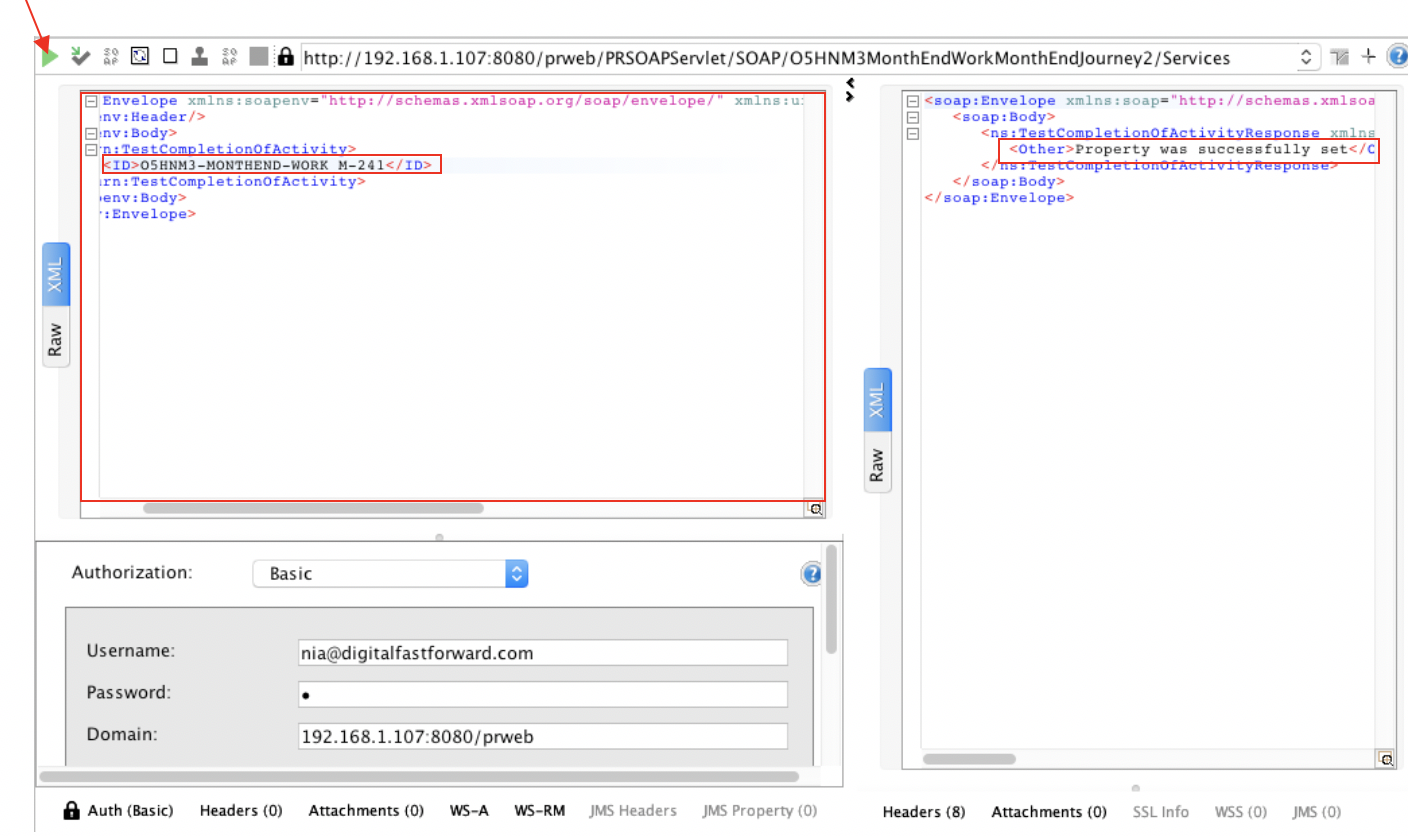
11. On the left hand side of the “Request 1,” window you will notice ID tags, this is the parameter that your created in your activity, we will want to populate this value with the same instance format the we used earlier: O5HNM3-MONTHEND-WORK M-241. However, you need to choose a different instance since your other instance value was already set. Once you pick an instance, click the green play button in the top left corner of the “Request 1” window, and you should receive the expected output on the right-side of your Request 1 window. The “Other” tags is the output parameter that you created in your activity.
 12. If you want to double check that your property was set, repeat steps 13 & 14, for your selected instance number that you specified in the SOAP UI “ID” tags.
