Complete a Case Step Through an Activity
By: Nia Christian
Date: 12/3/18
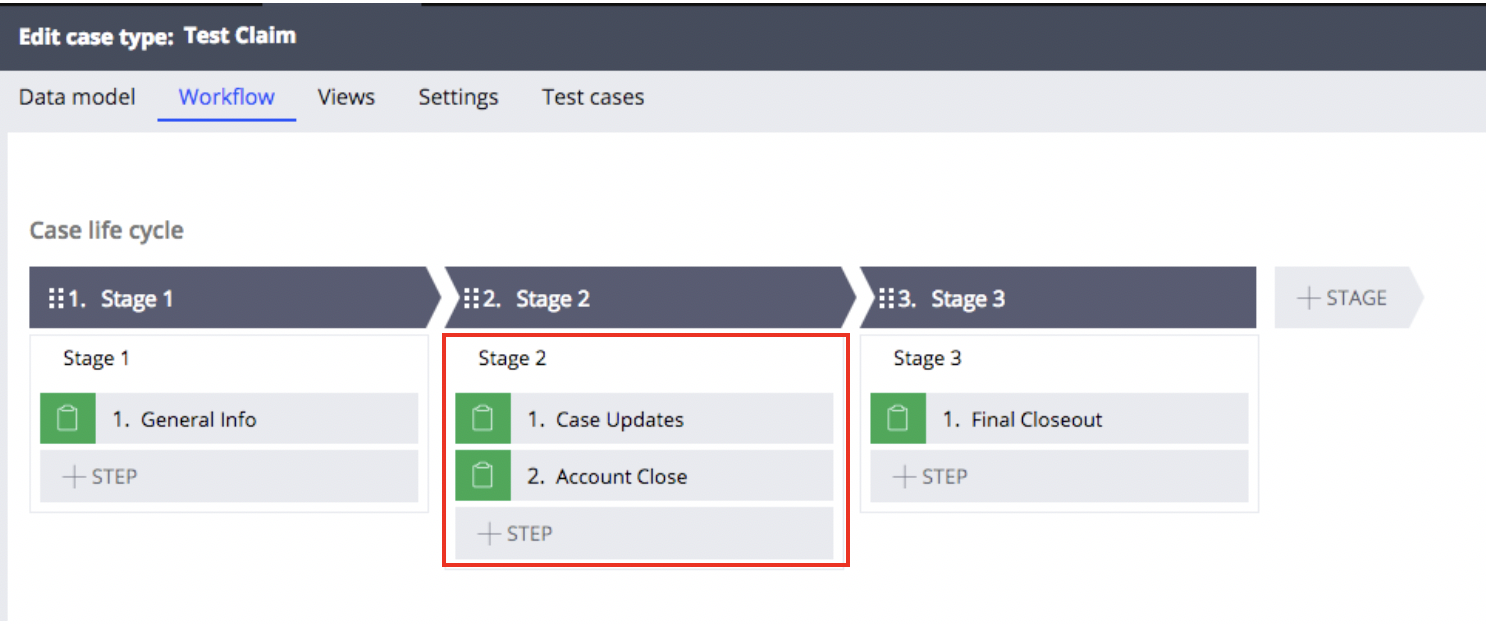
- Create a case with at least 2 stages. Make sure that the second stage has 2 steps.
 2. Configure a view for all assignments within your Stages. Save your work.
3. From the nav bar, click “App” and right click the name of your case, -> Create -> Technical -> Activity
 4. Once your activity is created, go to the Security tab and check to “Allow direct invocation from the client or a service” Save your activity
 5. Now from the parameters page, add the necessary parameters that you would like your user to be responsible for entering as data for an active case. In my case, I would like the users to be able to specify which case ID they would like to process the step for [Param.CaseID]. They will also need to enter a value for the [Param.CompleteStatus] property, in addition to this I would like them to specify for which step [Param.Step] they would like the activity to perform. I will also have the user input a value for [Param.Date]. Finally, once the step has been completed, I will need another parameter [IsStepCompleted] to output data to the user letting them know that the activity has successfully completed. * Be sure to set the correct In/Out for your parameters.
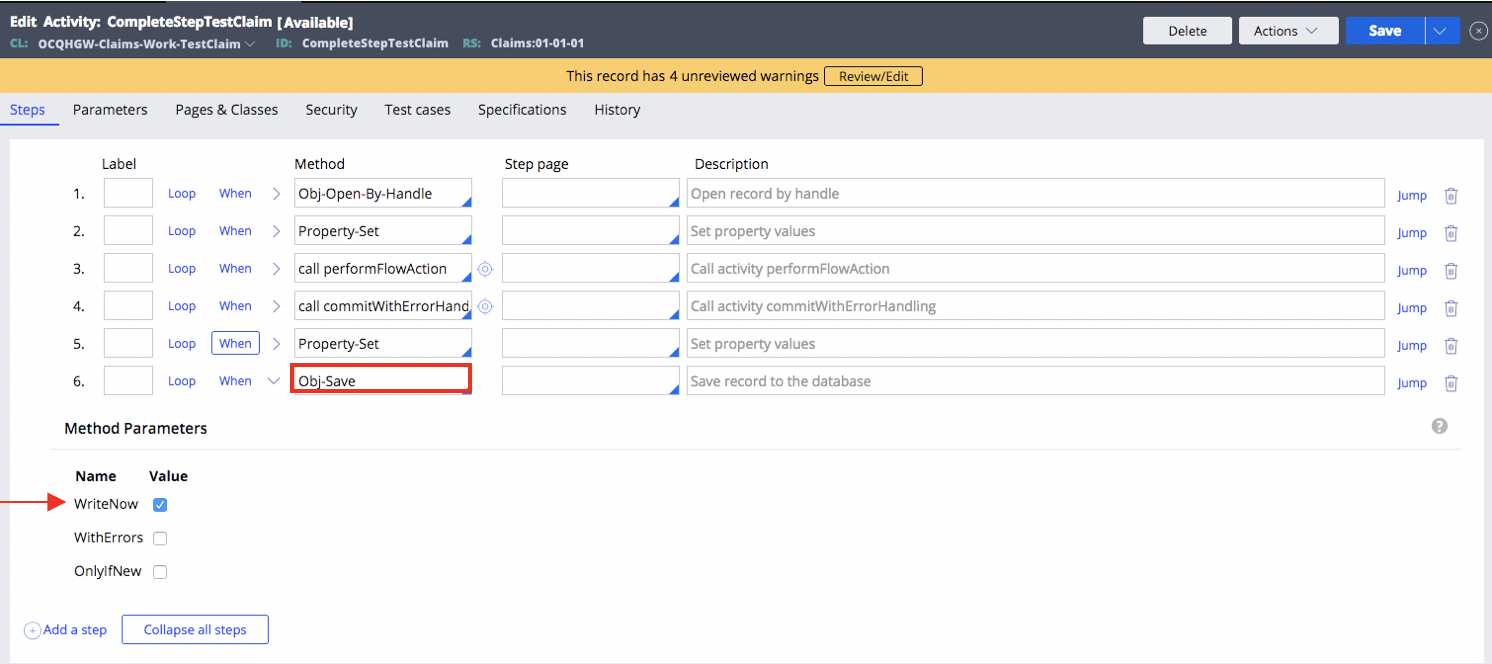
 6. Save your work and navigate to the Steps tab. The first method that we are going to need to add is the “Obj-Open-By-Handle” method so that we have access to our case. Open the dropdown to edit the Method Parameters. The InstanceHandle, also known as the CaseId, should be populated with your parameter for your case ID, Param.CaseID. Also, be sure to check the “Lock” and “ReleaseOnCommit” checkboxes. Save your work.
 7. The next method that we are going to add is “Property-Set”, here we are going to set Method Parameters to any property values for our case. We should set the PropertiesValue equal to our parameters so that the user can specify this information. Save your work.

8. Our third Method will be “call performFlowAction”, this tells the Activity to complete a particular Step within a case. Open the Method Parameters. The “flowName” can be found if you open the process that your assignment is contained in, in order to do this, open your Case, click on the stage of the assignment that you want to activity to complete, click “Open Process”. The “flowName” is the ID at the top of your open Process. See images below for details. You can also see the flowName in the open tab of your process.
 9. To continue with our Method Parameters for the “callPerformFlowAction”, type your flowName, the actionName is simply the name of your step/assignment, this can be found in the process of your stage with the assignment that you want the activity to complete. In my case, the assignment being completed is Case Updates, and the actionName was found in the process by opening the CaseUpdates connector. It is the “Flow Action” value, “CaseUpdates”. However, since this is input that I would like the user to specify, I am going to set the Method Parameter, “actionName” to my step parameter, “Param.Step”. Everything else can remain the default value. Save your activity.

 10. The fourth Method that we are going to add is the “call CommitWithErrorHandling”. This method allows the case to refresh and return the case back to the manual operator, once the activity has populated the values and submitted the previous step. This method has no Method Parameters.
 11. The fifth step that will be added is another “Property-Set” Method. We will use this method to set our output parameter, “Param.IsStepCompleted”, which will use a when rule to determine whether or not to return a status message back to the user that the step was successfully completed. First under the Method Parameters, our properties name is our output parameter, “Param.IsStepCompleted”, next our Properties value is whatever message you would like for the user to see, once the step was successfully completed in the activity. In my case, my message is “Step has been successfully completed.”
 12. Now, let’s configure the when rule for the “Property-Set” method, click the open target.
 13. On the Conditions tab, I want to display that the step has been successfully completed when the “Complete” property is my case is set to Yes. So my when condition will be When .Complete = Yes. Next I will save this condition.

14. Now, let’s go back to our activity to finish configuring our When rule. Now, in the When box, if you click down, you should see the When condition that you just created. Select that. Set the if true to “Continue Whens” and set if false to “Exit Activity”. So if the Complete property is set to anything other than yes, the activity will exit and no value will be returned to the user. Submit and save.
 15. Our final Method to add is “Obj-Save”, we need to save our changes and write them to the record so that our case gets updated with our changes. In the Method Parameters, check the “WriteNow” check box. Save your activity
 16. Now it is time to test your activity. From the Actions button, select Run and also open the Tracer
17. Input the correct input values, the CaseID, should be formatted like this “OCQHGW-CLAIMS-WORK T-109”.
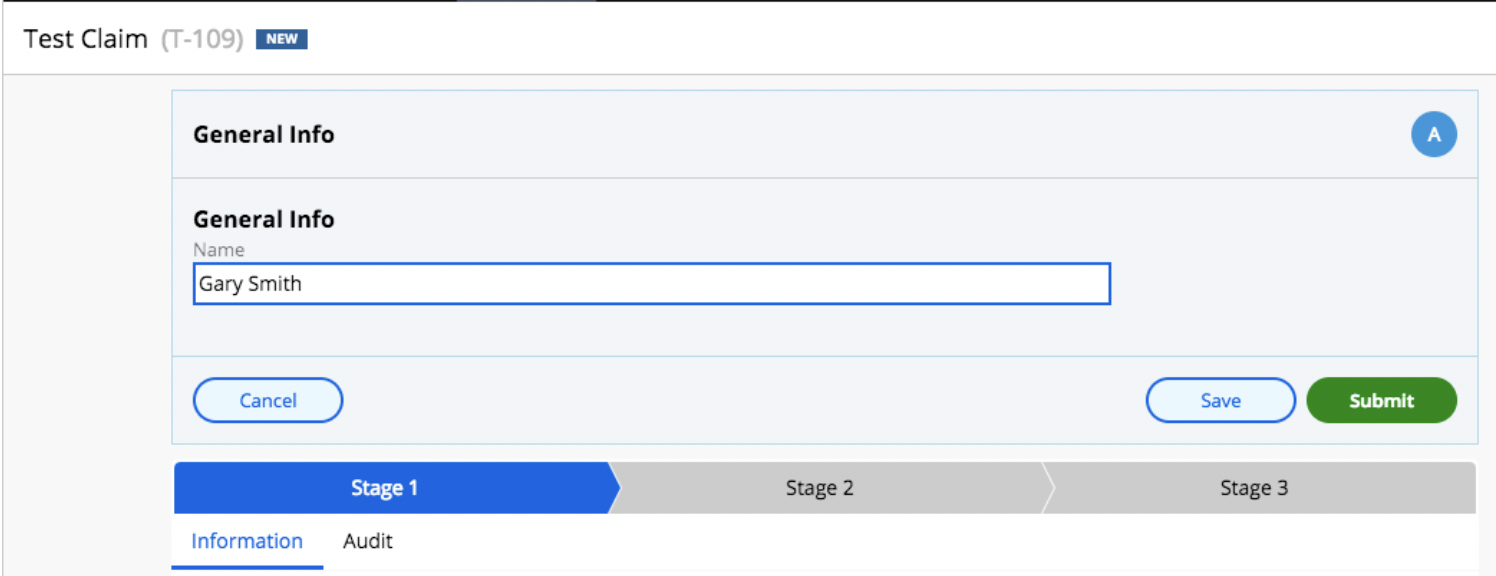
 18. Now that I have my values populated, I need to manually complete the first step in my case, since the Activity is only expected to complete the first step in the second Stage of my case.


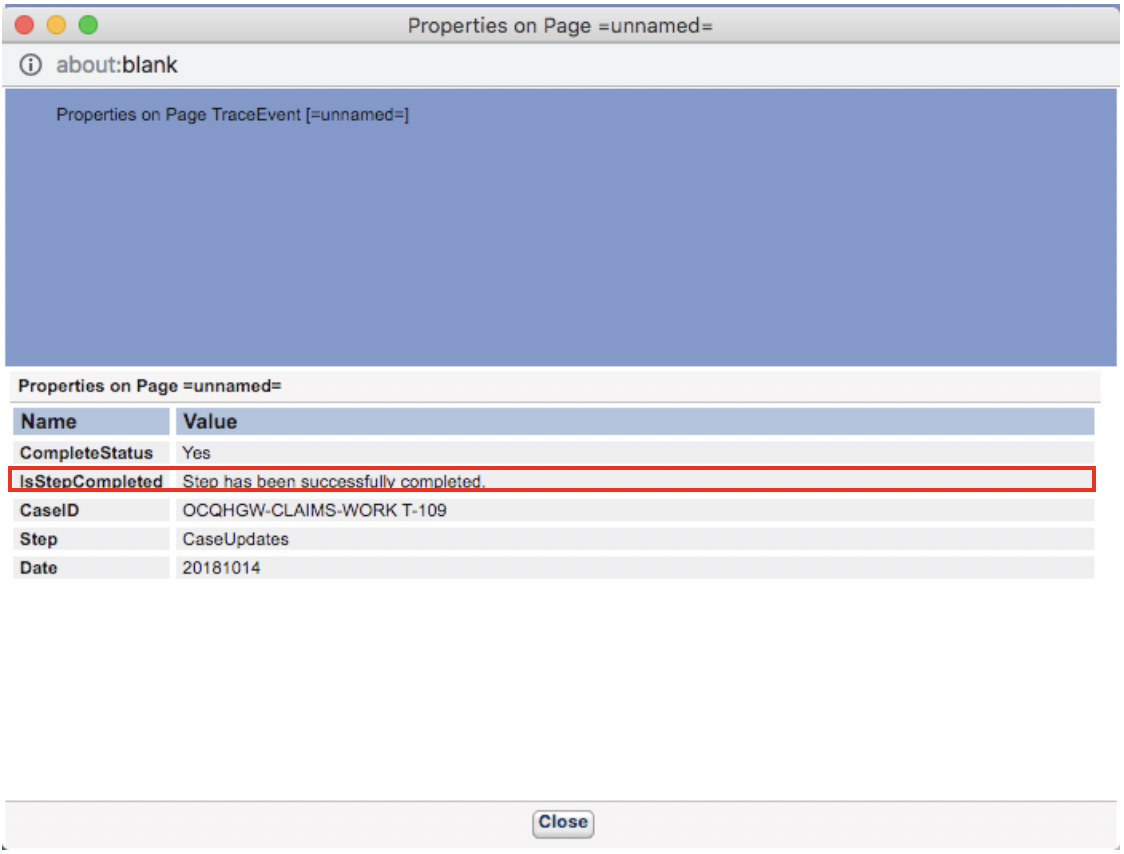
19. Once your first step is completed, click Submit. Now Run your activity. If your when condition is true, you should receive a return value, and you can verify in the Tracer.
 20. Now, let’s refresh the case you were working on. Your values that you set in your activity should be populated, and you should see a check mark next to the first Step in your second stage.
 21. The user should be able to manually resume the case at this point.
