Complete an Entire Case Through an Activity
By: Nia Christian
Date: 12/3/18
- Create a new activity in your application
- Once you name your activity, create and open it and first, click on the Security tab and check the box to “Allow Direct Invocation”. Save your activity

3. On the Parameters page, add a parameter called “CaseID”, this is what we will use to allow the user to specify which case they want to make progress on with the activity. Save your activity.

4. On the Pages tab, add your first step, the Method will be “Obj-Open-By-Handle”. For the Method Parameters, set the “Instance Handle” equal to your CaseID parameter defined in step 3. Be sure to check the “Lock” and “ReleaseOnCommit” checkboxes.

5. The second step we are going to add will be a Property-Set Method. Here we are going to set the values for the fields in our case. For our Method Parameters, the “PropertiesName” will be Primary.YourField name, and the “PropertiesValue” will be set either to a direct value entered by you, or a parameter value that the user will define when the activity is run.

6. The third step to add will be the “call pxChangeStage” Method. This will allow the activity to automatically progress the case to the next stage. In the Method Parameters, check the “ChangeToNextStage” checkbox

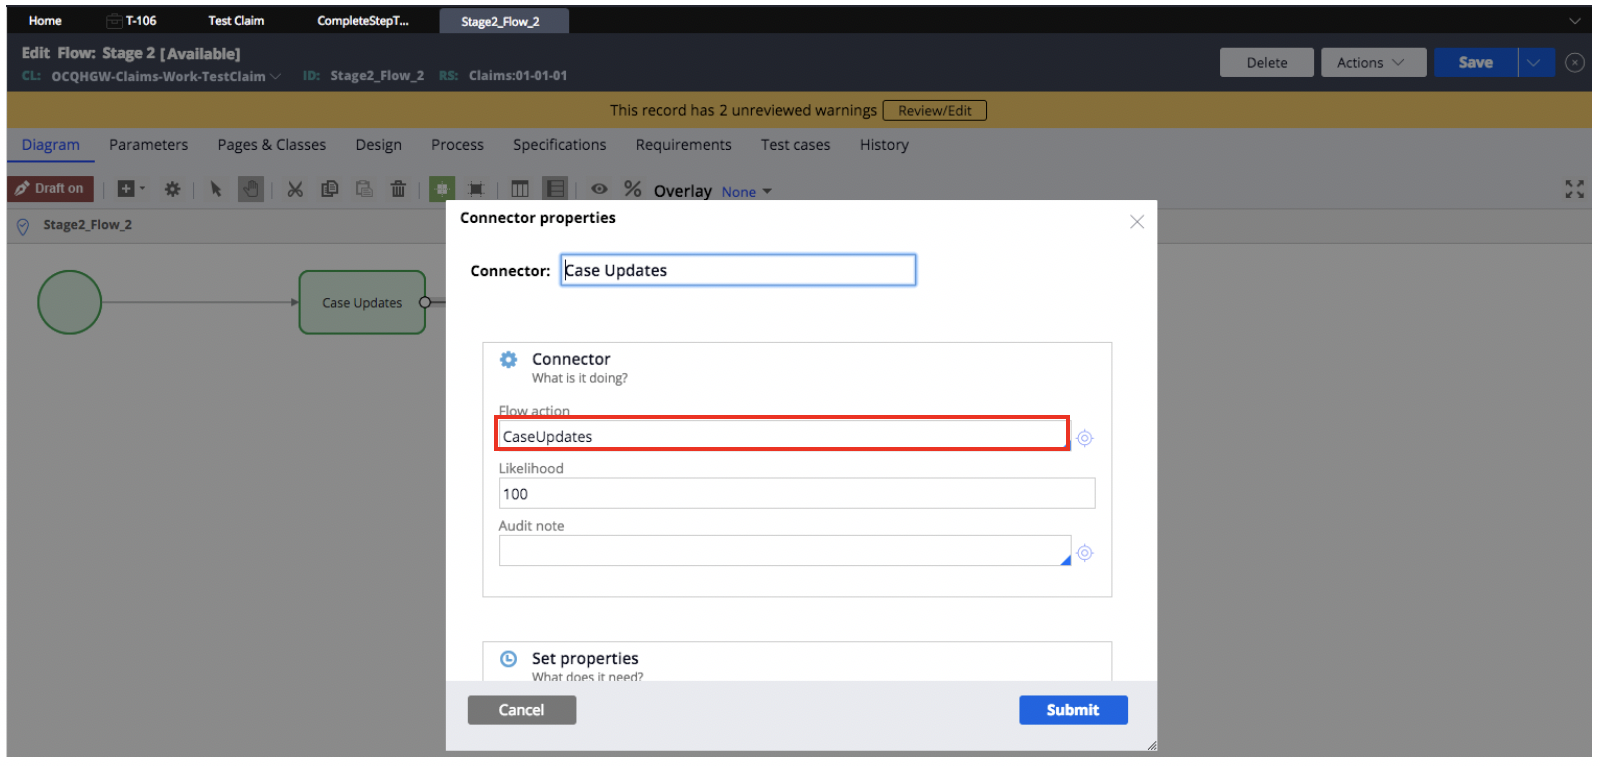
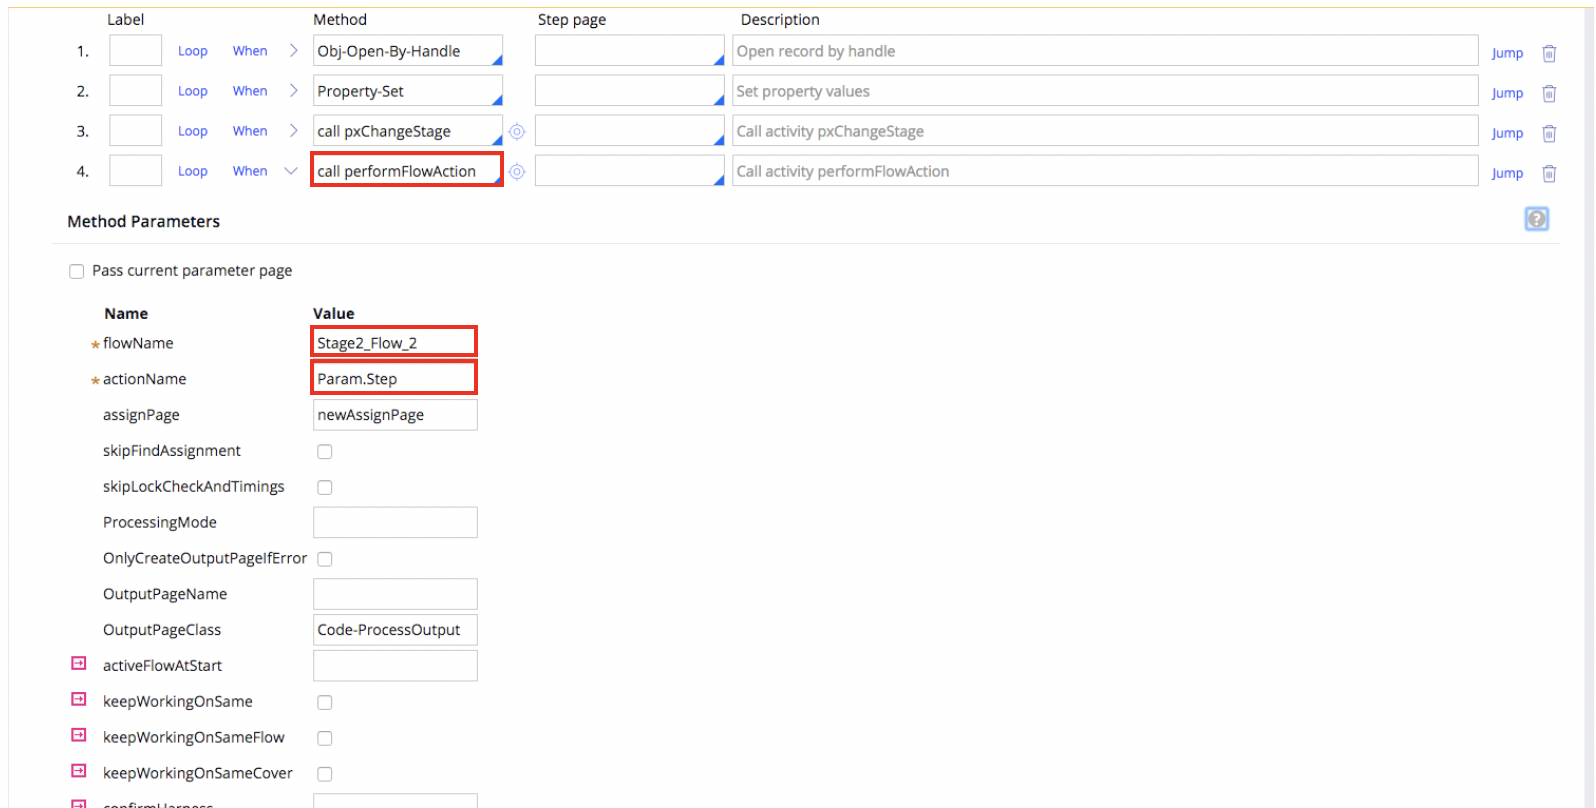
7. We will add the next step and the Method should be, “call performFlowAction”. For the MethodParameters, set the flowName equal to the name of the flow with the assignment that you would like to be automatically completed by the case. The “flowName” can be found if you open the process that your assignment is contained in, in order to do this, open your Case, click on the stage of the assignment that you want to activity to complete, click “Open Process”. The “flowName” is the ID at the top of your open Process. See images below for details. You can also see the flowName in the open tab of your process.


8. To continue with our Method Parameters for the “callPerformFlowAction”, type your actionName, the actionName is simply the name of your step/assignment, this can be found in the process of your stage with the assignment that you want the activity to complete. In my case, the assignment being completed is Case Updates, and the actionName was found in the process by opening the CaseUpdates connector. It is the “Flow Action” value, “CaseUpdates”. However, since this is input that I would like the user to specify, I am going to set the Method Parameter, “actionName” to my step parameter, “Param.Step”. Everything else can remain the default value. Save your activity.


9. Next you may need to add more “performFlowAction”methods and steps depending on how many assignments you have that you would like your activity to automatically complete. Because my workflow has a total of four assignments that I would like to complete, I am adding three additional steps all with the “call performFlowAction” Method. *If you add more steps, remember to update the flowName and actionName for each specific assignment.

10. Our final step/method to add will be “Obj-Save” and within the MethodParameters, check the “WriteNow” checkbox to immediately commit your changes to the DB

11. If you intend to allow the activity to only complete a few steps within the activity and then to allow a user to continue the completion of assignments within your case, before adding the Obj-Save, be sure to add a step that uses the “call commitWithErrorHandling” Method. The Method Parameters do not need to be specified. This allows the activity changes to successfully be committed and unlocks the assignment so that additional users can continue moving the assignment along the process.

