Create case using Pega API (POST /cases)
This article demonstrates the step-by-step configurations of how an external system can call out-of-the-box Pega API (POST /cases) to create and process a new case in Pega application.
Client use case
After deploying a new code to a higher environment, our DevOps orchestrator is invoking Pega API (POST /cases) to create and process a new case in candidate systems (e.g. DEV, QA, Staging, Production). This new case will automate recurring post deployment tasks such as updating access groups.
In this example, we are using Pega’s Deployment Manager (DM) as the DevOps orchestrator system that will invoke the Pega API (POST /cases) in candidate systems after deployment. We've created a new custom task (Run post deployment task) in DM to perform this task. This custom task calls an activity rule that invokes the Pega API.
- How to create a new DM custom task is outside the scope of this posting, but (if interested) the steps are documented in the following post - https://support.pega.com/discussion/build-custom-task-deployment-manager.
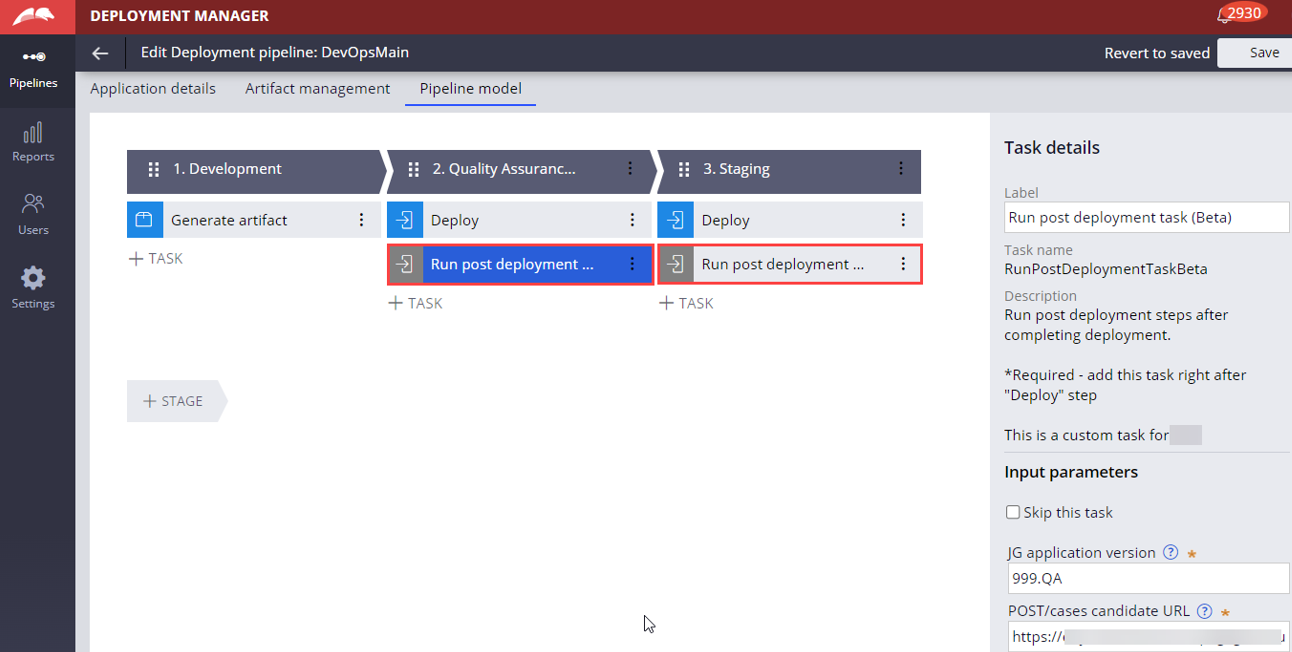
‘Run post deployment task’ step in the deployment pipeline calls an activity that uses D_ExecuteRestConnector data page to invoke the Pega API (POST /cases) in candidate systems.
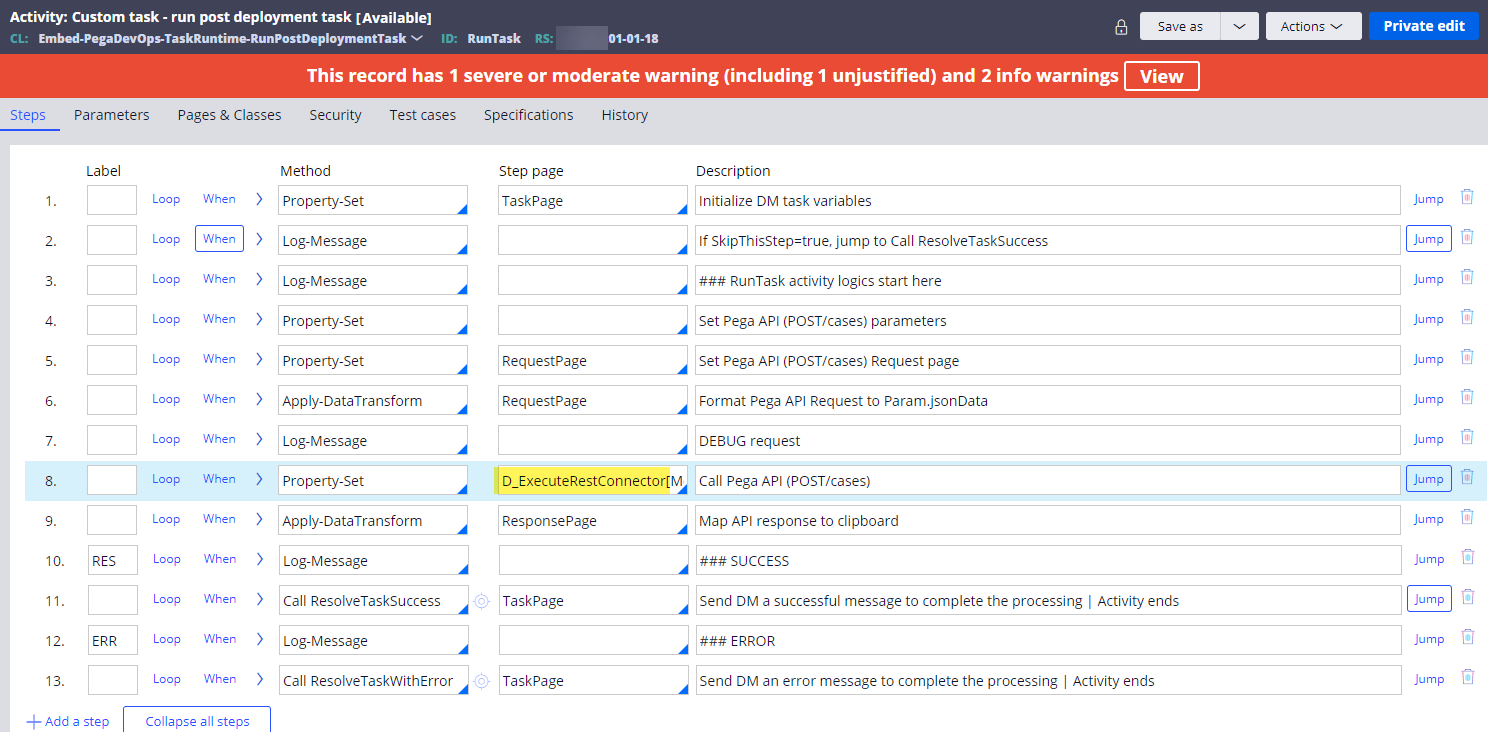
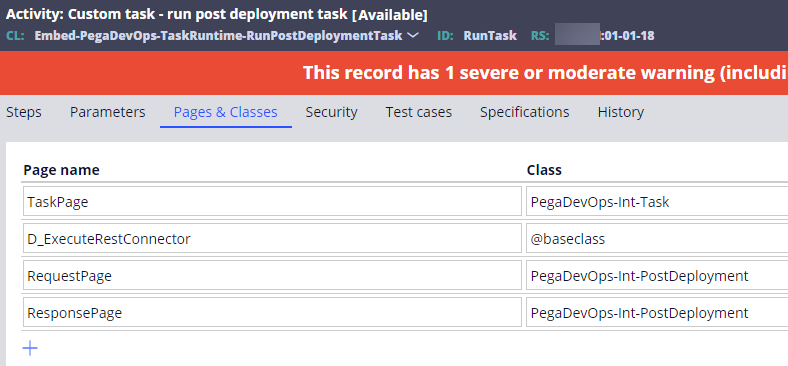
Pages & Classes tab:
For a quick start, we can just use a stand-alone activity to configure the steps below and unit test the Pega API (and later integrate it into your use case).
Activity steps
Step 1 - Set the authentication profile and resource path required to call a Pega API.

Param.ResourcePath has the end-point URL of the Pega API (POST /cases) – e.g. “https://XXXXX/prweb/api/v1/cases” - which can be also found from the Pega API landing page.

Param.AuthenticationProfile has the name of authentication profile instance ("DMDevOps"), which we created in the DevOps orchestrator server.

And, in each candidate environment (e.g. DEV, QA, STG, PROD), create an Operator ID ("DMDevOps") with a password, which needs to be set in the authentication profile as well.
It is important to note that DMDevOps Operator ID must reference an access group that grants access to the case type that we’re trying to create using Pega API (POST /cases). If not, Pega API may return an error; for example,
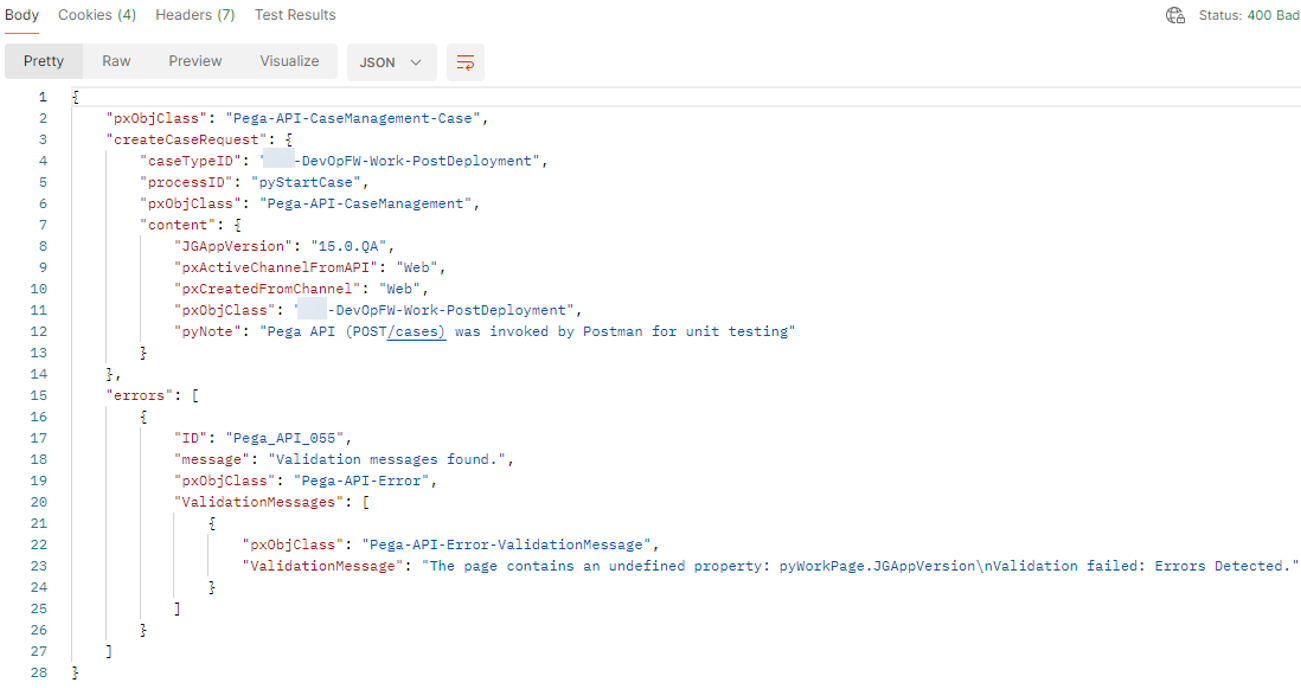
Step 2 (set the API request) - Set up the Pega API (POST /cases) request parameters.
2-1) Verify the format of the request parameters; this can be also found in the Pega API landing page.
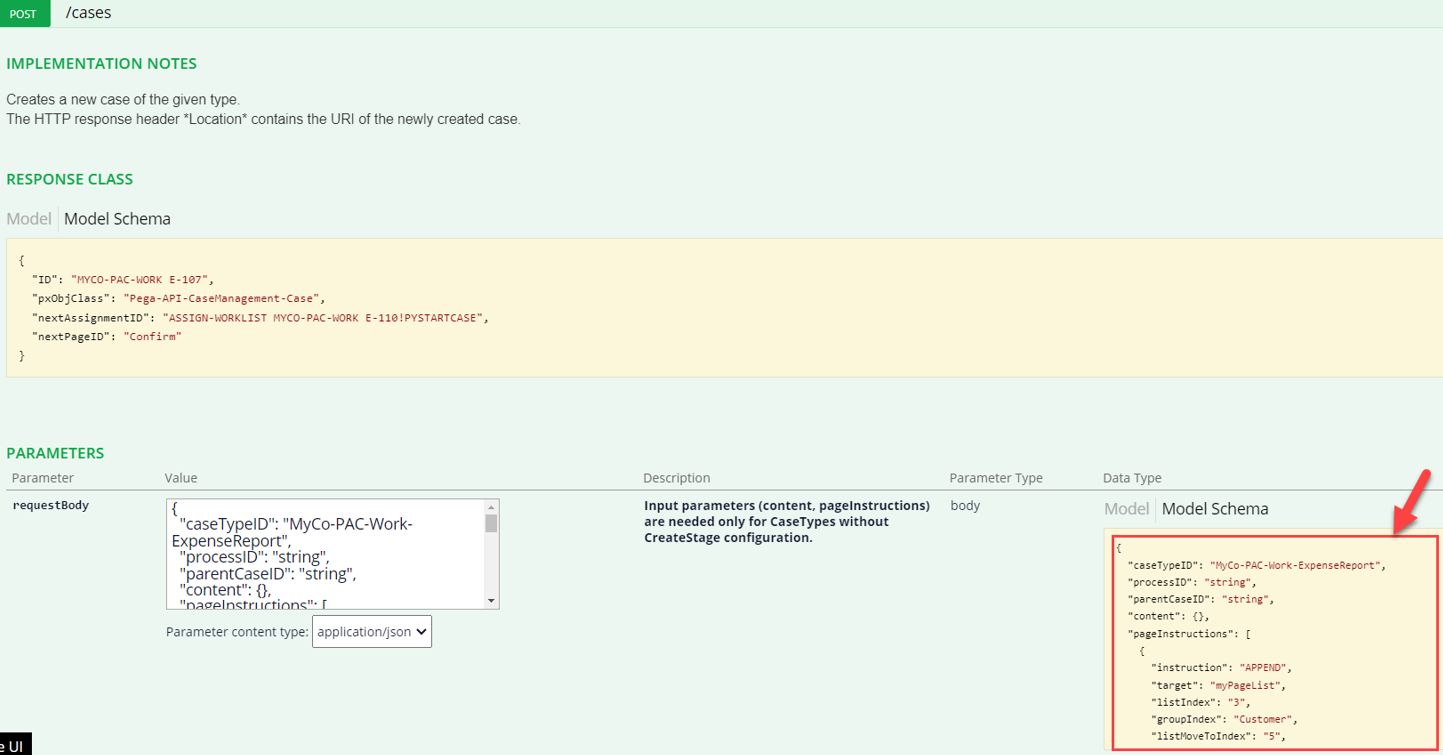
2-2) Initialize the values of the request parameters in the activity.
- CaseTypeID is required – “XXX-DevOpFW-Work-PostDeployment” is the case type created in the candidate environment.
- ProcessID is required. This is the starting flow of your case type.
- Content.JGAppVersion is a client specific parameter.
- Content.pyNote is a client specific parameter.

2-3) Call a data transform to convert the clipboard page to a JSON format.
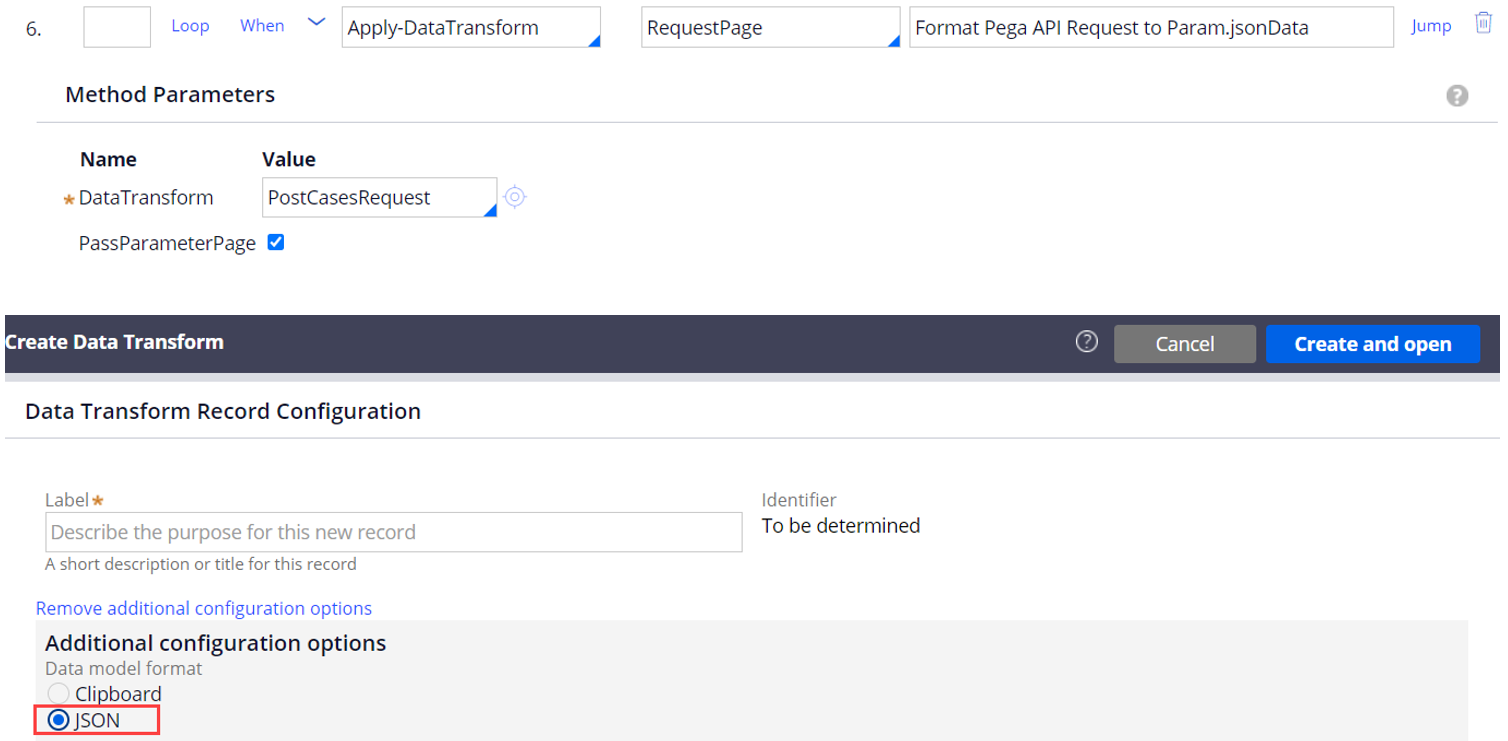
When creating a new data transform, select “JSON” in the Data model format field.
Set the clipboard page to each corresponding JSON element on the right side, which matches the API request parameters.
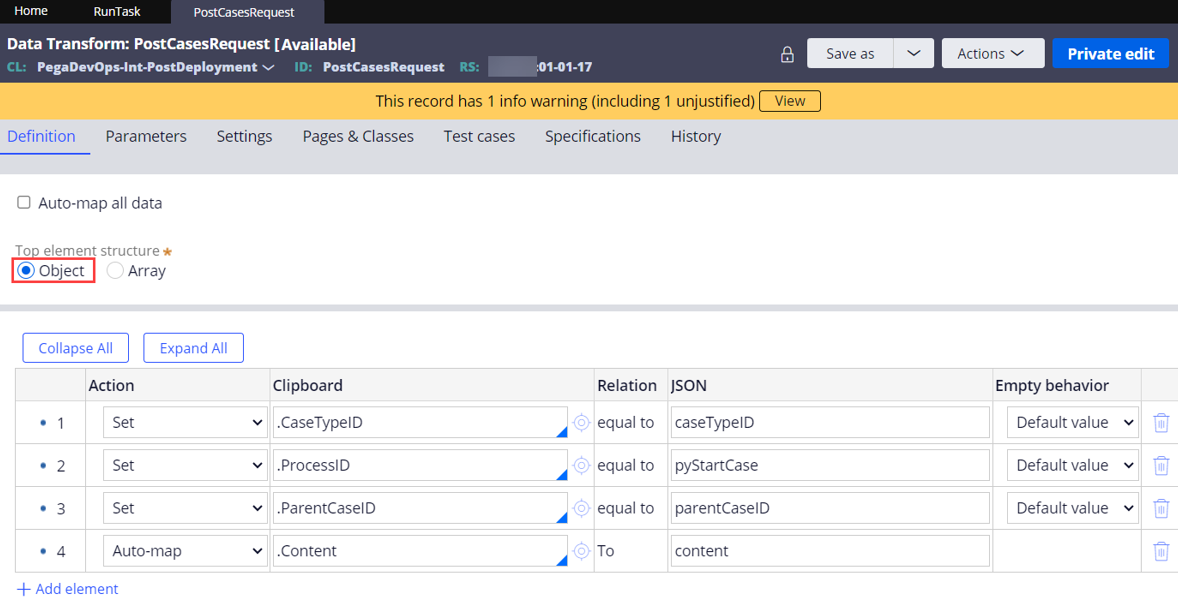
In this example, we are only setting the minimum request parameters required.
{

  "caseTypeID": "string",

  "processID": "string",

  "parentCaseID": "string",

  "content": {}

}
Step 3 (invoke API) - Call Pega API (POST /cases) using D_ExecuteRestConnector data page.

D_ExecuteRestConnector[MethodName:"POST",AuthenticationProfile:Param.AuthenticationProfile,RequestJSON:Param.jsonData,ResourcePath:Param.ResourcePath]If the API call is successful, you will get a response like this:

If the API call fails, you will get an error message – for example:
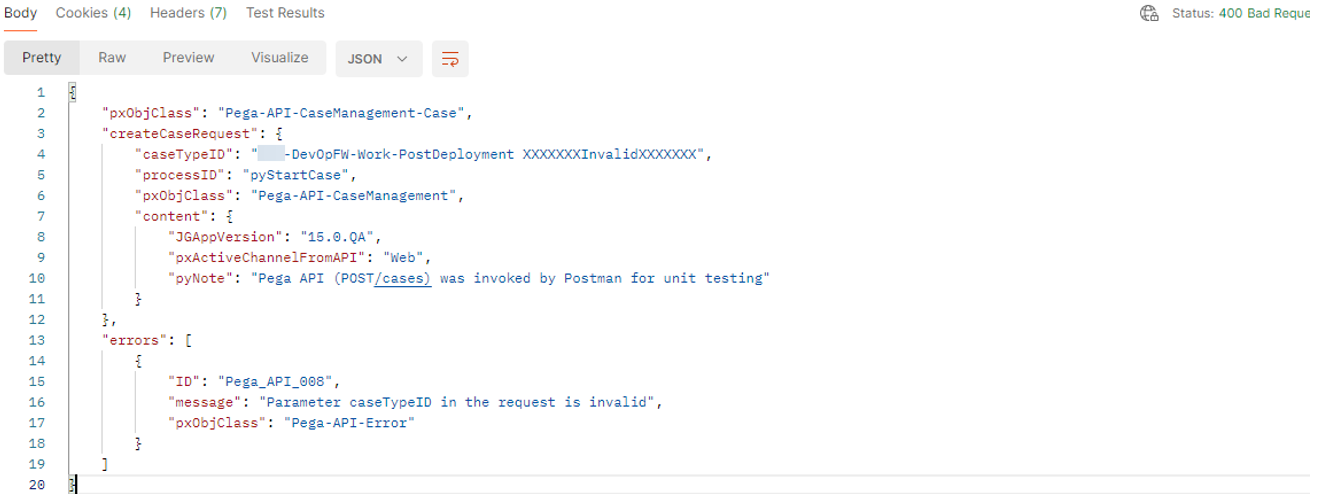
Here is an error handling in the activity step:

Step 4 (parse the API response) - parse the API Response from JSON format to clipboard properties.
Note: Param.jsonData contains the JSON response.
Use a data transform to parse the JSON response.

Create the data transform using the 'JSON' Data model format.
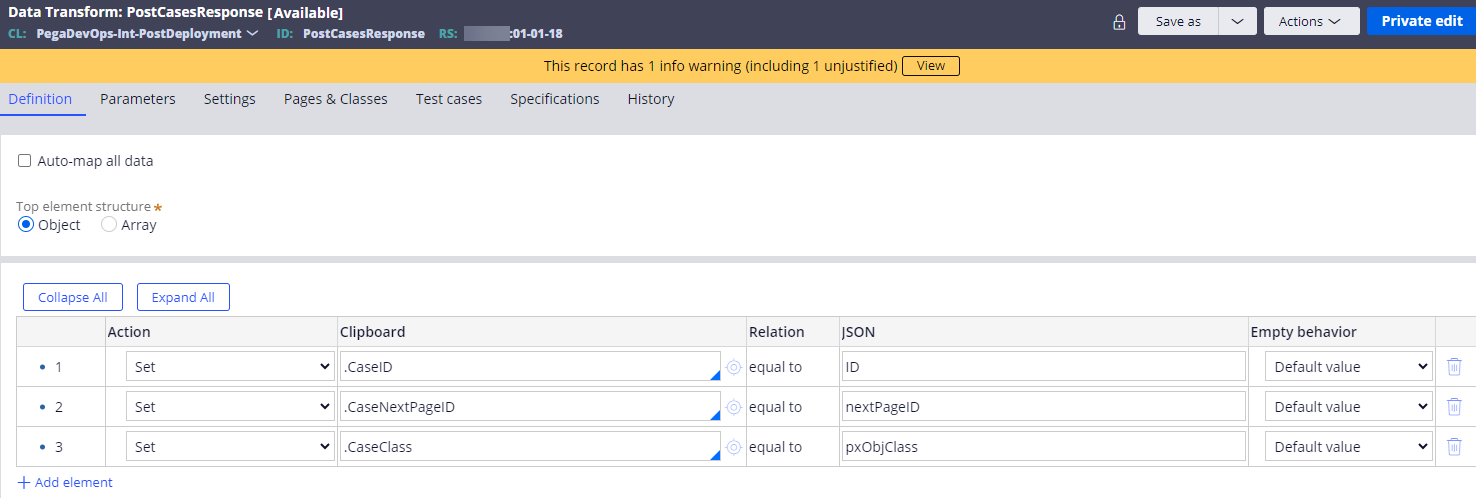
After the parse, ResponsePage.CaseID will contain the case ID created and sent by the candidate system.
Step 5 (validate) - Login to the candidate environment and verify a new case.
A new case has been created successfully.

Additional information
- Using Postman to unit test Pega API
Before configuring any rule in Pega, we can first use Postman to quickly unit test the Pega API (POST /cases) and get a better feel of it (especially if you haven't used Pega API before).
Here are sample Pega API Request sent and Response received:
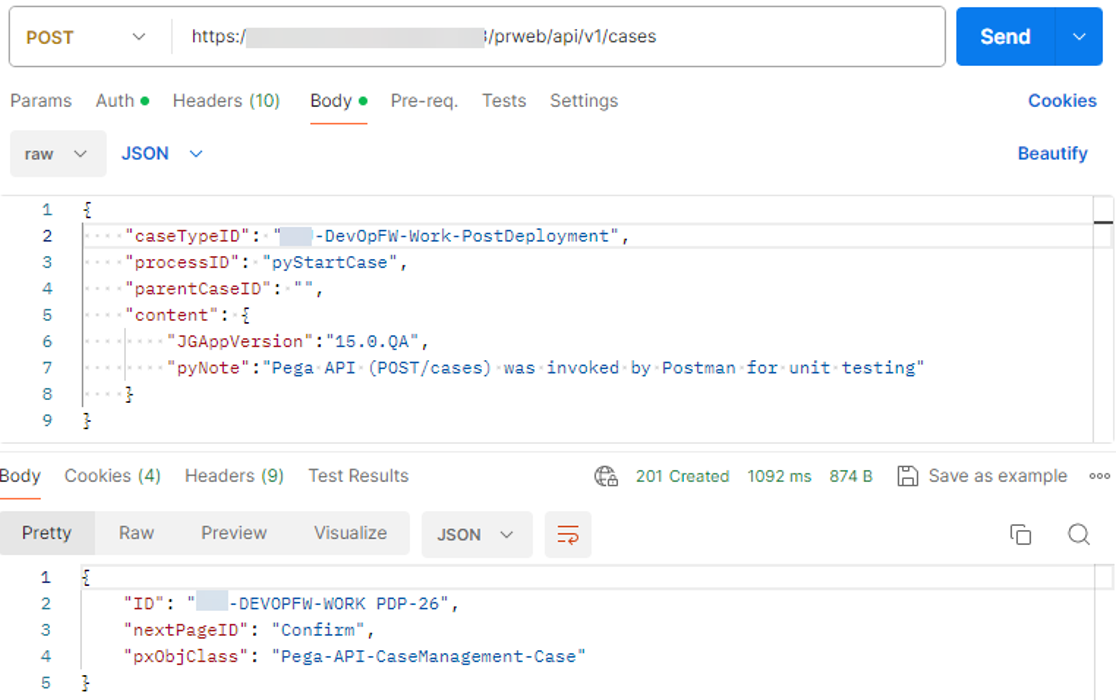
This example uses ‘Basic Auth’ authorization type.

===
Before anyone tries to build a new custom service in Pega, i'd suggest to first review the list of all OOTB Pega APIs, which in many cases will satisfy the client requirements. Using Pega APIs will significantly reduce the time to integrate with external systems and thus bring Pega application faster to market, giving our clients a competitive edge.
Please feel free to leave any question or feedback.
Thanks,
Will


