

Summary
This document provides detailed instructions and explanations on how to create and enable Insights within the Pega Platform™ UI Kit, release 25.1.2. It offers guidance on enabling Insights for dashboards and home pages. Users can leverage this information to enhance their UI Kit implementations by integrating insightful data visualizations effectively.
Working with Traditional apps
It is possible to use Pega Constellation content in existing Traditional section-based applications. Find out more in Using Constellation in existing applications.
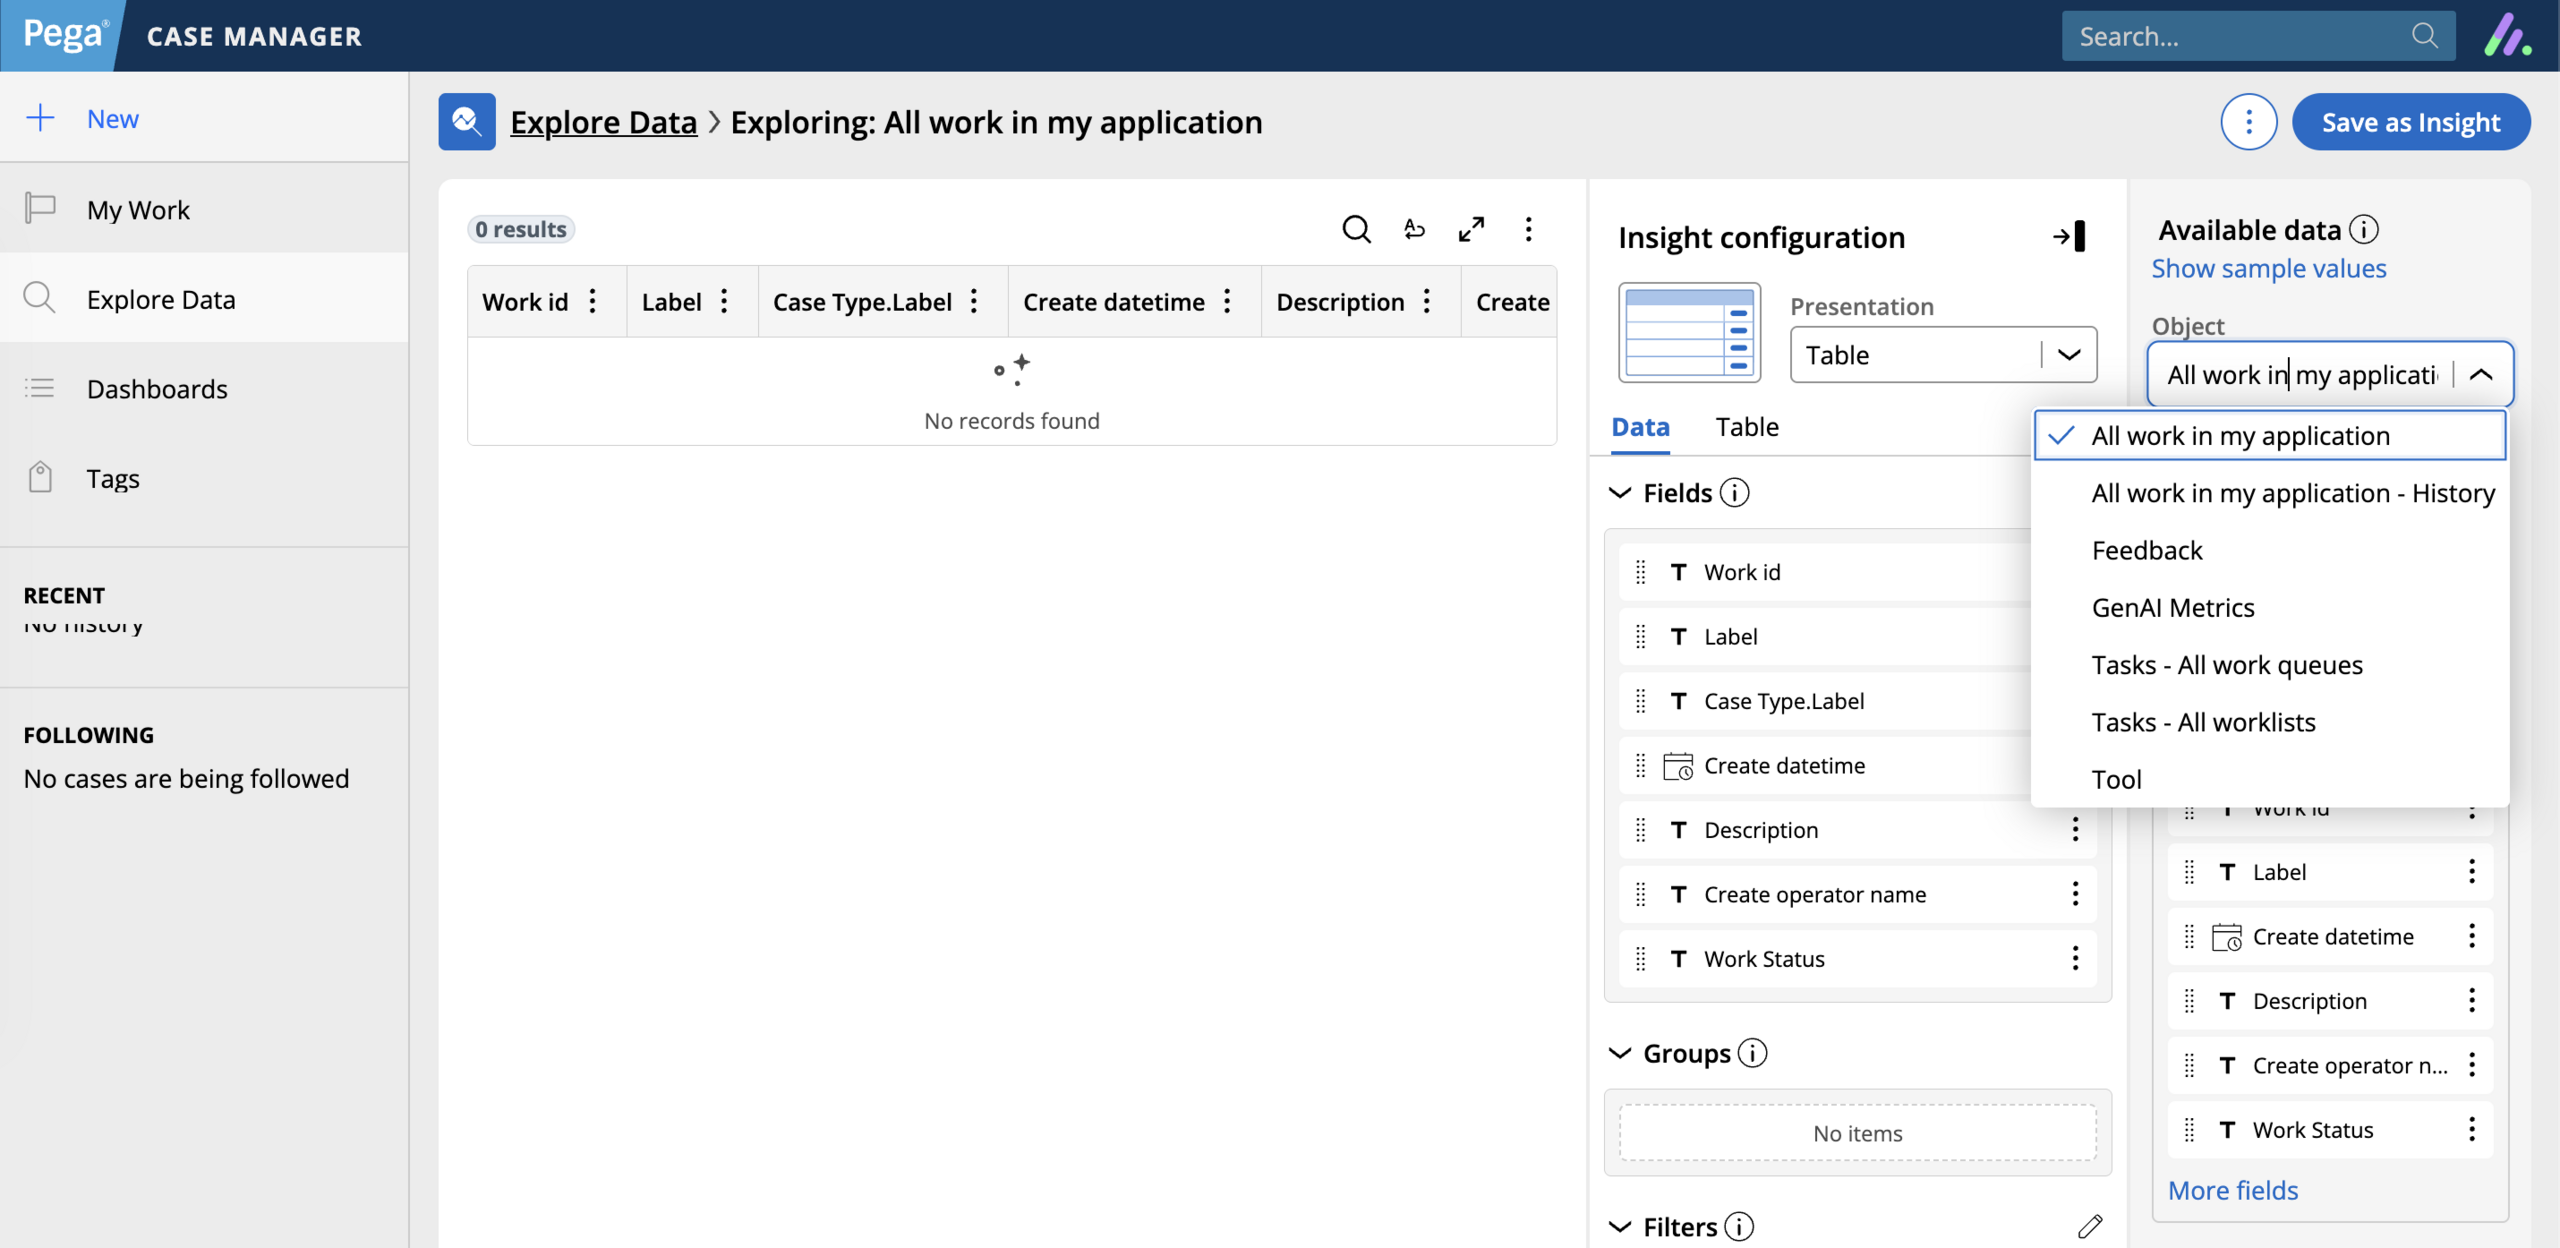
For Insights, you can add two OOTB landing pages, Explore Data and Dashboards, to your existing portals.
To enable these pages:
-
Follow the steps in the documentation:
The configuration below is common to all application types to enable Insights and related content.
Enable Constellation pages for your application
-
Open your Application definition and go to the section.
-
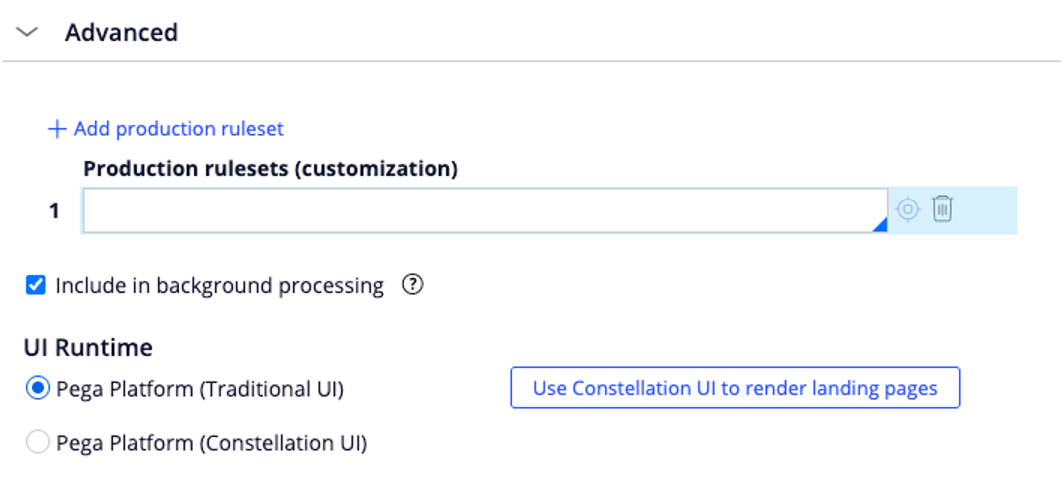
On Traditional section-based apps, the UI would look like below:
-
If you are not yet ready to change the "UI Runtime" to Constellation, keep the "Traditional UI" option selected and click the button .
-
Make sure to hit "Save" on the rule-form after this.
-
If you are ready to switch to Constellation (or if the app is already a Constellation app), switch the "UI Runtime" to "Constellation UI" and click the if it was not already generated before.

OAuth configuration
-
Ensure that an OAuth 2.0 Client Registration rule was successfully generated when your application was changed to use Constellation pages.
-
The rule will have a name like PegaApp_YourAppID (here, YourAppID is the ID from the Application Definition rule-form).
-
You can find it in the Records explorer under > .
-
On the rule, under the section, ensure that Access token lifetime setting is high enough.
-
Ensure that slower performing data queries will not run longer than this time limit. If queries exceed this limit, the user will be prompted for login credentials on long-running data queries.
Service package configuration
-
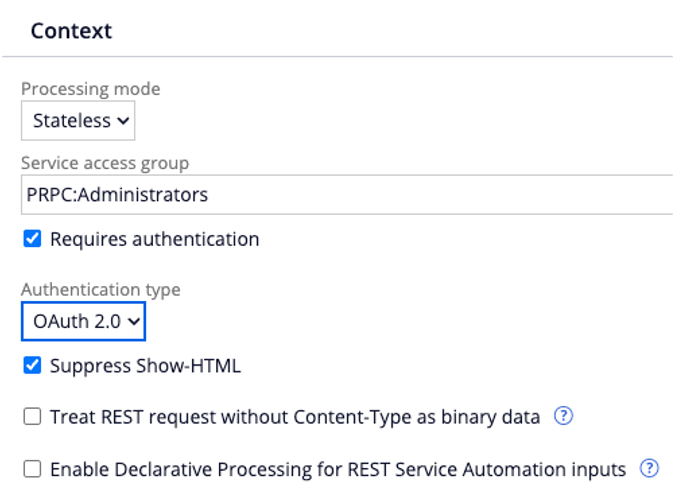
Ensure the application and dev Service Package rules are configured to use OAuth 2.0.
-
Go to the Records explorer under > .
-
Enable Rule creation
-
Ensure that your users can create/modify Insights and Dashboards. Behind the scenes:
-
Insights are stored as instances of the Rule-UI-Insight class.
-
Dashboards are stored as instances of the Rule-UI-View class.
-
-
To be able to perform CRUD operations on these, a given user should have an access role that allows these operations.
-
From the platform, we enable these permissions on the PegaRules:SysAdm4 and PegaRules:User4 access roles.
-
Make sure that these roles/permissions are not overridden in your user’s access group.
-
-
Also, since these are Rule- instances:
-
There needs to be an open ruleset or branch ruleset available to store changes to Insight and Dashboard rules.
-
The operators should have the Allow rule check out checkbox enabled.
-
Note: Depending on the Pega Platform release of your portal, additional steps may be needed as explained in the sections below.
Portals with Dynamic navigation
On relatively newer portals, you can directly add the landing pages as shown below:
-
Open your portal from . When Dynamic navigation is enabled, it will look like this:

-
Click "" and add the two OOTB landing pages:
-
pzDataExplorer from menu.
-
pzDashboardsManager from menu.
-
-
Save your portal and (re)launch it to use the new pages.

Static portals convertible to Dynamic navigation
Some older portals have Static navigation, but they provide an option to switch to Dynamic navigation. Follow the below steps for such portals:
-
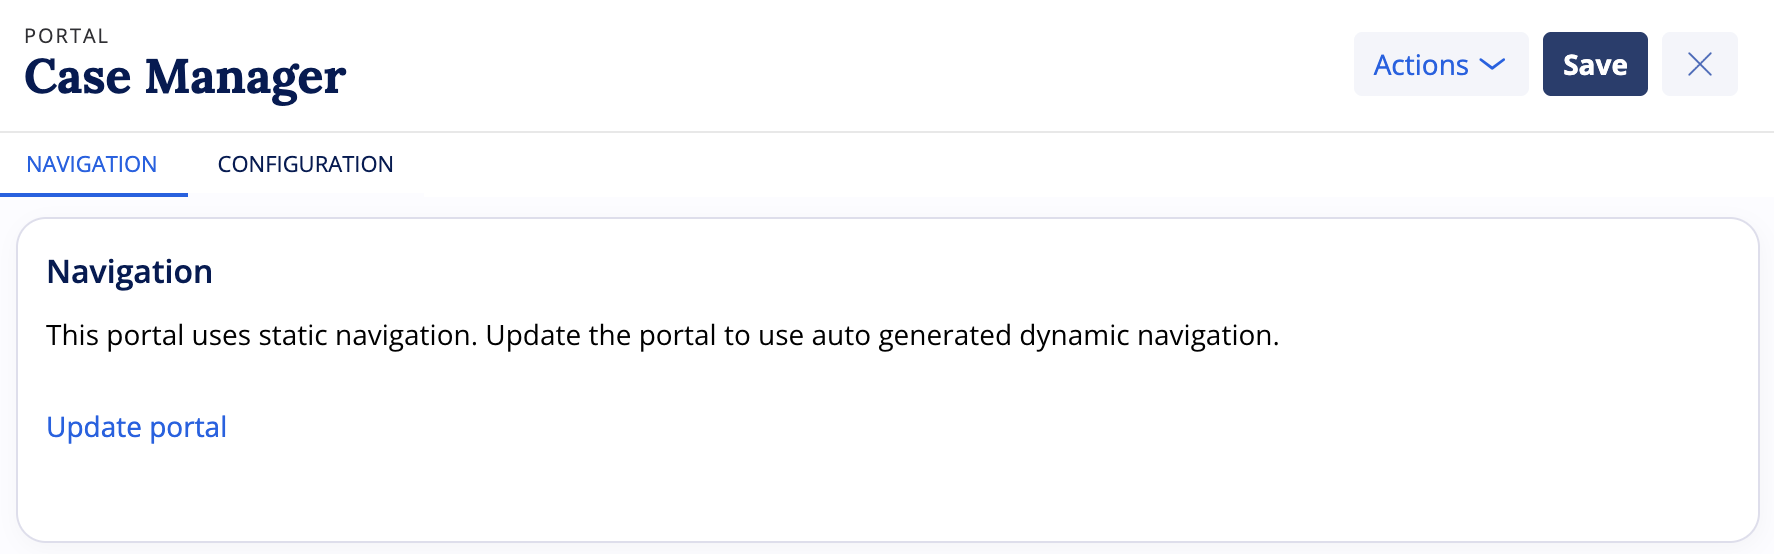
From the menu, open your portal.
-
Click the "" button. This will turn on dynamic navigation for the portal.
-
As the warning popup suggests, you need to add back your nav pages, but otherwise everything works the same as before.
-
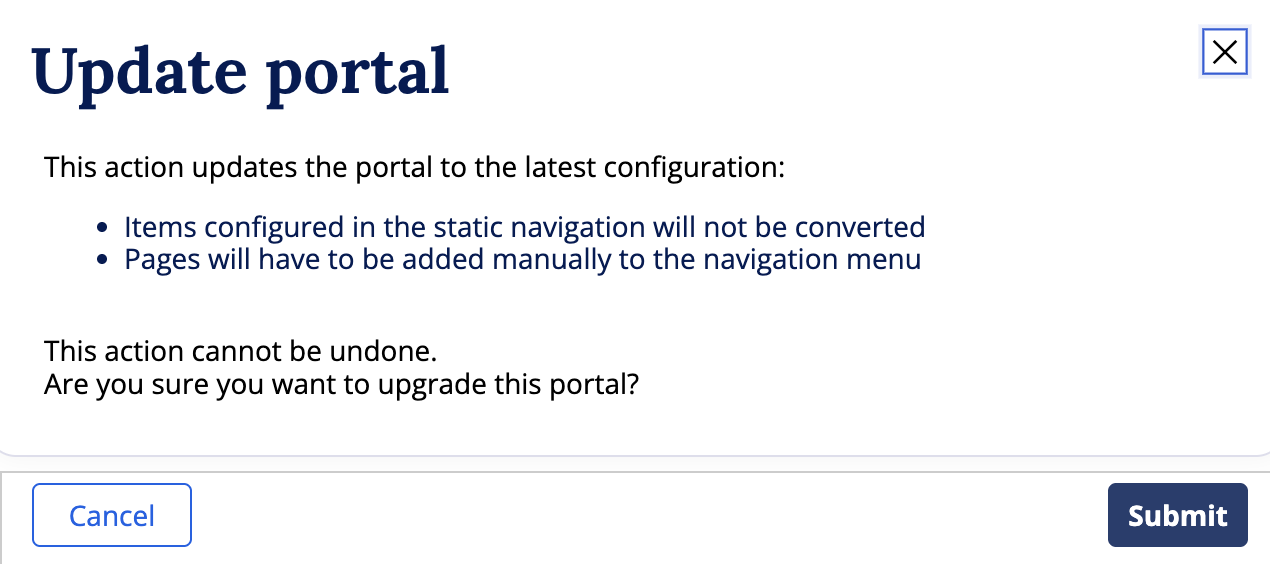
- The updated portal looks like below. Use the “ menu to add back all your previous pages.

-
Then add the two OOTB landing pages:
-
pzDataExplorer from Landing pages menu.
-
pzDashboardsManager from Custom pages menu.
-
-
Save the portal and (re)launch it to use the new pages.

Static portals NOT convertible to Dynamic navigation
On portals from earlier releases, the option to update to Dynamic navigation may not be available. In these cases, when you open the portal from the Channels and Interfaces page, it would look similar to this:
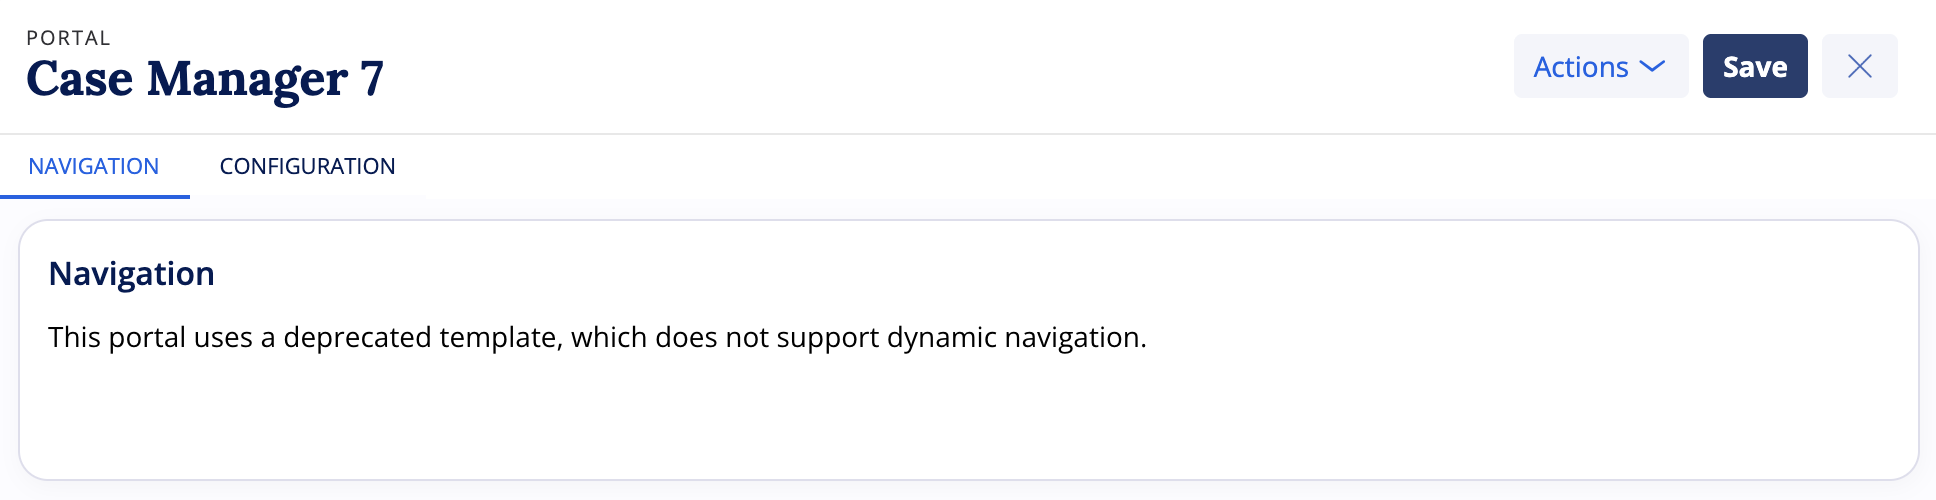
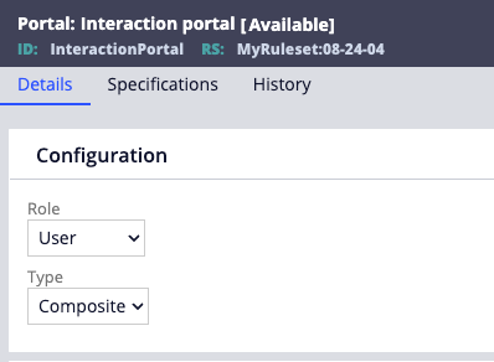
Note: In some of these cases, the steps below might work, but they cannot be guaranteed for heritage portals. If the below does not work, create a brand-new portal with dynamic navigation and follow the steps from the previous sections.
For such earlier portals, try the below steps:
-
Open the navigation rule for your portal. It will look similar to this:

-
Add a new child node :
-
Configure General/Presentation sections as required.
-
Under , set up a Harness with the below configuration:
-
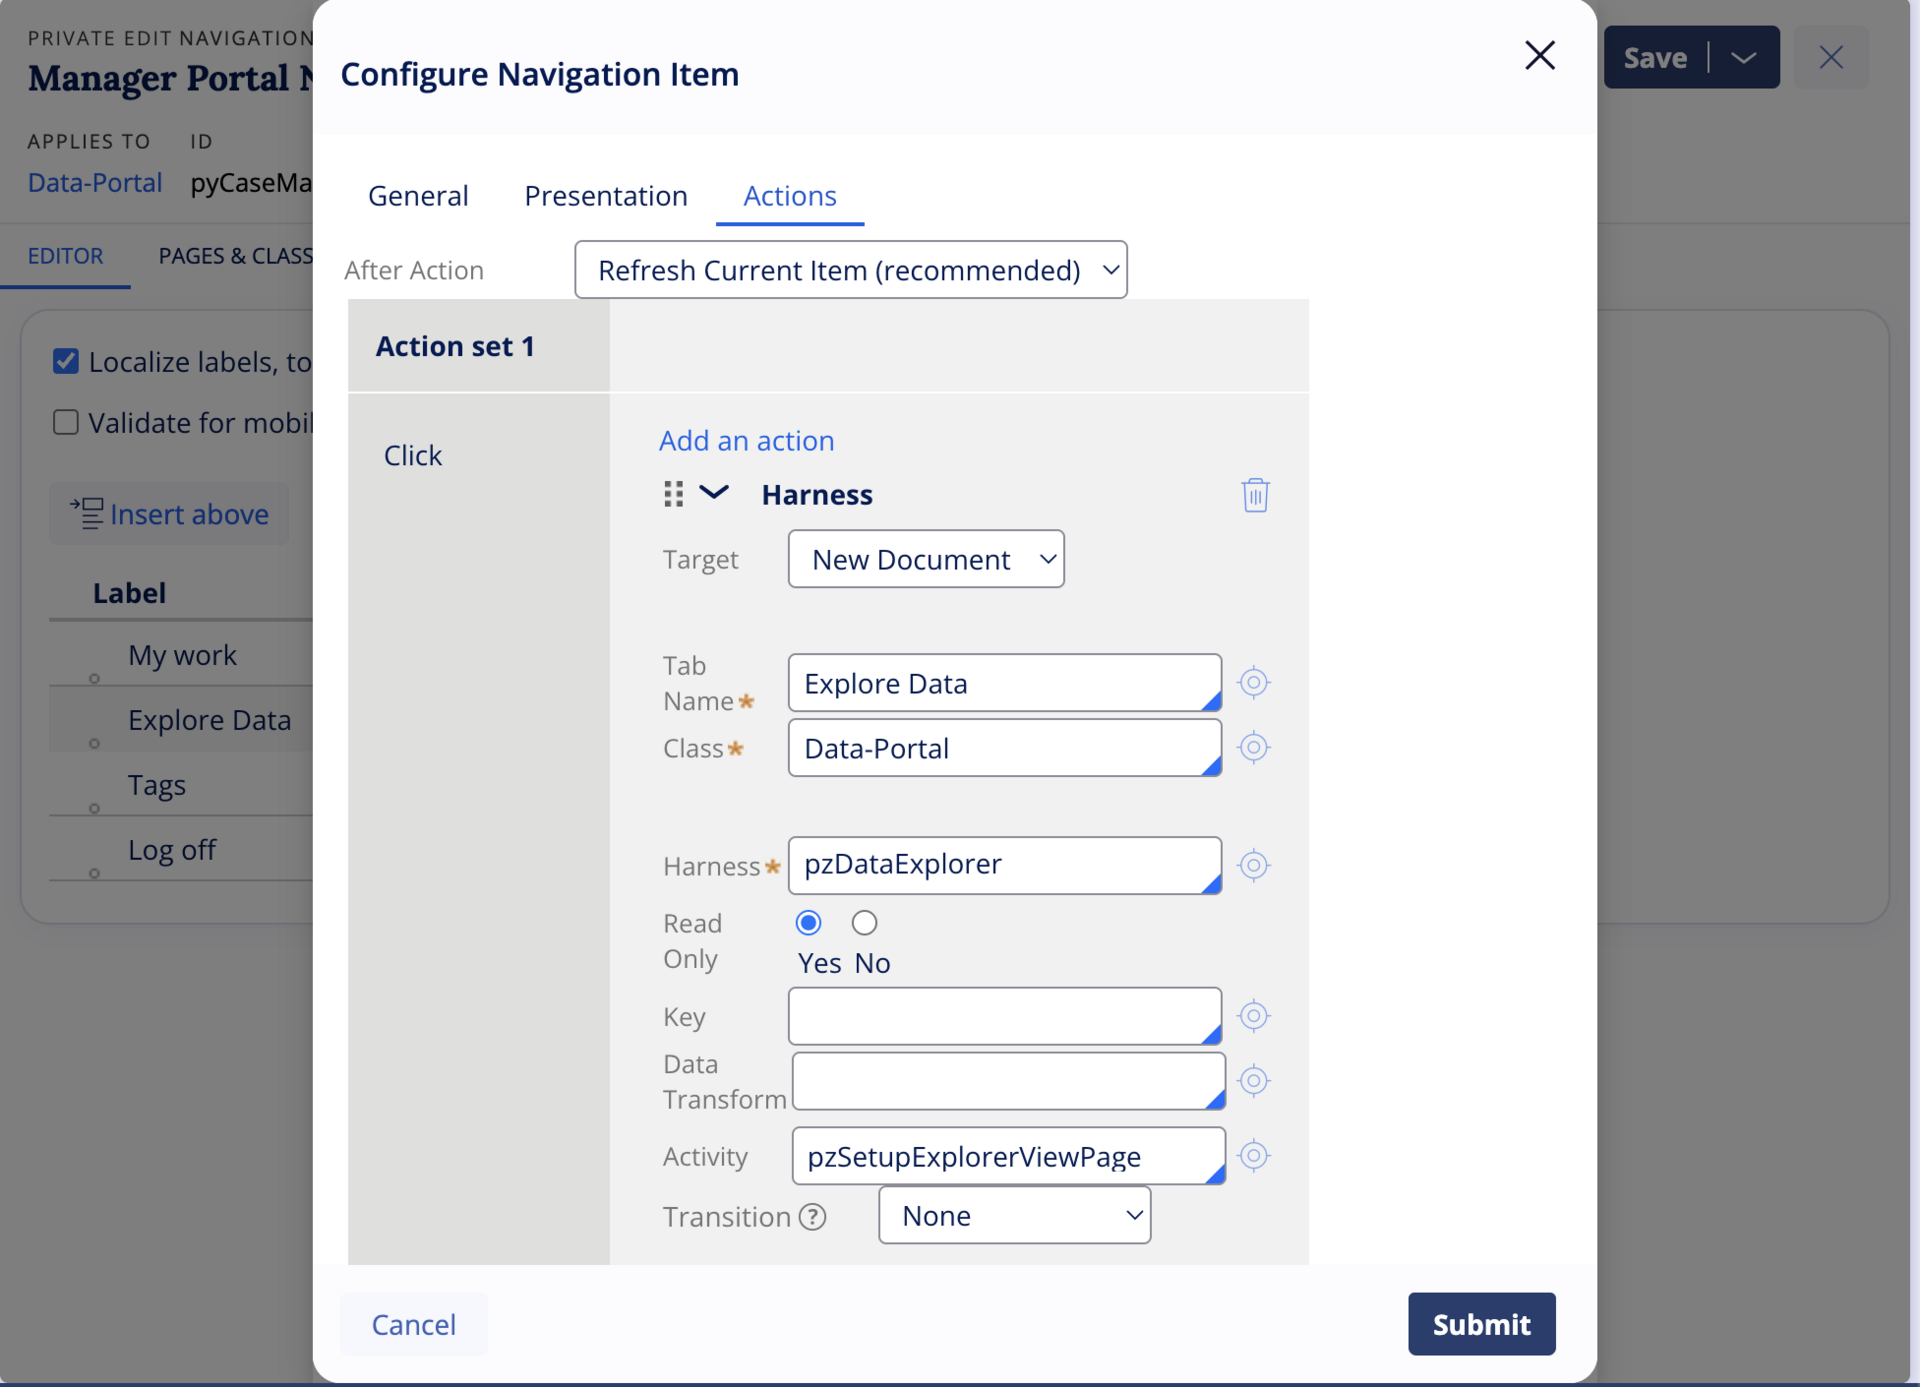
-
Add a new child node :
-
Configure General/Presentation sections as needed.
-
Under , set up a Harness with the below configuration.
-
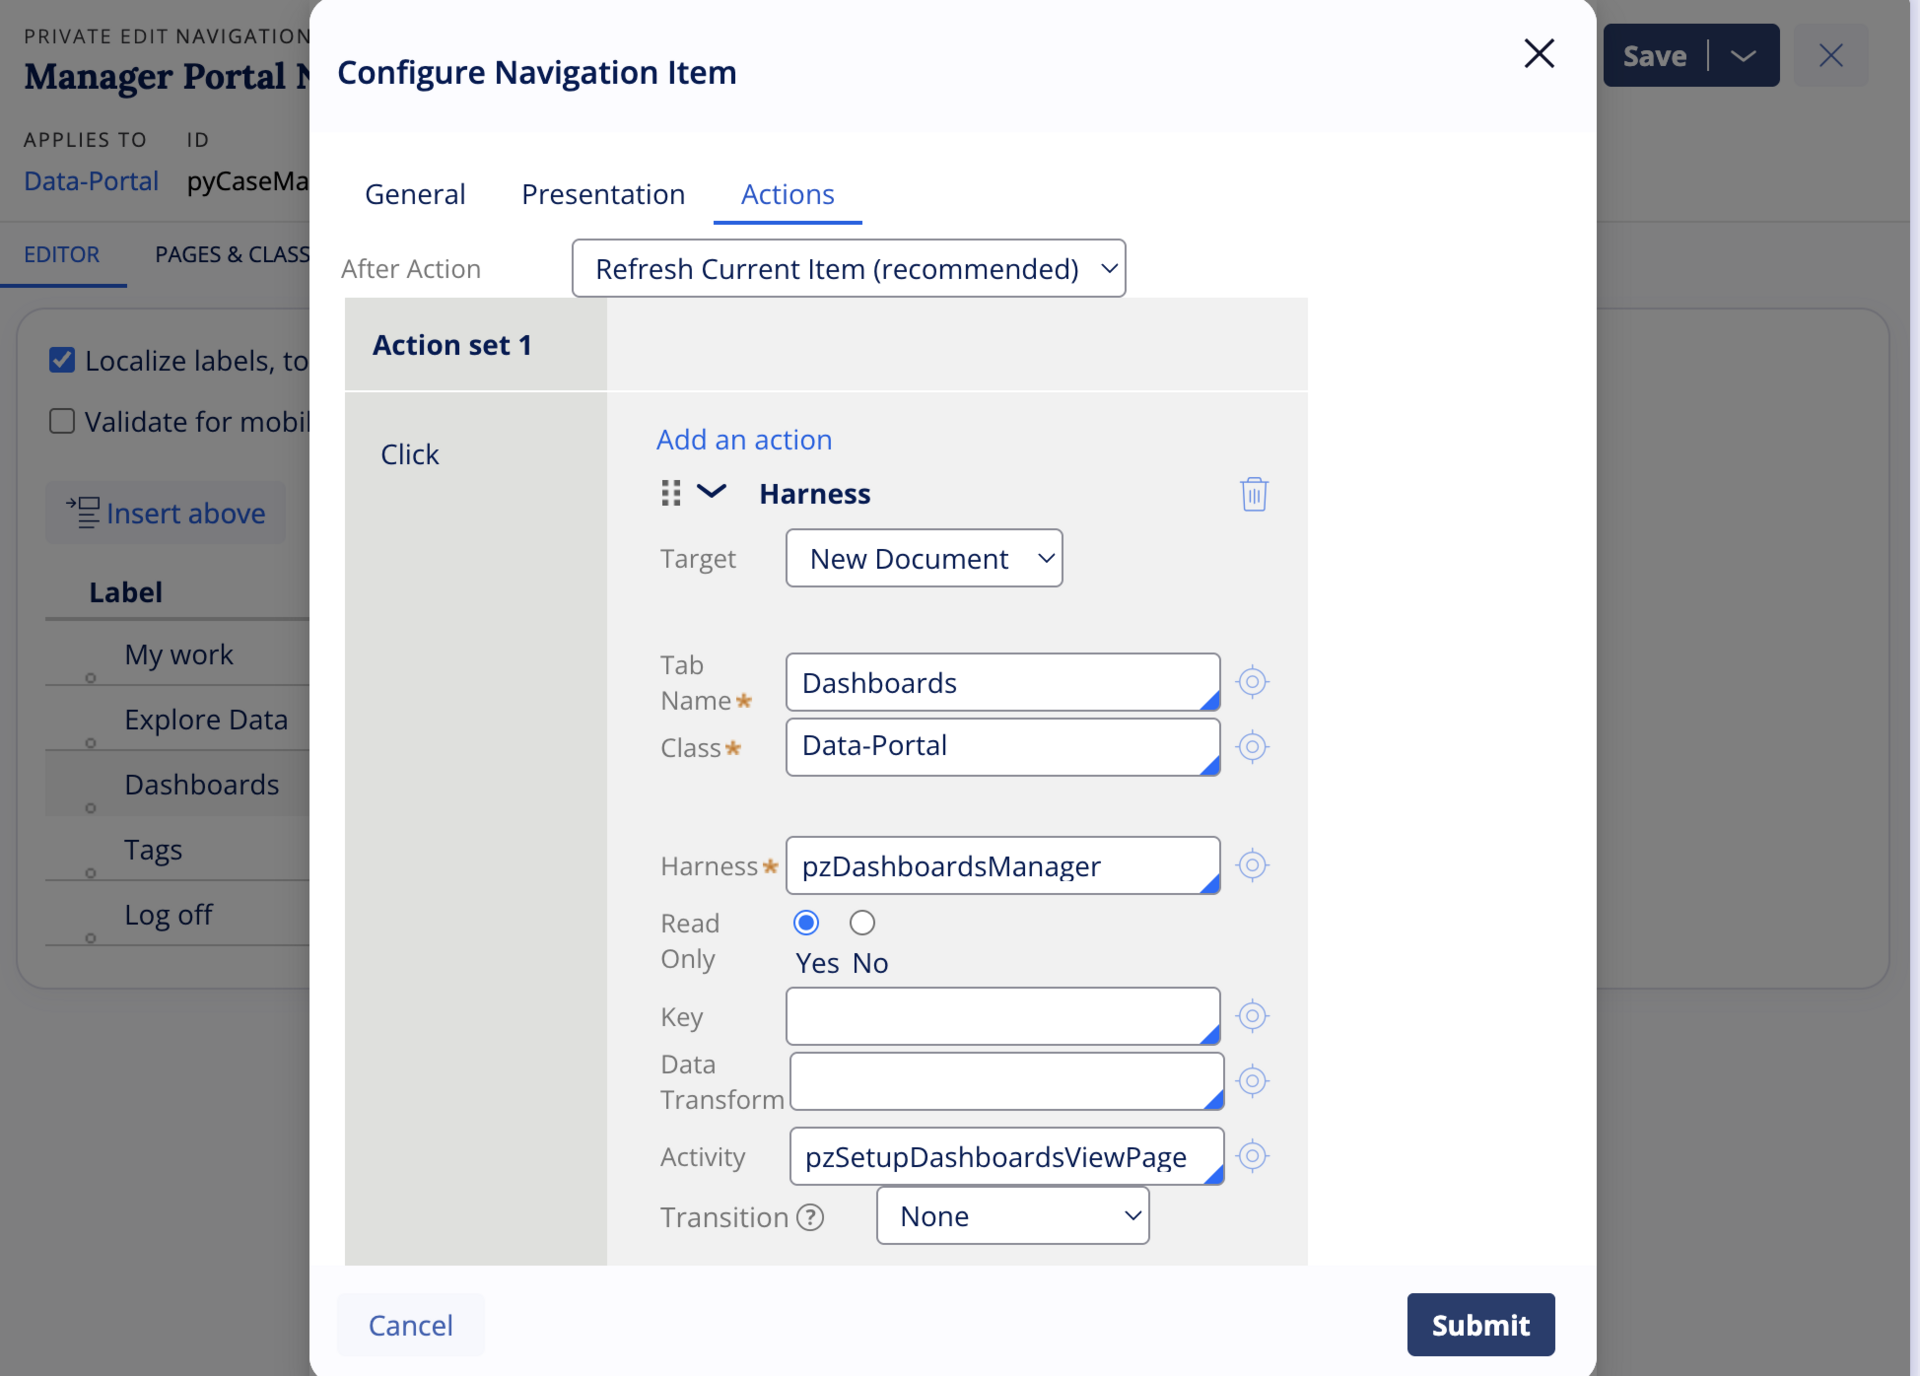
- Save the navigation rule and (re)launch the portal to use the new pages.
References
Using Constellation in existing applications
Enabling Insights for Dashboards and Home in UIKit