Discussion
Pegasystems Inc.
BR
Last activity: 20 May 2025 17:00 EDT
How to Save Data in a Data Object
Introduction
This guide provides step-by-step instructions for saving data in a Data Object, ensuring proper configuration and data flow between your case and data tables.
Step-by-Step
Step 1: Verify the data model and embedded property configuration
Why? Before saving data, we need to ensure the structure is correctly configured so data can flow from the case to the table.
1.1 - Confirm you have a data model called "Product" (for this example)
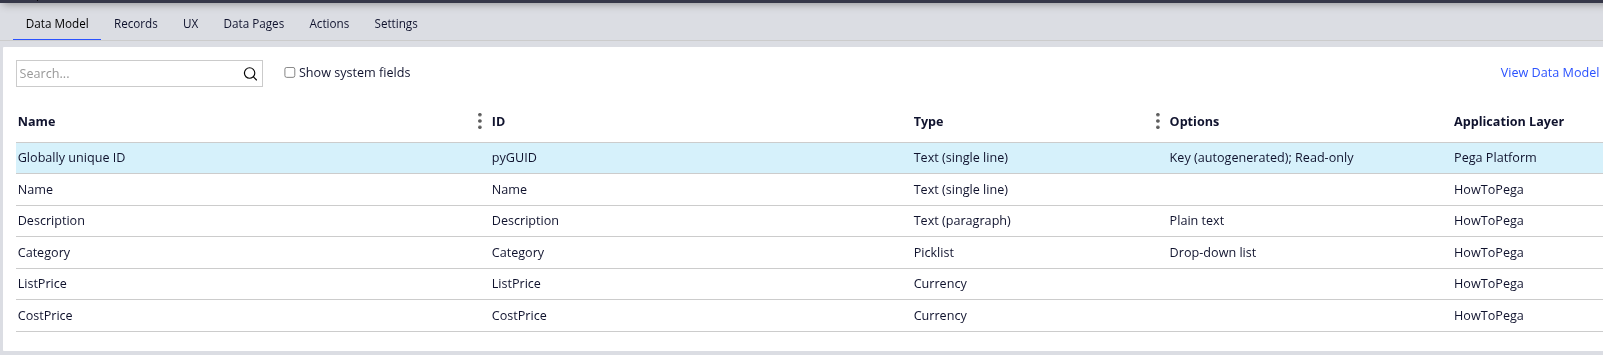
1.2 - Verify that the embedded data property in the case also called "Product" is correctly configured to match the structure of the product data model

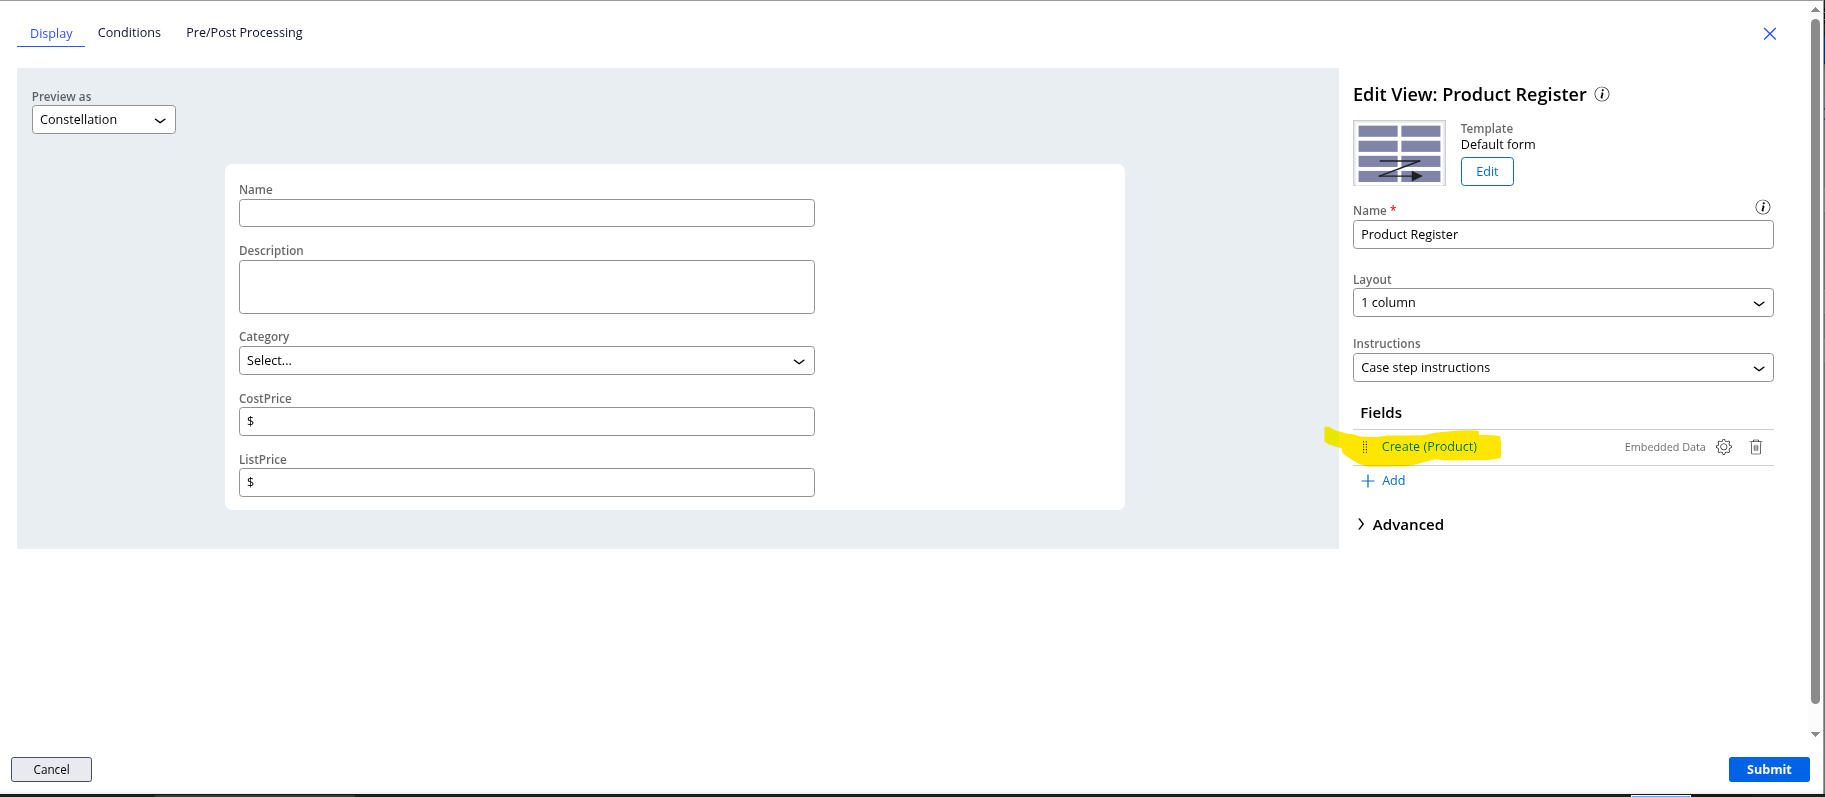
Step 2: Create a view for the Product
Why? Creating a dedicated view ensures that the data is properly structured according to the Product data model, making it accessible and manageable within the application interface.

Step 3: Add the view to the case
Why? Adding the view to the case allows users to interact with the Product data directly from the case interface, providing a seamless experience for data entry and visualization.
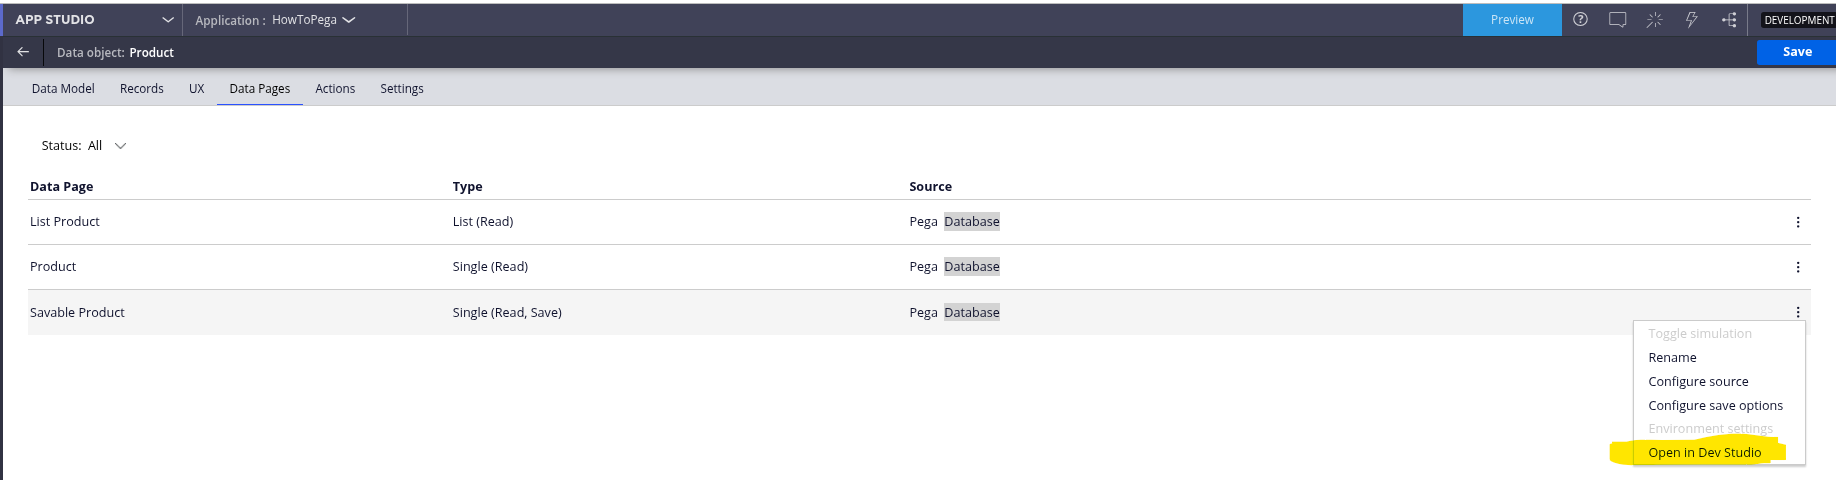
Step 4: Create a copy of the savable data page called CreateUpdateProduct
Why? Using the automatically generated data page (created by App Studio) provides a foundation for our save operation while allowing us to customize it for our specific requirements.
4.1 - Open the Savable Product in Dev Studio
4.2 - Go into Actions and "Save as"
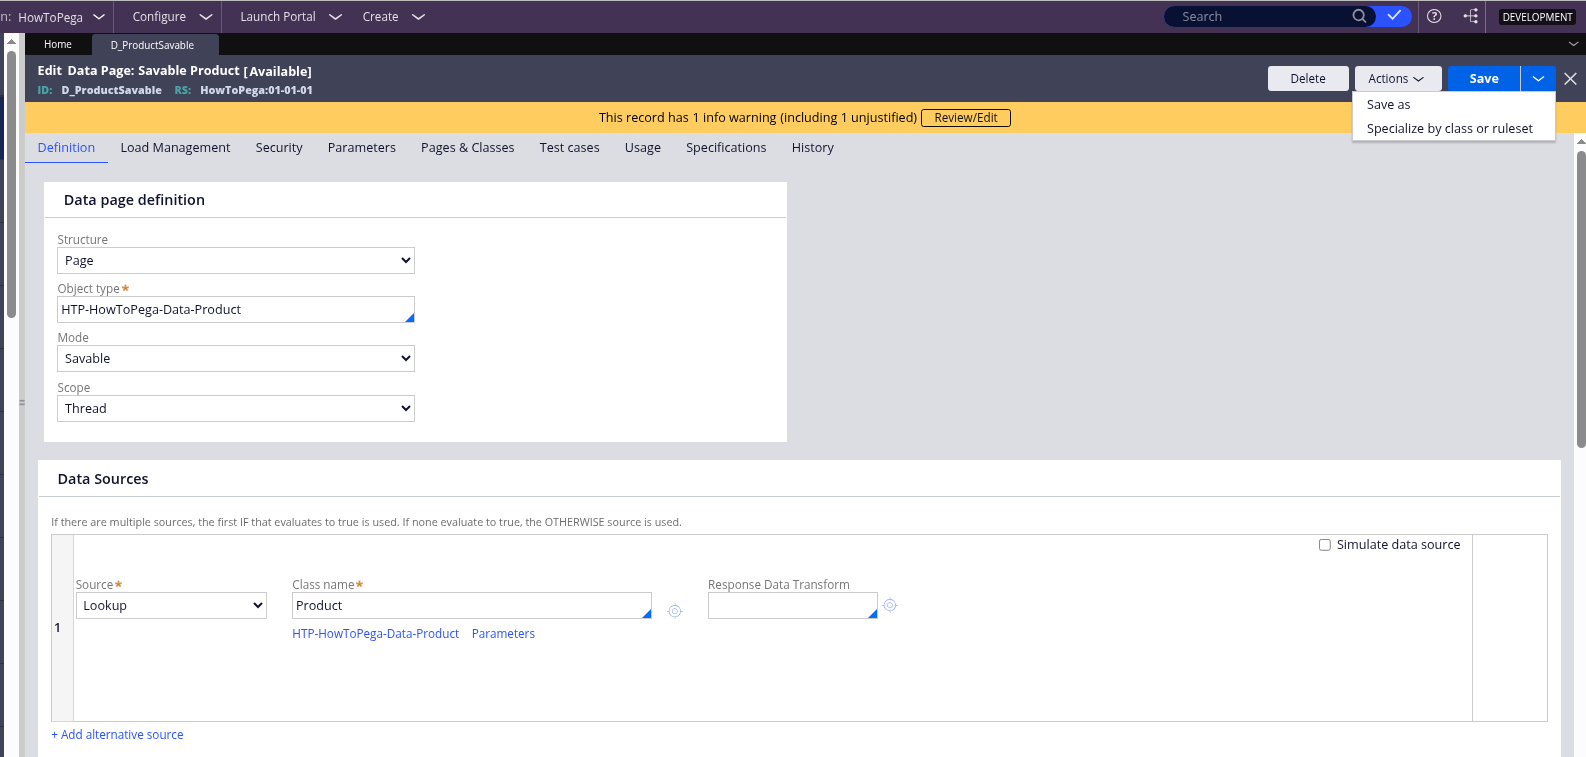
4.3 - Create a copy named "CreateUpdateProduct"
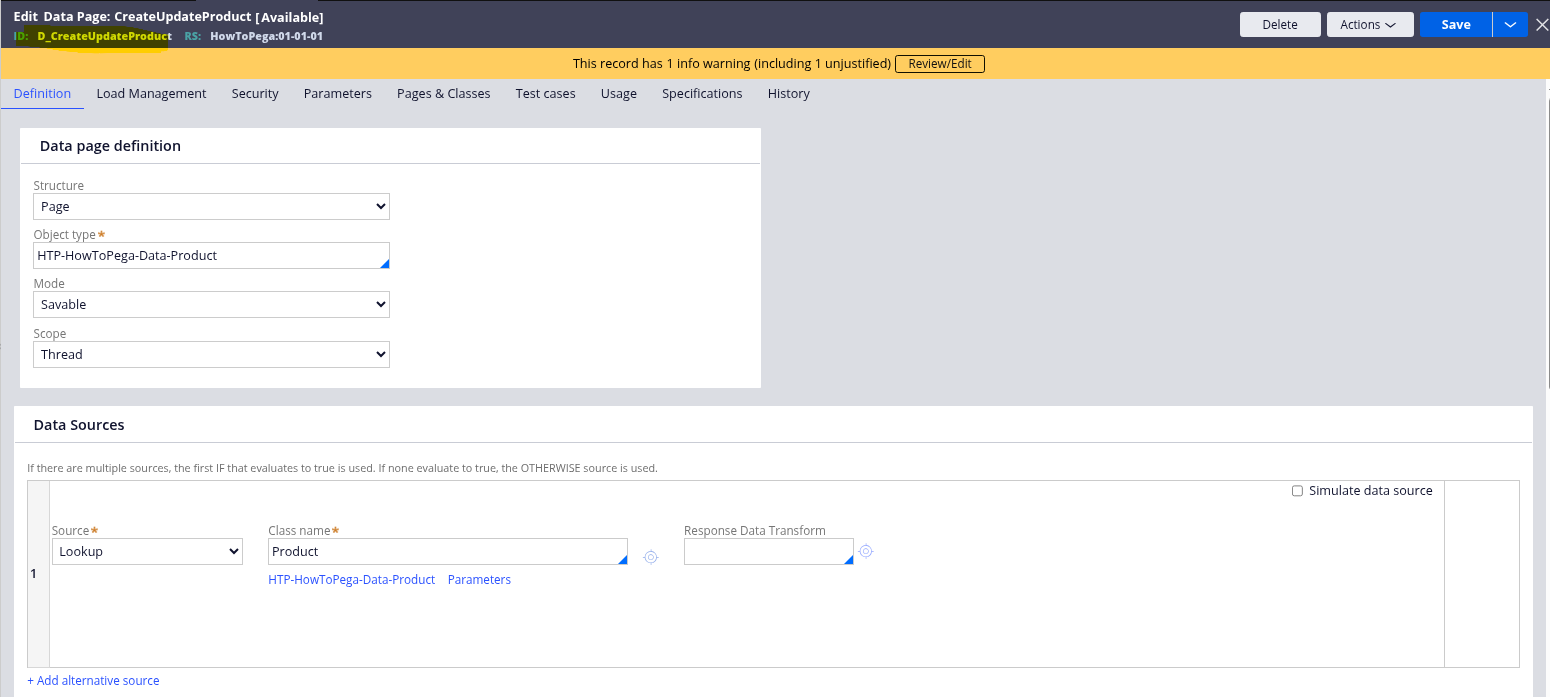
Step 5: Add a new 'Data source' to the data page
Why? Adding a new data source establishes the connection between our interface and the database, defining how data will be retrieved and stored.
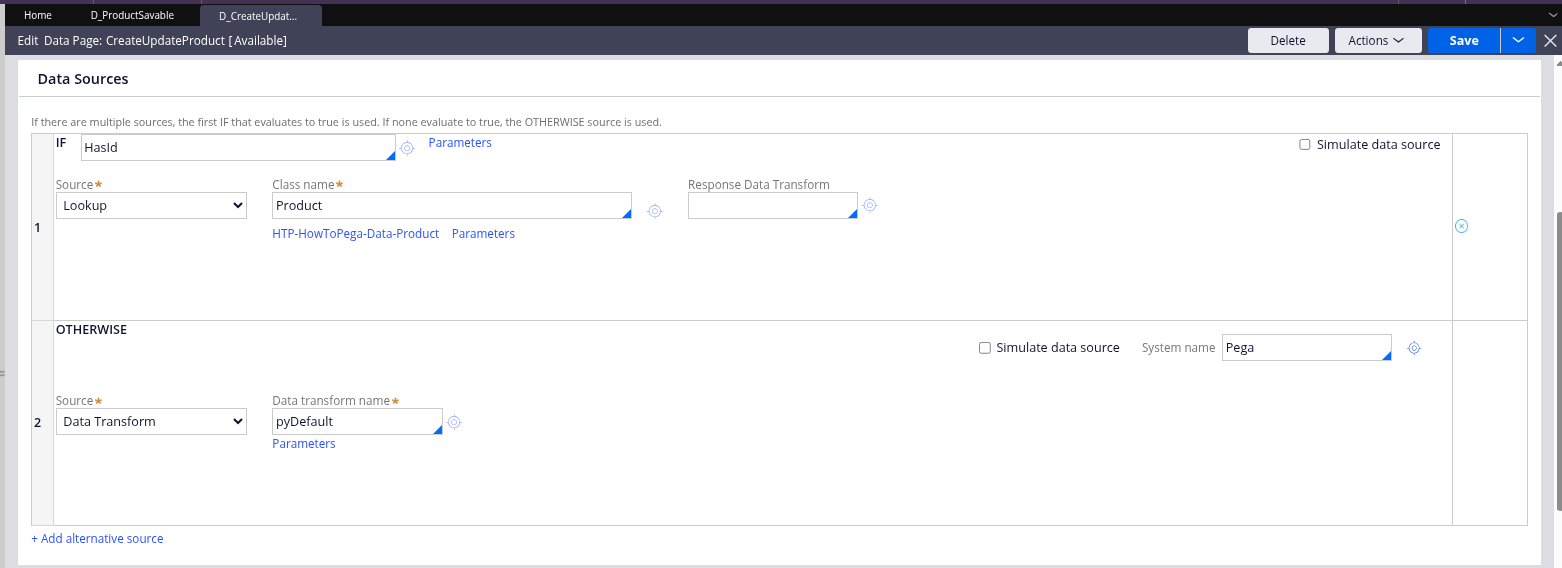
Step 6: Create a When condition
Why? We will keep the default behavior if the parameter pyGUID is sent to the Data Page, that is, the Lookup. This condition helps determine whether we're performing a lookup, insert, or update operation.

Step 7: Create an activity
Why? The activity is responsible for calling the Data Page that is going to save or update the Product information. This encapsulates the save/update logic in a reusable component.
7.1 - Activity steps.
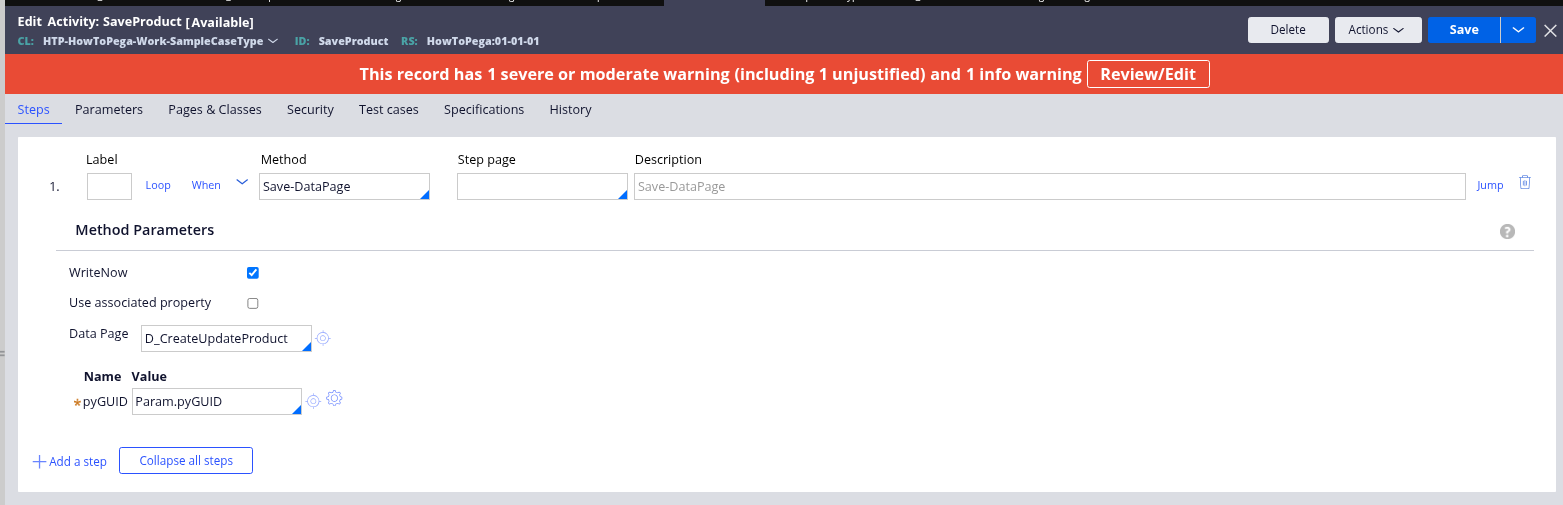
7.1 - Activity parameters

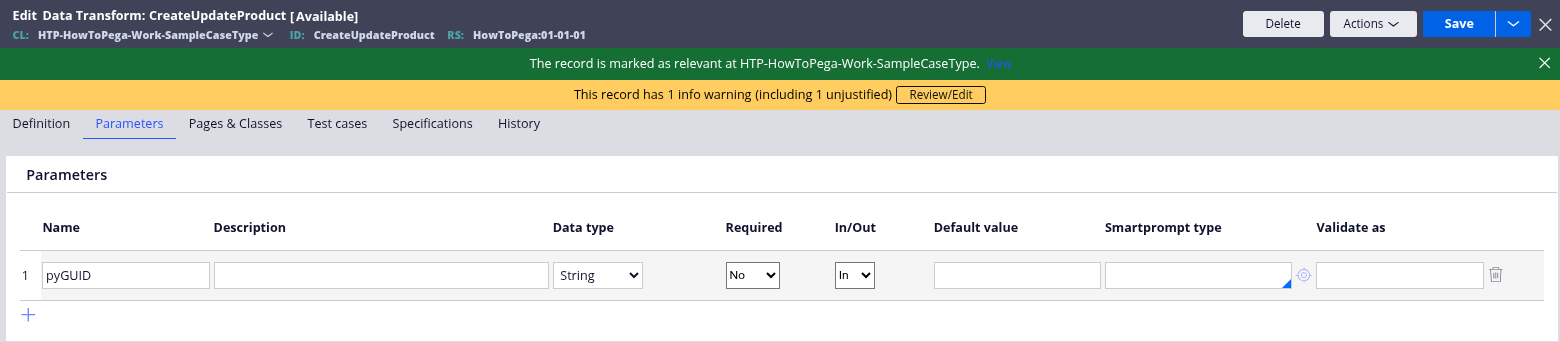
Step 8: Create a Data transform
Why? The data transform is responsible for making the correct treatments to verify if it's an insert or update operation and also calls the activity that saves the product.
8.1 - The data transform steps validate if the pyGUID is sent. This validation is used so we can separate insert from update.

8.2 - Data transform parameters.
8.3 - Data transform 'Pages & Classes' has to declare the Data Page.

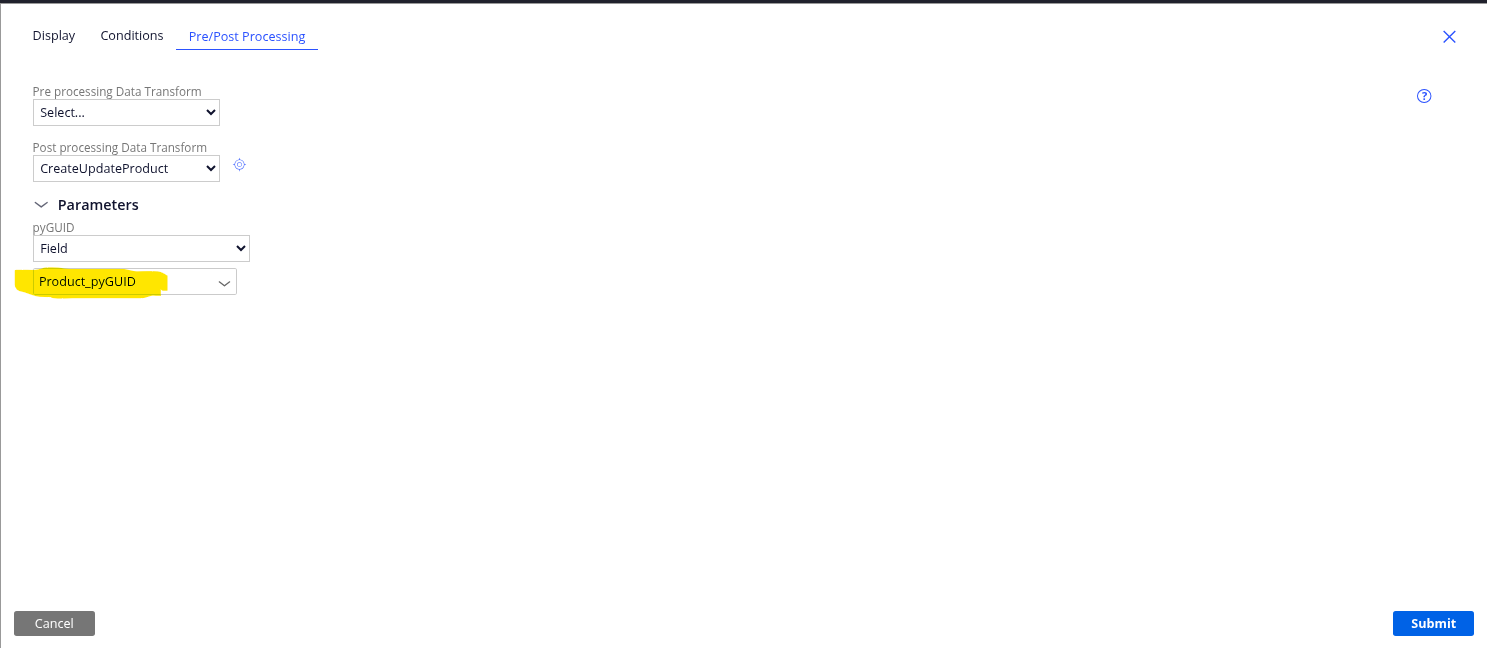
Step 9: Configure the Post-Processing to call the Data transform
Why? Adding the data transform to the Post-Processing field ensures that our save logic executes automatically after the user submits the form, creating a seamless experience while maintaining data integrity.
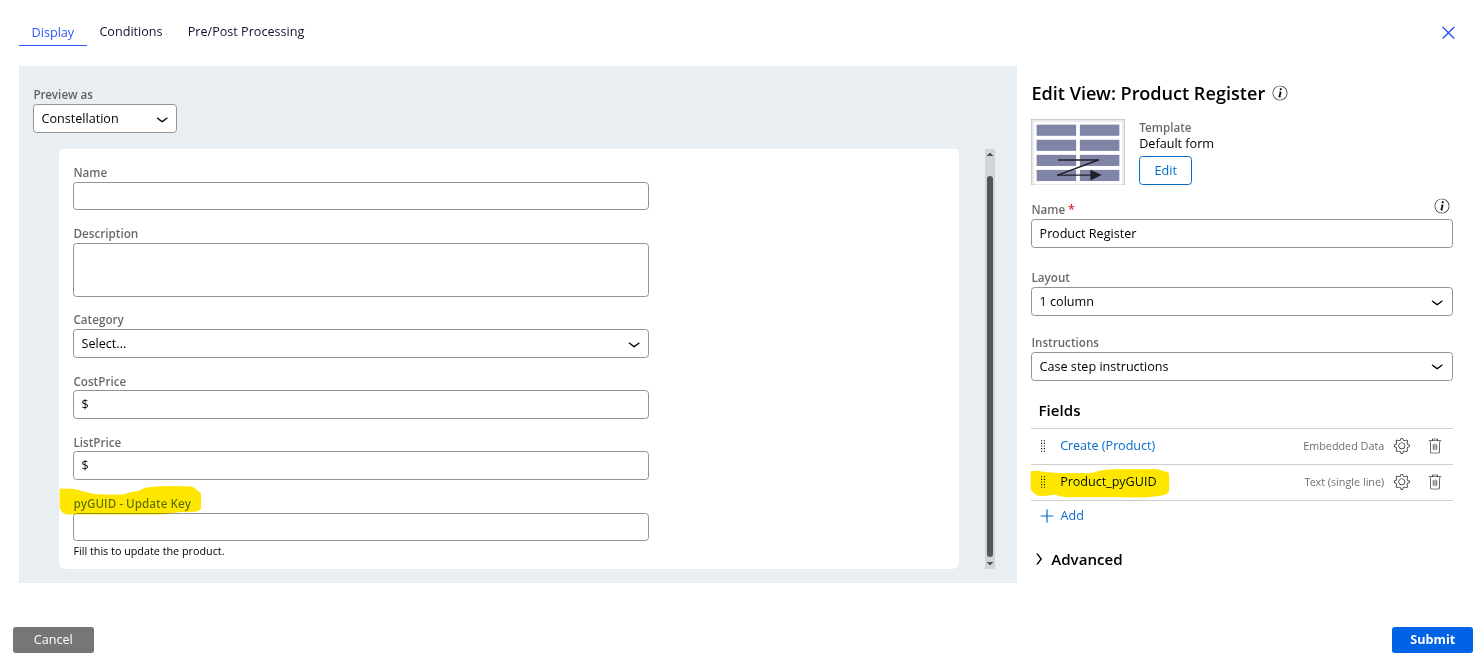
Step 10: Validate your information
Why? Validation is a critical final step to ensure that all configurations are correct and the data saving process works as expected, preventing potential issues in production.
10.1 - I added a field called Product_pyGUID in my form, so I can test my implementation. If it's blank, the Data transform will go to the insert path; otherwise, is an update.
Conclusion
By following these ten steps, you have successfully configured your application to save data from your case to a Data Object. This approach provides several advantages:
• Data Integrity: The structured approach ensures that data maintains its integrity throughout the save process.
• Reusability: The components created (data pages, activities, and data transforms) can be reused across your application.
• Maintainability: The clear separation of concerns makes future maintenance and troubleshooting more straightforward.
• Scalability: This pattern can be extended to handle more complex data relationships and validation requirements.
Remember that proper data handling is fundamental to building robust Pega applications.
References:
- https://academy.pega.com/module/saving-data-system-record/v7
- https://academy.pega.com/topic/data-modeling/v4
- https://academy.pega.com/module/creating-data-objects/v2
- https://academy.pega.com/topic/adding-data-transform-process/v3