Constellation: How do you change background color for a specific field?
I am looking to change the background color for only a specific field/property.
I would also like to change it based on the value of the field as well.
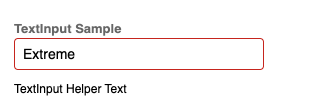
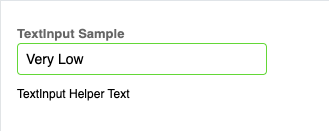
Example: "field value: Extreme (box should be red) || Very Low (box should be light-green)
Is this possible to do in Constellation?
Accepted Solution
Updated: 31 Jan 2025 10:37 EST
Pegasystems Inc.
US
If you follow the directions to install DX component builder and initialize a project here:
- Then use the 'npm run createAll' in the terminal - This will generate a example TextInput component along with other examples.
- Then in your editor you can add the code below to the files listed in the comments. Style.ts and Index.tsx.
- You will replace the Input component with this new styled component. <Input/> for <BorderInput/> in the Index.tsx file. (line 225?)
- Add the imports and the setBorderColor function to the Index.tsx and adjust the logic to suit your needs.
- Then you test in storybook using the 'npm run startStorybook' command in the terminal.
This example will change the border color - I would caution against changing the background color. But if that is the business need it is a simple CSS change.
// Style.ts

import styled, { css } from 'styled-components';
import { Input } from '@pega/cosmos-react-core';

export const StyledPegaExtensionsTextInputWrapper = styled.div(() => {
  return css`
    margin: 0px 0;
  `;
});

interface BorderInputProps {
  borderColor?: string;
}

export const BorderInput = styled(Input)<BorderInputProps>(({ borderColor }) => {
  return css`
    margin-bottom: 10px;
    padding: 8px;
    width: 250px;
    border-color: ${borderColor || '#939393'};
  `;
});


// Index.tsx

import { StyledPegaExtensionsTextInputWrapper, BorderInput } from './styles';

function setBorderColor(tempValue?: string): string | undefined {
    if (!tempValue) {
      return undefined;
    }
    return tempValue === 'Very Low' ? '#2de007' : '#e00707';
}


<BorderInput borderColor={setBorderColor(inputValue)}/>Pegasystems Inc.
CA
Yes, it's possible using Pega DX components.
Digital FastForward
US
@RameshSangili
Thank you, I am looking into it and I have been following the guide to create my own components.
Do you have a bit more guidance or details on where I should be adding those conditions to change the background color of the text with the custom components based on the value of the field?
Pegasystems Inc.
CA
Please refer to the Constellation DX Components. This would be a great place to start with it.
1. Create a field level (Text) DX component for the color coding
2. Config.json - Configure a new parameter to pass the values for the colour coding(refer maxRating).
3. Index.tsx - Apply the color coding logic based on the parameter value.
4. Build the component
5. Test it on Storyboard
6. Authenticate
7. Publish the component to your Development environment (make sure it's available in Rule-UI-Component )
8. Add a Text Field to View and Change Display as "your component name"
Accepted Solution
Updated: 31 Jan 2025 10:37 EST
Pegasystems Inc.
US
If you follow the directions to install DX component builder and initialize a project here:
- Then use the 'npm run createAll' in the terminal - This will generate a example TextInput component along with other examples.
- Then in your editor you can add the code below to the files listed in the comments. Style.ts and Index.tsx.
- You will replace the Input component with this new styled component. <Input/> for <BorderInput/> in the Index.tsx file. (line 225?)
- Add the imports and the setBorderColor function to the Index.tsx and adjust the logic to suit your needs.
- Then you test in storybook using the 'npm run startStorybook' command in the terminal.
This example will change the border color - I would caution against changing the background color. But if that is the business need it is a simple CSS change.
If you follow the directions to install DX component builder and initialize a project here:
- Then use the 'npm run createAll' in the terminal - This will generate a example TextInput component along with other examples.
- Then in your editor you can add the code below to the files listed in the comments. Style.ts and Index.tsx.
- You will replace the Input component with this new styled component. <Input/> for <BorderInput/> in the Index.tsx file. (line 225?)
- Add the imports and the setBorderColor function to the Index.tsx and adjust the logic to suit your needs.
- Then you test in storybook using the 'npm run startStorybook' command in the terminal.
This example will change the border color - I would caution against changing the background color. But if that is the business need it is a simple CSS change.
// Style.ts

import styled, { css } from 'styled-components';
import { Input } from '@pega/cosmos-react-core';

export const StyledPegaExtensionsTextInputWrapper = styled.div(() => {
  return css`
    margin: 0px 0;
  `;
});

interface BorderInputProps {
  borderColor?: string;
}

export const BorderInput = styled(Input)<BorderInputProps>(({ borderColor }) => {
  return css`
    margin-bottom: 10px;
    padding: 8px;
    width: 250px;
    border-color: ${borderColor || '#939393'};
  `;
});


// Index.tsx

import { StyledPegaExtensionsTextInputWrapper, BorderInput } from './styles';

function setBorderColor(tempValue?: string): string | undefined {
    if (!tempValue) {
      return undefined;
    }
    return tempValue === 'Very Low' ? '#2de007' : '#e00707';
}


<BorderInput borderColor={setBorderColor(inputValue)}/>Updated: 28 Jan 2025 15:15 EST
Digital FastForward
US
@RichOren
Thank you Rich I have the code written and it appears to function as needed in the Storybook.
Currently running into the issue when authenticating the Development environment with the Pega instance.
Note: I am testing this in the Pega Community Edition instance and following the ConstellationDX guide.
- Using "npm run authenticate" works until it shows: "Awaiting authorization to complete (Ctrl-C to exit). You may need to enter credentials within your default browser."
- I have tested changing my default browser to all of the most common browsers and does not work.
- I have run this command in multiple terminals: Command Prompt, VSCode Terminal, IntelliJ Terminal. None of these open a browser window.
- I have tested opening the browser window myself (using the specified server URL in the tasks.config.json and logging in while the command runs and this does not work.
I'm wondering if I can test this inside the Community Edition or not.
Digital FastForward
US
Sure the code snippet for it is below.
{
  "components-directory-path": "src/components",
  "import-relative-path": "Downloads",
  "export-relative-path": "Downloads",
  "server-config": {
    "rulesetName": "CustomDXComponents",
    "rulesetVersion": "01-01-01",
    "sourceOfComponents": "Server",
    "devBuild": true,
    "serverType": "infinity",
    "server": "--Removed--",
    "clientId": "10095186356008396159",
    "clientSecret_comment": "Needed only when using 'passwordCreds' or 'clientCreds' grantType",
    "clientSecret": "",
    "grantType": "authCode",
    "redirectUri": "https://localhost:4010/",
    "authService_comment": "Infinity authentication service alias (when grantType is set to 'authCode')",
    "authService": "pega",
    "cert_and_key_comment": "Path to SSL certificate file and SSL key file to use when starting local HTTPS server",
    "cert_and_key_comment2": "Needed only when using 'authCode' grantType and redirectUri begins with 'https://localhost'",
    "cert": "./keys/dxcb.crt",
    "key": "./keys/dxcb.key",
    "user_and_password_comment": "useful primarily when grantType is set to 'passwordCreds'",
    "user": "",
    "password": "",
    "questions_comment": "useful for designating how frequently questions should be asked during npm run authenticate",
    "questions_askAlways": "",
    "questions_askNever": "",
    "questions_askOnce": "server,authService",
    "questions_askedOnce": ""
  },
  "component": {
    "library": "MyLib",
    "type": "",
    "version": "0.0.1",
    "subtype": "",
    "description": "",
    "icon": ""
  },
  "usePromotedWebPack": false,
  "libraryMode": false,
  "showDebug": false
}
Updated: 28 Jan 2025 21:39 EST
Pegasystems Inc.
US
I am glad you were able to get the coding success - good job! To trouble shoot Authentication please try to confirm a few things below.
Make sure your Operator ID is set to Authors. I.e <AppName>:Authors
Has these Roles Set:
|
ROLES |
|---|
|
<AppName>:SysAdm4 |
|
<AppName>:SecurityAdministrator |
|
<AppName>:PegaAPI |
In the OAuth 2.0 Client Registration / DX-ComponentDev Rule make sure the clientId matches the tasks.config.json clientId.
Note: You may need to click the "Revoke access and refresh token" button and add the clientSecret to your tasks.config.json
Make sure there is a Ruleset named "CustomDXComponents" and it has been created and added to your application definition rule. Also make sure it is unlocked.
You might also have to add the Username and Password of the Authoring Operator ID to the tasks.config.json
 "user": "",
 "password": "",
I cannot get access to Pega Community Edition instances to be able to trouble shoot.
Best,
Rich
Digital FastForward
US
@RichOren
Ensured that everything you have listed was correct and it was.
I have also tested the Note you specified and the result was the same.
It will still end the authentication with the same message: "Awaiting authorization to complete (Ctrl-C to exit). You may need to enter credentials within your default browser."
I believe this might not be possible in the Community Edition Trial.
Updated: 19 Jan 2026 21:38 EST
Virtusa Consulting and Services Pty Ltd
AU
@RameshSangili - just a thought, if for such small things we have to create a custom DX component, then don't you think Constellation OOTB is very limited? and that there should be a faster/easier way to extend.
Pegasystems Inc.
US
@JacobH23 this is a very bad idea to rely on color to conduct critical or any other information - this will fail any accessibility audit - there is no design system that will change the input color based on the field name - you should use the label and instruction text and helper text to provide more information and guide the user - creating a Constellation DX component for this purpose is not a good idea...