Discussion
Pegasystems Inc.
PL
Last activity: 19 Aug 2025 9:20 EDT
Views configuration
Why
Constellation offers a new low-code prescriptive paradigm for developing applications quickly by using out-of-the-box components built around the concept of center-out configuration. This framework creates products that require less customization and one-off development, which promotes a slightly different approach to application creation.
Benefits and Best Practices:
App Studio and Dev Studio Best Practices:
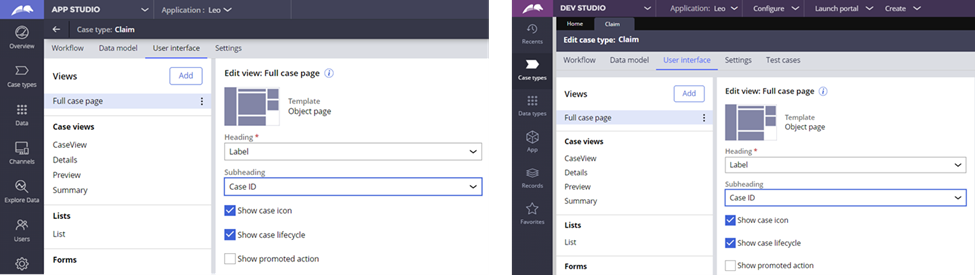
- User Interface tab can be accessed from both App Studio and Dev Studio
- Suggested approach is to work in App Studio to take advantage from low-code capabilities
- Switching to Dev Studio only when it is needed to perform advanced configuration
- Changes in Dev Studio must be App Studio compliant
Advanced View configuration and best practices
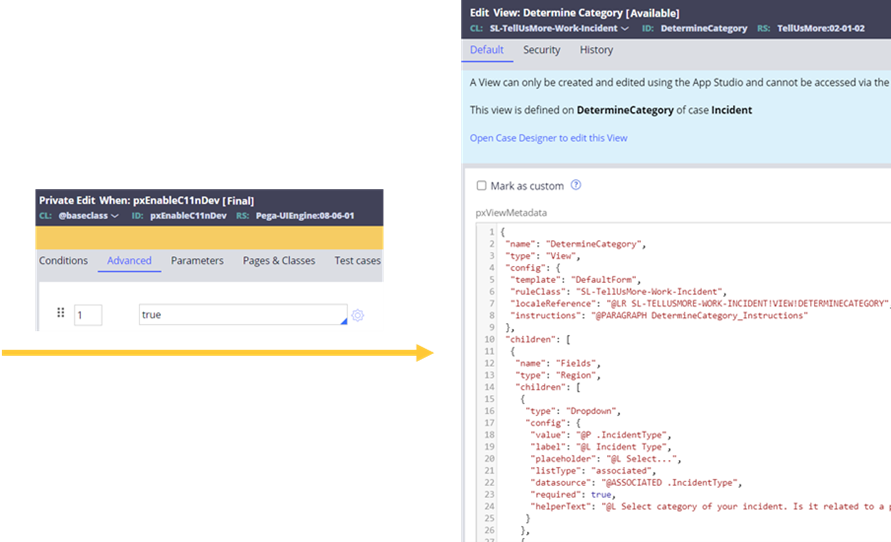
- Modification of views can be only done in graphical low-code manner
- Sometimes it is useful to look on advanced configuration of UI rules to understand connections and constraints – especially for LSA doing branch review
- To enable advanced view private edit When rule pxEnableC11nDev and make sure it returns true.
Best practice
- Do not edit the JSON directly as this can result in bugs, unexpected behavior and maintenance overhead for future updates. The JSON should only be used to diagnose issues, not introduce customization.
- Your changes in JSON configuration will be overridden when you next time update View from User Interface tab
- Your changes in JSON might be causing issue during platform upgrade
When you don’t see rules that you expect to see:
- Make sure that rule that you are looking for on User Interface tab is marked as relevant
- Data Object to be visible needs to be added to application
- Log into Dev Studio, navigate to data types, then show or hide existing data types.
- Data Model -> show hide existing data objects
- If you changed configuration of your field, it might not be picked up on User Interface tab. If logging in and logging out does not help, you will need to recreate field.
Associating View with Flow Action
When creating assignment from Case Designer Flow action and View gets created automatically. Additionally, if you want to create a new Flow Action that references a Constellation View, rather than a Section, you cannot, because the View setting is read-only in the Flow Action Rule form.
- Workaround described in following article: Aligning Views to Flow Actions through naming
Auto-saving of Views
System autosaves all changes made to Views automatically. That give the possibility to have a live preview of end UI but also following consequences:
- There is no possibility to cancel changes (use of branches is more than suggested)
- There is no back/revert button
- All changes are final
For each change system will keep history record
Previous versions of View configuration can be restored – the same way as for any other rule – from History tab on Rule Form
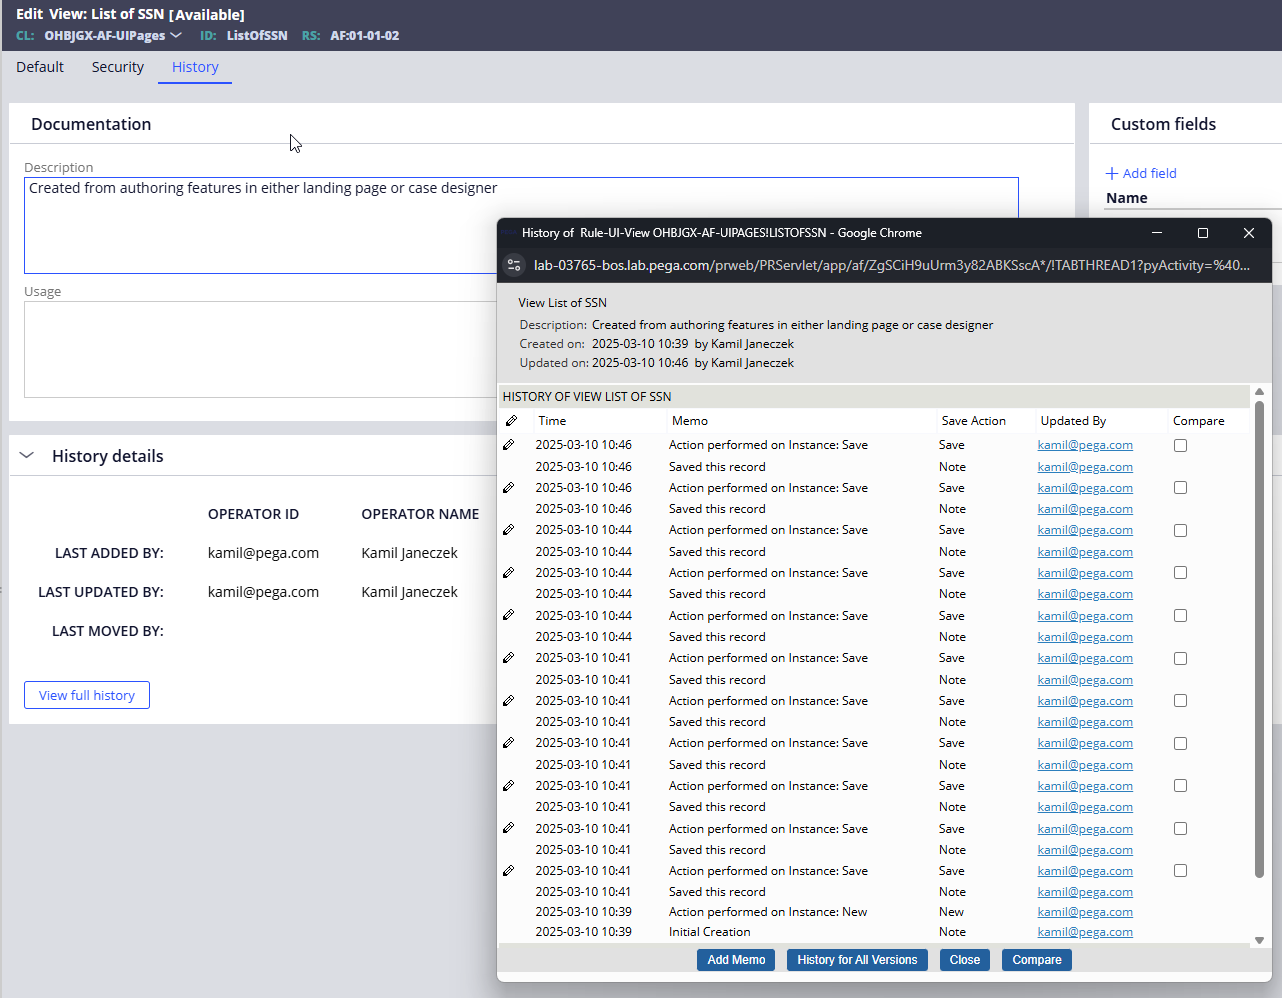
Figure 3 - Autosaving of Views
Defining a Collect Information Step
- When you need to define a Collect Information Step to collect data from the user, define the View from the Step directly. Selecting the Step, on the right you have the “Configure View” option. When you select that button, the System opens the View Editor where you can define the new UI. In this editor you can add fields and/or existing Views. You can also create new Field or View directly from here. In this configuration you can reuse existing fields or views. Creating the view here lets the System create needed flow actions.
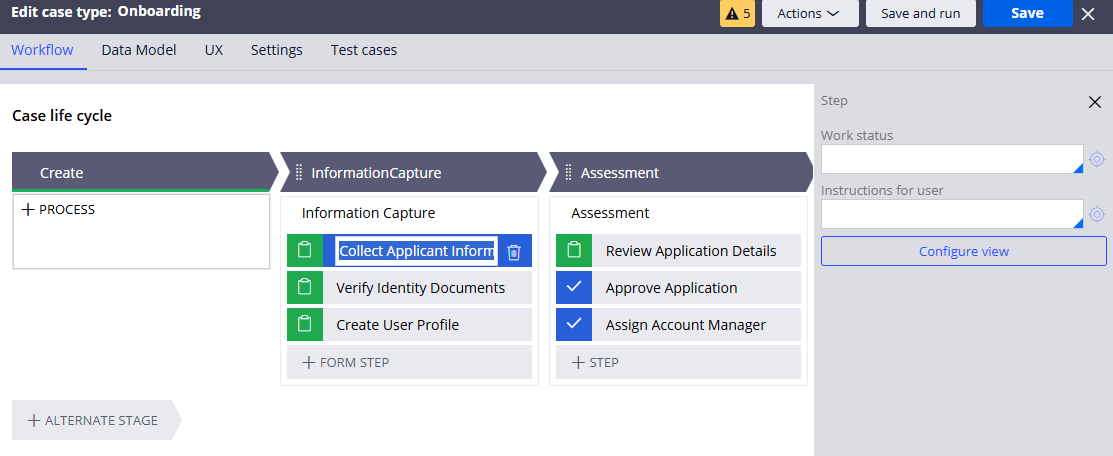
Figure 4- Configuring the View starting from the Workflow of the case is best approach to use to set up correctly the usage of the view in the Case life cycle
- For each Item (Case or Data Object) the System creates out of the box Views, most important are:
- Create: automatically generated when a Case Type or a Data Object is created, provides a dedicated space for users to input initial information. Supports draft saving functionality, allowing the user to save incomplete work and return later
- Edit: generated alongside the Create view, enables users to modify existing information after initial creation. Reusable across different contexts within the application
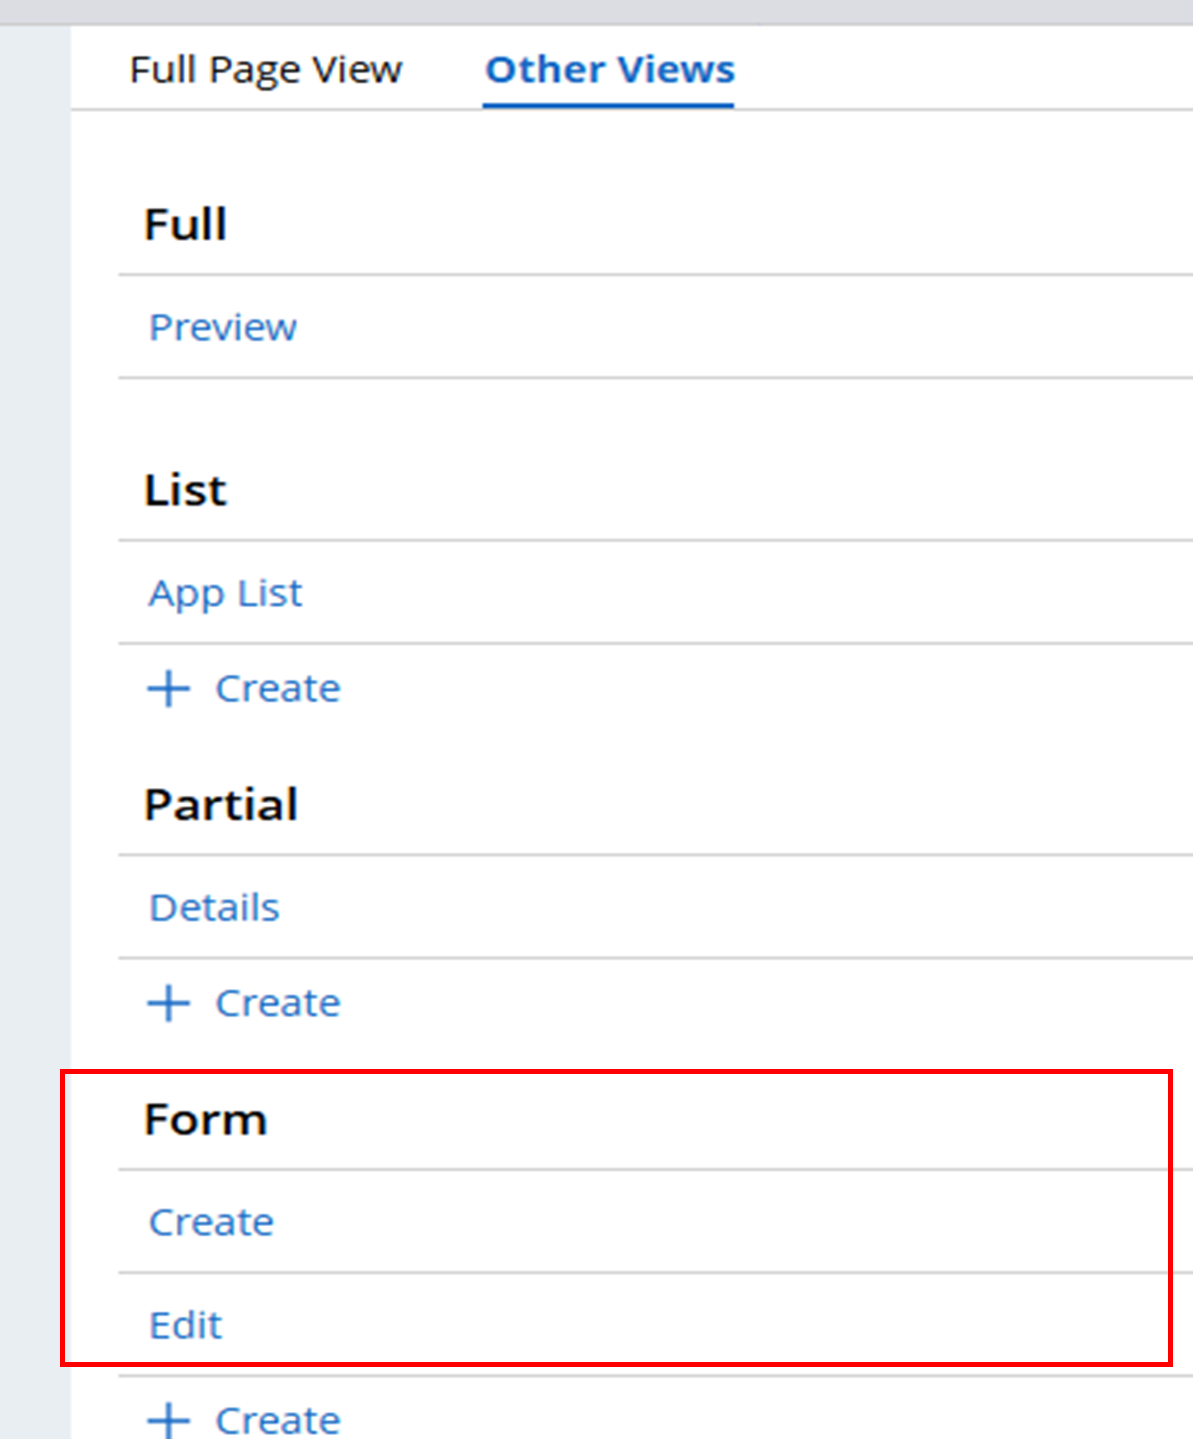
- Create and Edit Views are of Form type. The Form view is Editable. Partials are read-only.
Step 1: create a case, be sure the Create View contains primary fields (out of the box Label and Description, you can add or remove the needed fields)
Step 2: select “save and run”, you can see the Create view, it is editable and shows you the input needed, as per the example below
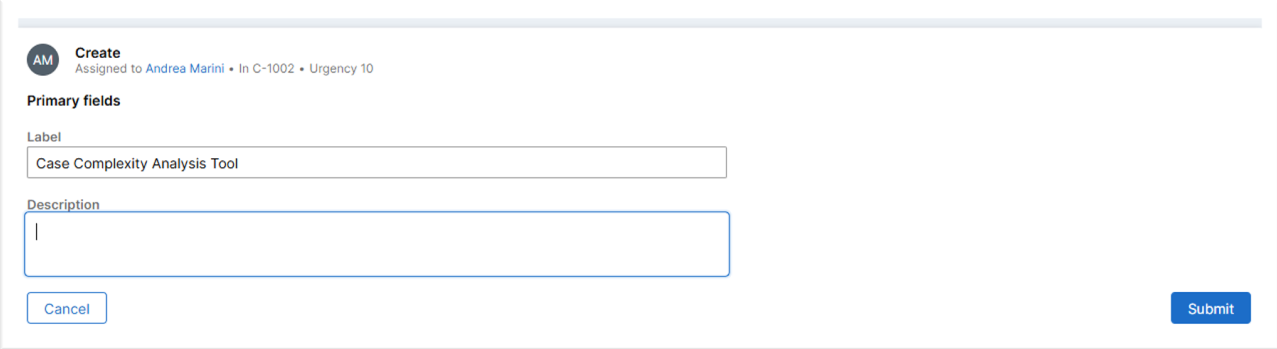
Figure 6 – In a Create view, the field are by default editable
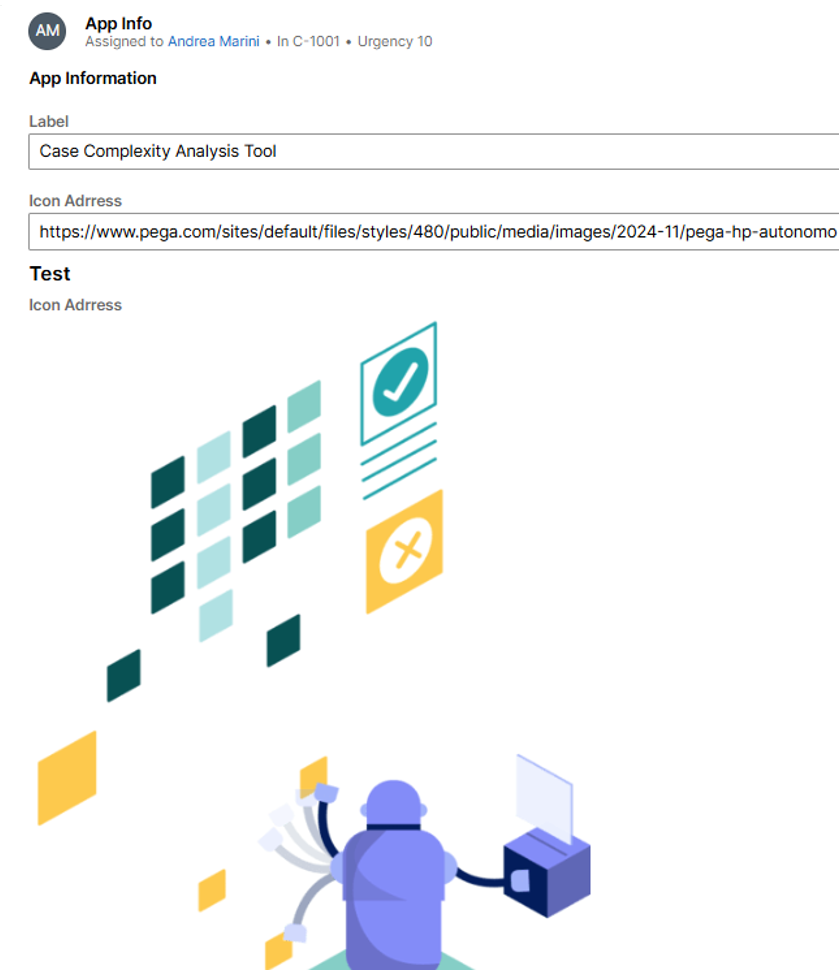
Step 3: Exit the preview and open the Details Partial View. Remove the Primary View and add the Create View. Run the case. In the Details part you can see the same View as per Case Creation step, but in read only mode: using a Form view in a Partial View set this as a read only view

Figure 7 - The same Create view, used in a Partial view, become read-only
- Add a Link to an image on a View. If you add to a view a field that is an icon/image, you must pay attention to the view type: the link to the image is presented as URL when the View is editable, or the same field is presented as an image if the view is read-only. You can see an example in the image below where the “Icon Address” field is on two different views (Form view the first one, Partial View the second one)
- View with fields that span on multiple columns, you must apply simple View configuration:
Step 1: create the view to store the field you want it spread throughout the View. For example, in the view below, we have one input text field using a one column template

Figure 9- Single column View
Step2: in a custom Form view, in this example a Collect Information, you can define a Default Template that uses three columns layout. Importing the view defined at step 1, you can see one column field and field in three columns on the same view.
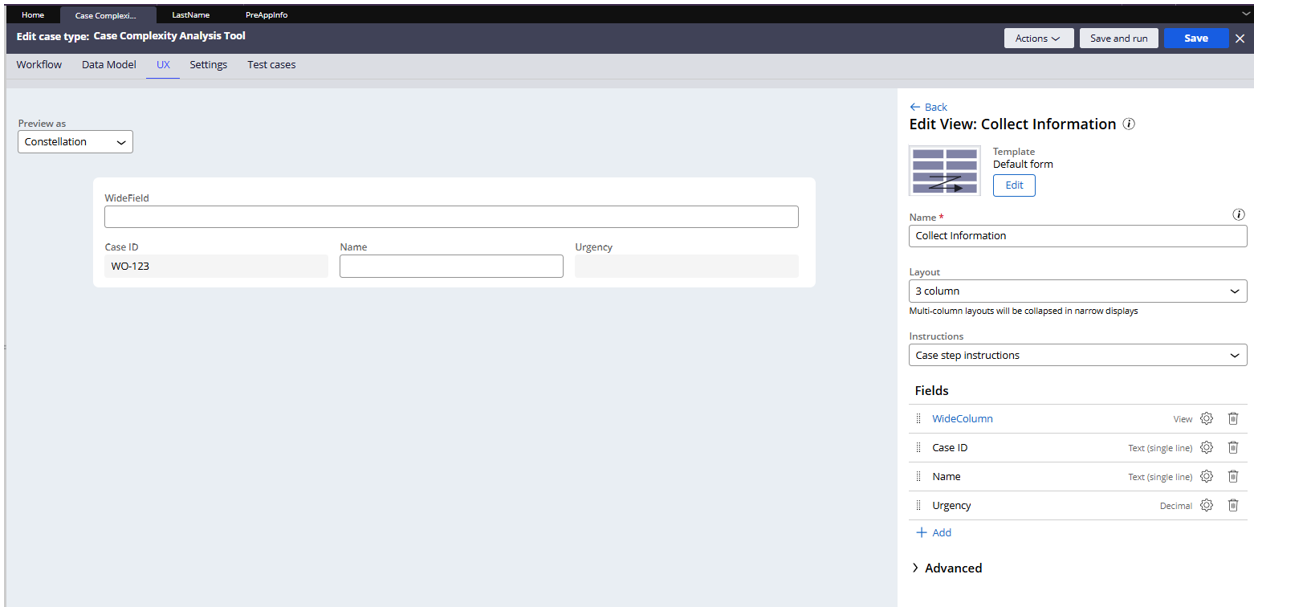
Figure 10- Using single column layout into a three-column layout, shows the field that occupying the whole three-column.
Pay attention: both templates are of the same type, what is different is the layout and setting! If you want your View override the behavior of the included Views, you can select the checkbox in the Advanced section: “Embedded Views inherit parent View's column layout.”
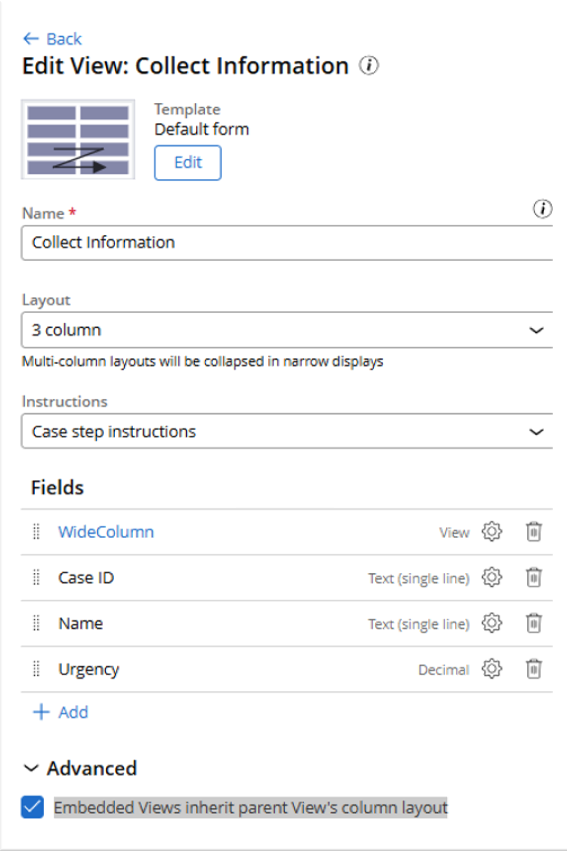
Figure 11- Selecting the “Embedded Views inherent parent View’s column layout”, changes the behavior
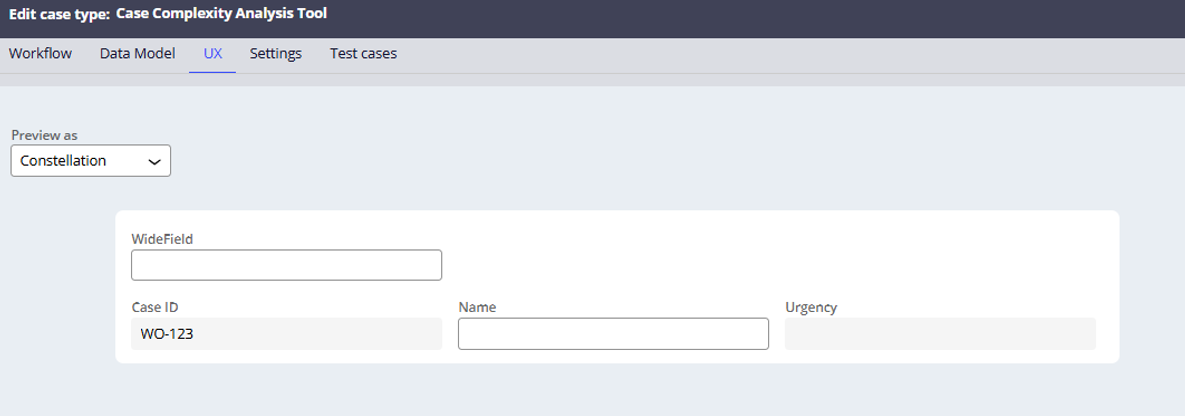
Figure 12- The result of the checkbox
Refresh a View: The simplest way is to refresh a View depending on a field value, using visibility conditions on View. In the image below for example, you have a View with a drop down, when you select a value, it shows the corresponding View.

Figure 13- Configuring a simple visibility condition on a field group
If you want to update the entire View you can use the corresponding Flow Action, setting up the refresh settings from the Dev Studio, as per the screenshot below where the Flow Action triggers the View refresh on “Name” changes, copying the value to the Last Name.
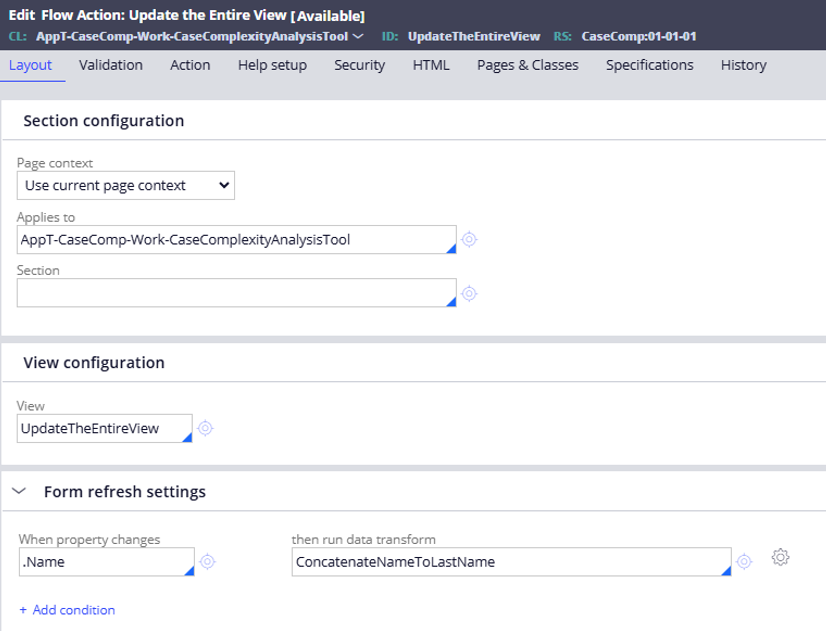
Figure 14- In the Flow Action, it refreshes the View based on the property set and the Data Transform configured.
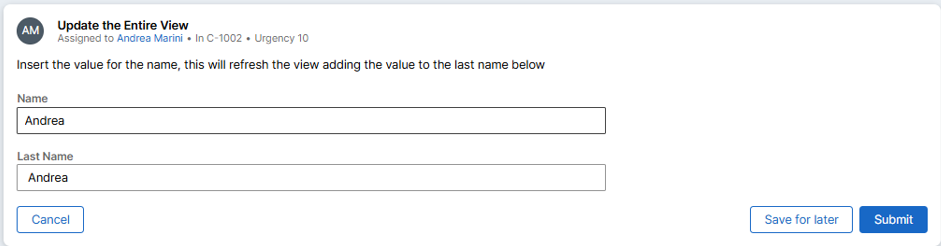
Figure 15- Typing the name value, as the change of the field is triggered, the View is refreshed, and the value of the Name is copied to the Last Name field.
Relevant Views and best practices
- Relevant records get inherited through the class hierarchy
- If a view is marked as relevant for a class, it also gets marked as relevant for the subclasses.
- This makes the view (and other rules as well) visible on the User Interface tab of case designer for the subclasses. This promotes reuse by exposing all inherited views to the user.
- The downside is that it could lead to a very cluttered list of views. Many of these inherited views may not be applicable/relevant to this case type and can cause confusion for the developers.
- The relevant records for views that are inherited but not customized should be marked inactive to avoid showing up.
- As of now, there is no indication to differentiate the views created/specialized for the case type vs views that are inherited.
- When creating assignment from Case Designer Flow action and View gets created automatically. Additionally, if you want to create a new Flow Action that references a Constellation View, rather than a Section, you cannot, because the View setting is read-only in the Flow Action Rule form.
Best practices
- Access to User Interface tab is possible from both App Studio and Dev Studio
- Suggested approach is to work in App Studio to take advantage from low-code capabilities
- Switching to Dev Studio only when it is needed to perform advanced configuration
- Keep in mind that your changes in Dev Studio shall be App Studio compliant
- When you use App Studio to create and configure Views, all the background work related to Rule creation and Class handling and Ruleset selection is done automatically. You can check that information hovering the “i” close to the View name, as depicted in the image below.
- As a best practice, build your Views from the lowest embedded level upwards. For example, when you want to reuse fields, the best practice is to embed those fields in a View created directly in the target Class. From the View maintenance perspective, embedding Views is preferable to embedding fields.
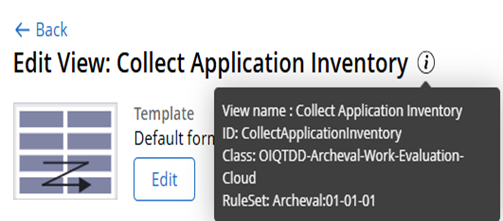
Figure 16 - Hovering the “i” close to the View name shows you: View name, View ID, Class where it is saved and Ruleset/Ruleset-Version.
Summary
Configuring views in Constellation represents a modern approach to creating intuitive user interfaces through a template-based system. Views serve as containers for UI components, including fields, widgets, and nested views, which can be organized using out-of-the-box layouts that align with common interface scenarios. The configuration process involves selecting from four primary view types (Full Page, Partial, List, and Confirmation), each serving specific purposes in displaying and collecting information relevant to case resolution. Design templates provide consistent structure across views by specifying regions for UI elements, while the configuration workspace offers real-time visual preview capabilities to assess the user experience.
References:
Constellation 101 Series
Enjoyed this article? See more similar articles in Constellation 101 series.