Discussion
TATA CONSULTANCY SERVICES
US
Last activity: 13 Nov 2019 9:31 EST
How to create a WS-Security Profile using Signature and Keystore JKS ? (Explained)
"Web Service Security Profile" plays a very critical role in securely exchanging the messages / data between your Pega Application and the Web Services that you are consuming in your application.
In this post, we will focus on the below ::
- How to create a WS-Security Profile ?
- How to create a Pega Keystore Instance ?
Note that, before you create a WS-Security Profile, make sure to have the
- Signature Key ready - like…
- X509 Certificate,
- its alias name,
- Signature Password,
- Signature Algorithm, etc.
- Keystore ready
- Keystore File,
- Keystore FileType,
- Keystore Password, etc
Steps to create a WS-Security Profile :
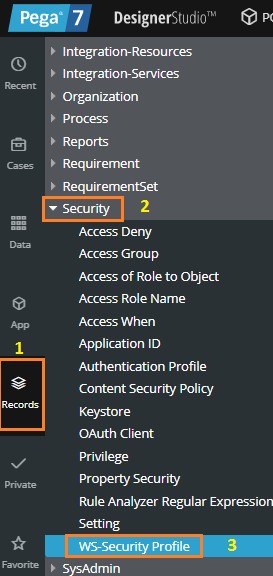
Click on “Records” Explorer >> Expand “Security” >> Double click on “WS-Security Profile”
Click on “Create” for creating a New Web Service Security Profile.

Give a Meaningful Name for the Security Profile. May be based on the usage of this Security Profile for different Services that your Pega Application is consuming, you can give the name accordingly.
<<Type of Services>>-<<WS-Security Profile>>
Examples:
- Datapower-WS-SecurityProfile
- JAVA-WS-SecurityProfile

For this example, I have given the WS-Security Profile Instance Name as “JAVA-WS-SecurityProfile”. Click on “Create and open” to create the WS-Security Profile Instance.

Create a WS-Security profile to securely exchange messages between your application and a web service for an Outbound or Inbound SOAP messages

In this example, we will focus on the Outbound SOAP Messages.
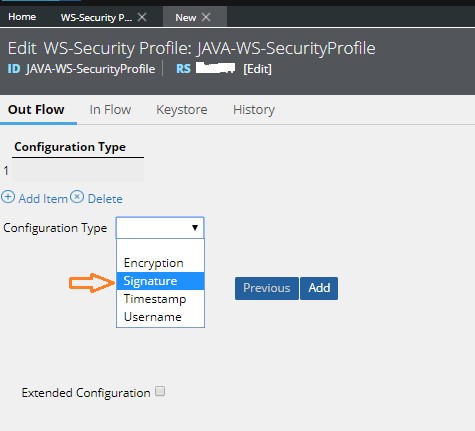
On the “Out Flow” tab, click the “Add Item”.

In the Configuration type list, select one of the following outbound SOAP message types.
- For this example, we will choose – “Signature” as a Configuration Type
- For detailed information regarding the other Configuration Types – please refer to the below Pega Help Topic :
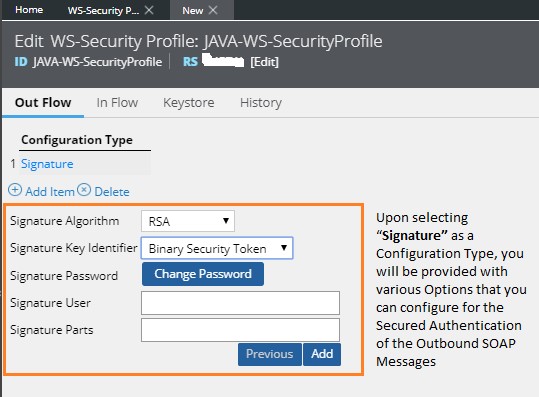
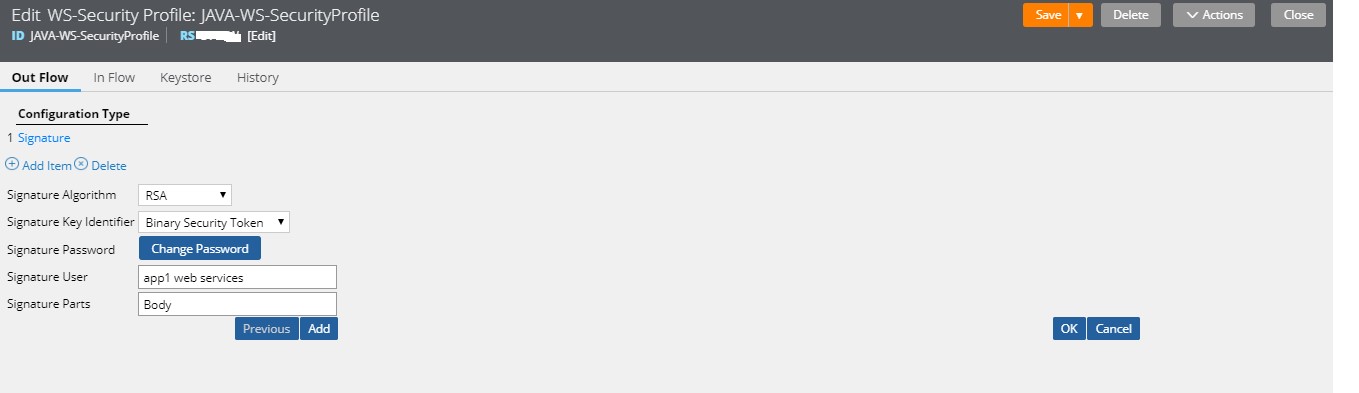
Upon selecting “Signature” as a Configuration Type, you will be provided with various Options that you can configure for the Secured Authentication of the Outbound SOAP Messages.
- In the Signature algorithm list, select the digital signature algorithm to use for encryption.
- In the Signature key identifier list, select the key identifier type to use to identify the signature token. As a best practice, select Issuer Name and Serial. When you select this option, only the user name and serial number of the certificate are sent in the message; the certificate is not sent in the security header.
- Click Change signature password to change or add a password that is associated with the signature.
- In the Signature user field, enter the name of the alias listed in the Keystore field on the Keystore tab in this rule form.
- In the Signature parts field, enter a semicolon-separated list of element names to sign. Element names must be in the format: {Element}{Namespace URI}ElementName. For example, to encrypt and/or digitally sign the WS-Security UsernameToken element, the value would look like this: {Element}{http://schemas.xmlsoap.org/ws/2002/07/secext}UsernameToken
By default,
- Signature Algorithm è RSA
- Signature Key Identifierè Binary Security Token
gets selected automatically.
You may choose the other values for those fields as per the Security Signature that you are planning to use.
Please note that, before you are creating WS-Security Profile, please make sure to have the Signature Key ready (like… X509 Certificate, etc).
You already have the Password of the Signature that you have created even before this WS-Security Profile.
Set that Password here. Click on “Change Password”.

After referencing the Password of your signature in the above step. Click on “OK”.
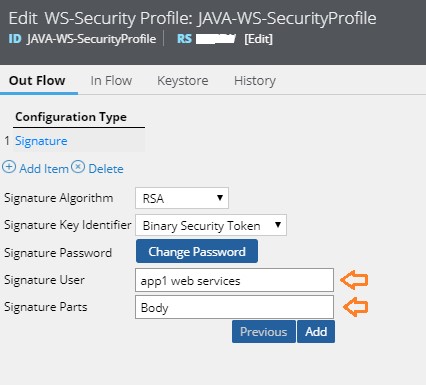
Specify the Signature User Name:
- Signature User Name is nothing but the “alias name” of the X509 Certificate that you have configured in the JKS/Keystore Tab.
Specify the Signature Parts:
- Specify the SOAP XML Parts that you want to Sign in.
- In our case, we will keep it as “Body” i.e Body of SOAP Service Request XML.
Now, click on Keystore Tab, reference the Keystore Instance that you have already created or you can create a one at this Point..
Key-In the New Keystore Name that you want to create by clicking on Magnifying glass icon.
Or if you already have Keystore Instance that you have already created.. press the down arrow & choose the right Keystore Instance from the Keystore Instances List that you have already created.

Steps to create Keystore Instance; incase if you haven’t created a one already.
Keystore record contains the File that has the Private/Public Key Pairs. Let’s create Keystore Instance.

Give the Keystore Name & Short Description
Click on “Create and open”
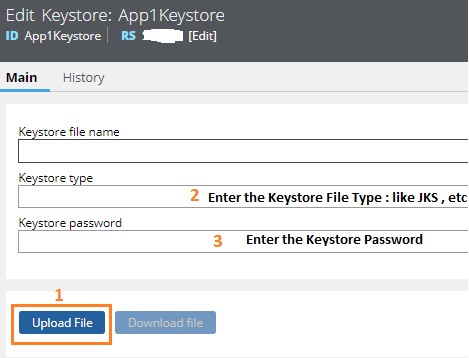
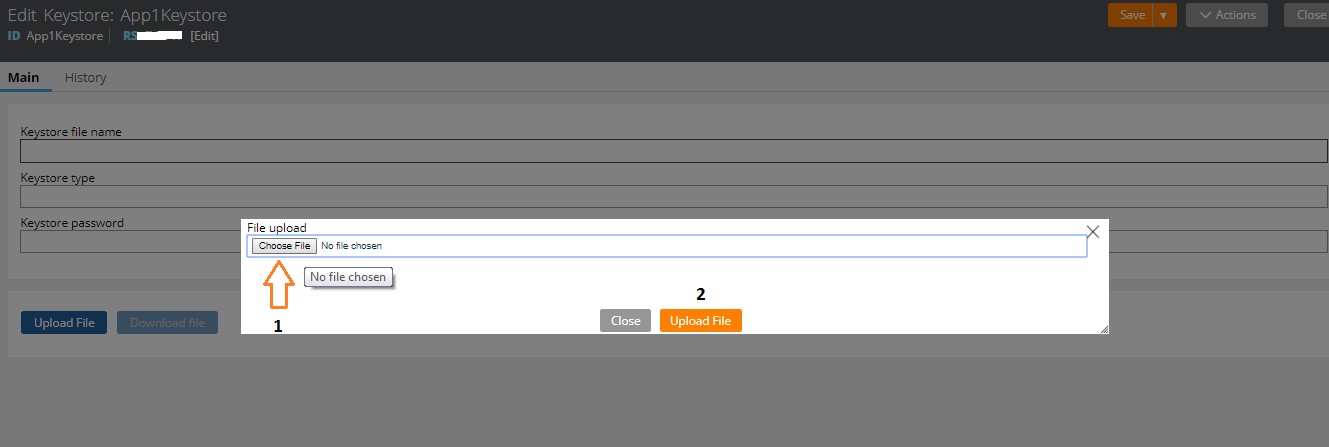
Click on “Choose File” (choose the file from the path where you have saved the Keystore File)
Once you have chosen the right file, Click on “Upload File”
After you upload the File, give the Keystore File Type:
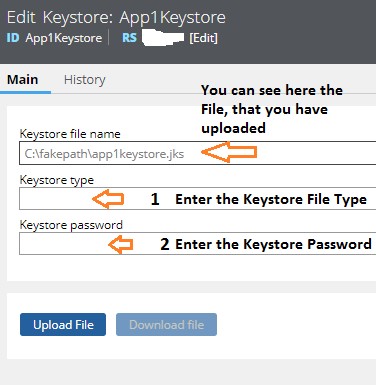
We can source a keystore from a data page, a URL, or an external file in one of the following standard formats: JKS, JWK, PKCS12, KEYTAB, or KEY.
In our example, we will specify Keystore Type as “JKS”. This JKS File contains the Private KEY .
Now, Key-IN the password of the Keystore that you have uploaded.
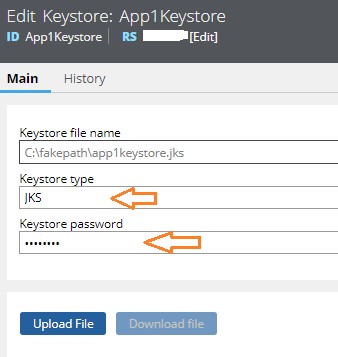
Click on “Save” Button.
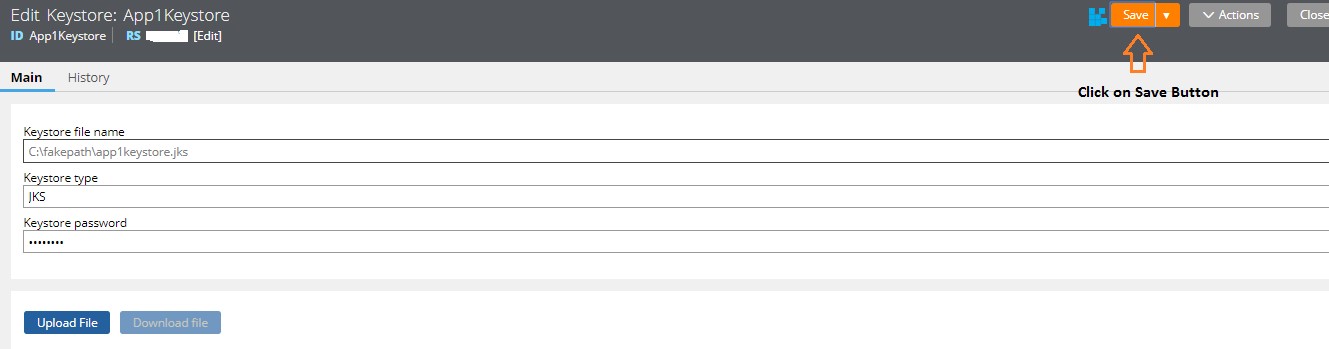
Keystore Instance :: App1Keystore Instance has been saved

We can use this in the WS-Security Profile & Save the WS-Security Profile Instance as well.

The WS-Security Profile Istance è “JAVA-WS-SecurityProfile” has been Saved now.
Finally, we can use this WS-Security Profile Instance in the SOAP Connector Rule that we want to Sign the Outgoing SOAP Messages with X509 Signature/Certificate for authentication.
Reference :
- Certificates are essential in exchanging the data between Client/Server. Here Client & Server can be of any two Applications / Components / Systems / Interfaces.
- In the current context, we had used the X509/MessageSigning Certificate for authenticating the Web Services.
- X509/MessageSigning Certificate typically have
- a Public Key (shared with the Web-Service Providers) ==> CLIENT
- a Private Key (resides at Pega Application side (in the form of Keystore Instance) that is consuming the WebServices) ==> SERVER
- In above, we have referred the Service Provider as Client & Pega Application as Server.
- When Pega Application sends a Web Service request to the Service Provider,
- the Service Provider responds back with the data
- this data is encrypted with the Public Key at ServiceProviders side before even sending it to the Pega Application.
- now, once the data is encrypted - it is sent to the Pega application
- Pega Application, uses the Private Key that is present in it's KeyStore instance & decrypts that data which was sent by the Service Provider.
- When Pega Application sends a Web Service request to the Service Provider,
- So, this is how the Public & Private Keys play their role & Encryption & Decryption happens respectively.
Evonsys
IN
DHL IT services
IN
Informative
Pegasystems Inc.
IN
Thank you for sharing this on our PSC!
Pegasystems Inc.
US
Great step by step walkthrough, with screenshots no less! Excellent!
TATA CONSULTANCY SERVICES
US
Appreciate your time in going through this Article & providing feedback ! ThankYou !!
Service Public De Wallonie
BE
Hi and thank you for the clear explanations.
Our use case is a bit more complex, since we want to have a single SOAP connector using different security profiles. To make it simple, we want to configure multiple Pega applications to use the same connector but with distinct X-509 certificates (each application has his own certificate).
There are currently no obvious ways to do it in Pega : each connector must have his own security profile defined at design time AND security profile signature user can't be set dynamically depending on the calling application...
Any thought will be welcome ;-)
Bernard
It's a very clear information.