Discussion
Accenture
Accenture
US
Accenture
Posted: Jan 11, 2019
Last activity: Feb 5, 2019
Last activity: 5 Feb 2019 13:15 EST
Creating Custom Dashboard Widget For Case Manager Portal
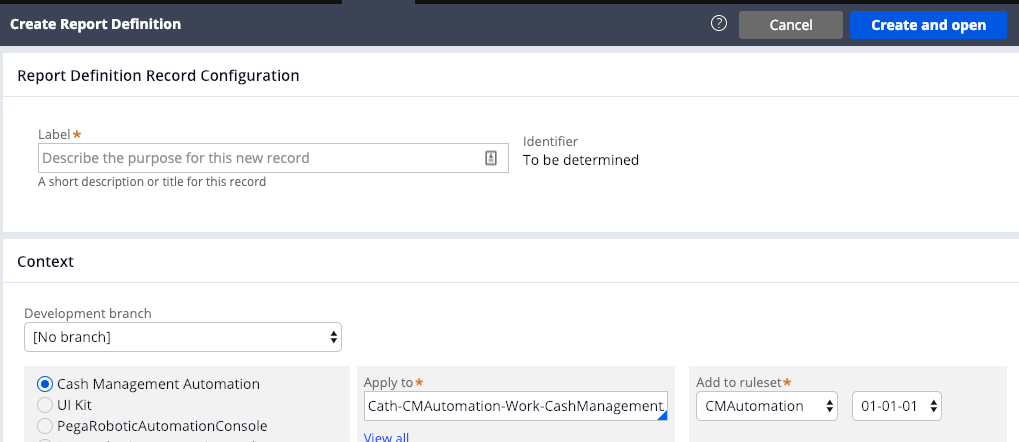
- Go to Designer Studio > App > Reports > Report Definition > Create.
- Add a name to the report definition and Create and Open the report.
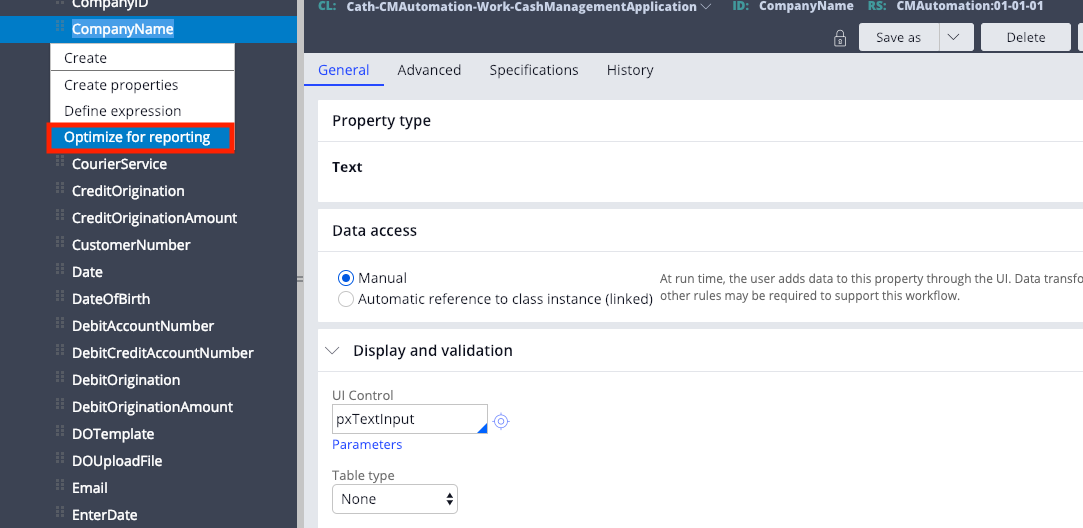
- Before adding to the report column, optimize each property for reporting.
- Under the column source, add the properties you want to display in the report definition.
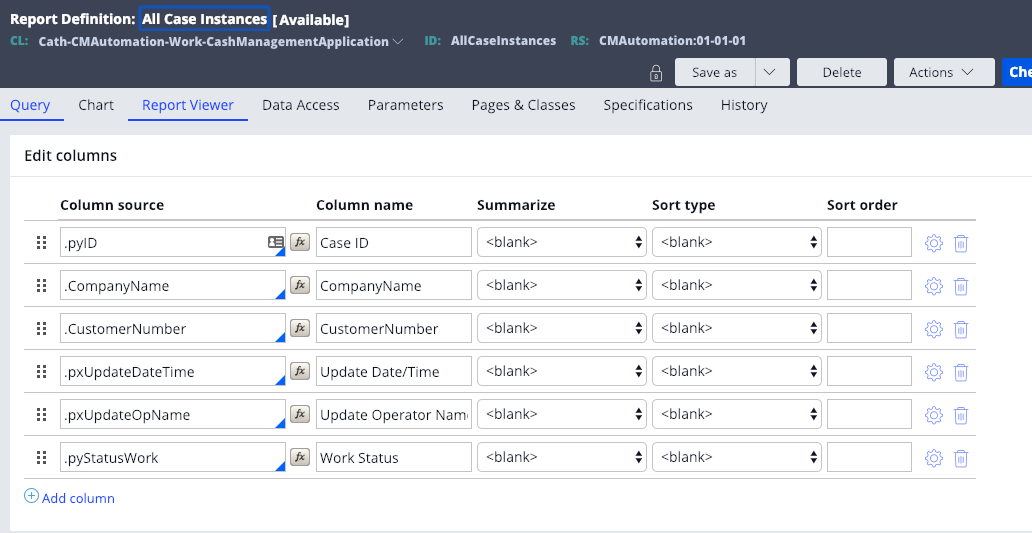
- Add any filters to the properties added if required: eg; pyStatusWork = “New”.
- Save and run the report definition.
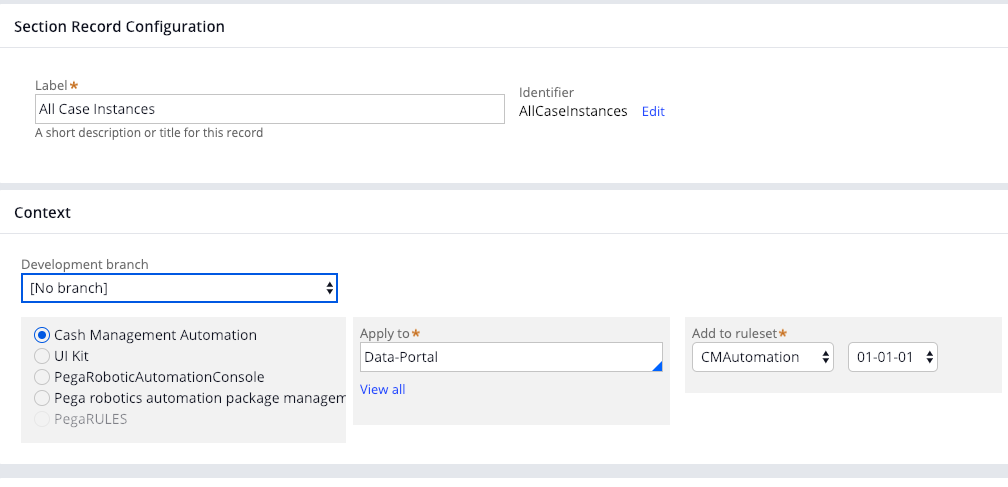
- Next go to Designer Studio > App > User Interface > Section > Create.
- Add a label to the section and save it under the Data-Portal class.
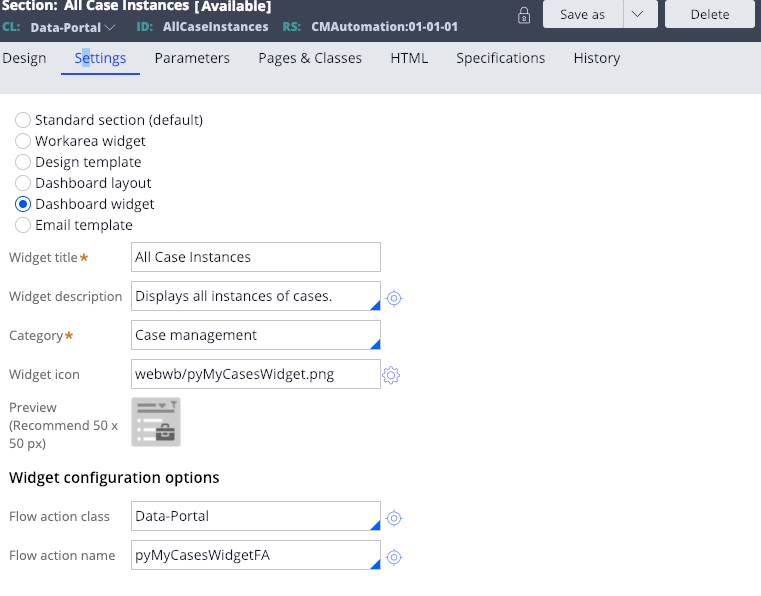
- Go to Section Settings and select dashboard widget.
- Add a widget title, a short description and an icon.
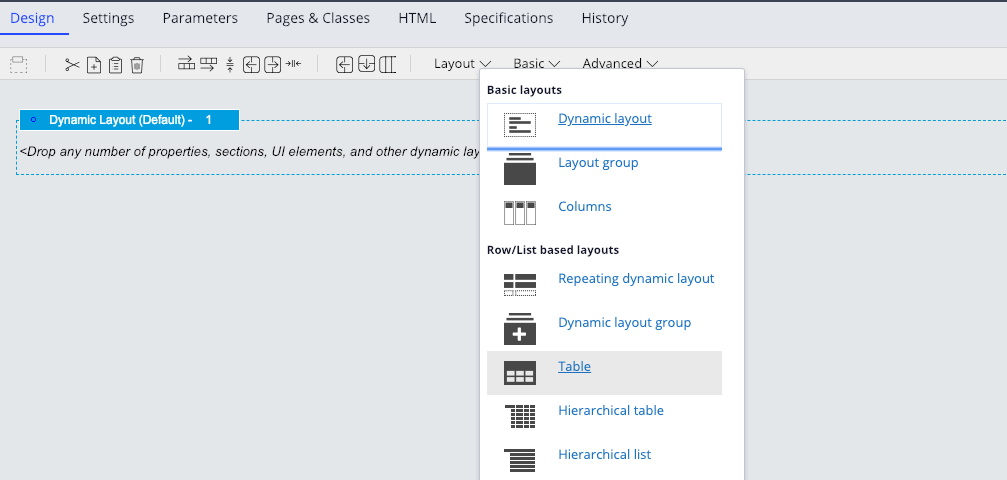
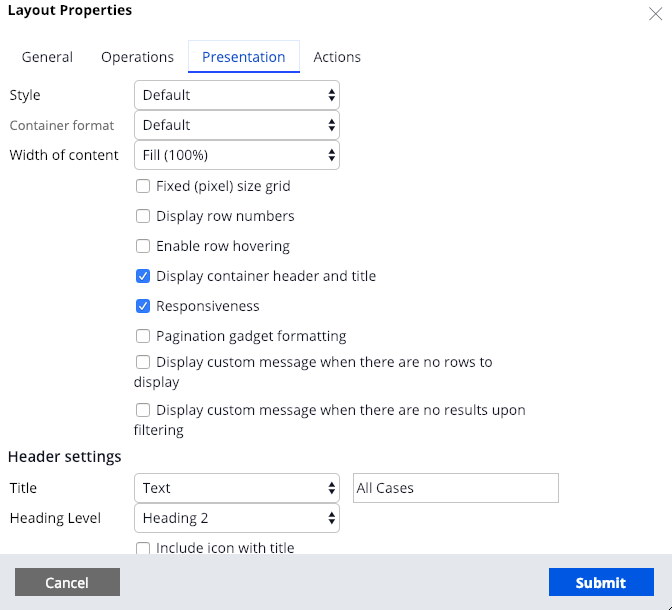
- Include a table to the dynamic layout and add a title to the table.
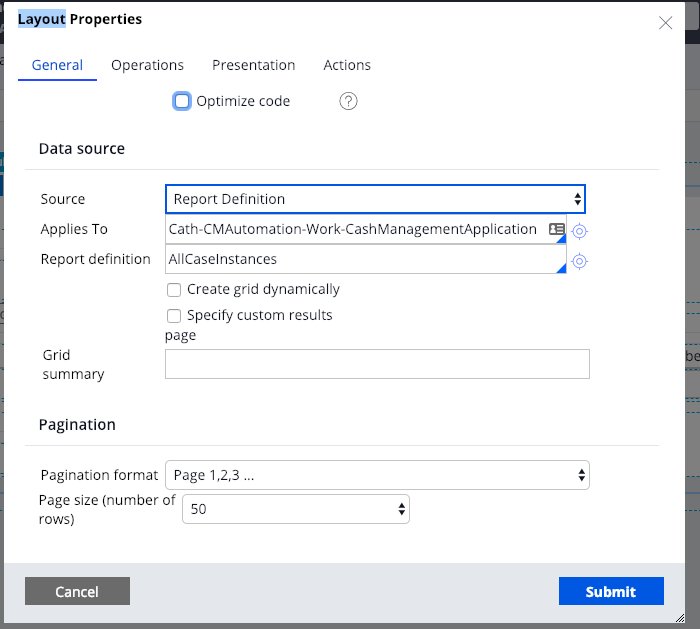
- Also, add the source of the table which in this case is the report definition. Mention the class of the report and its title.
- Include as many columns you would like to display on the report. In Each column add the property and its label.
- All the properties must be included in report definition before adding to the section columns.
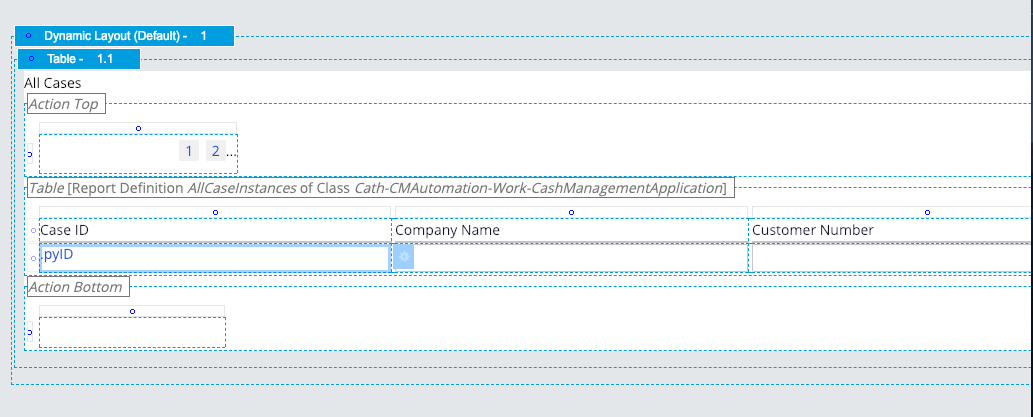
- Save and run the section.
- Launch Case Manager Portal and click the gear icon to personalize the dashboard.
- Click ‘Add widget(s)’ and the widget title that was created above should appear.
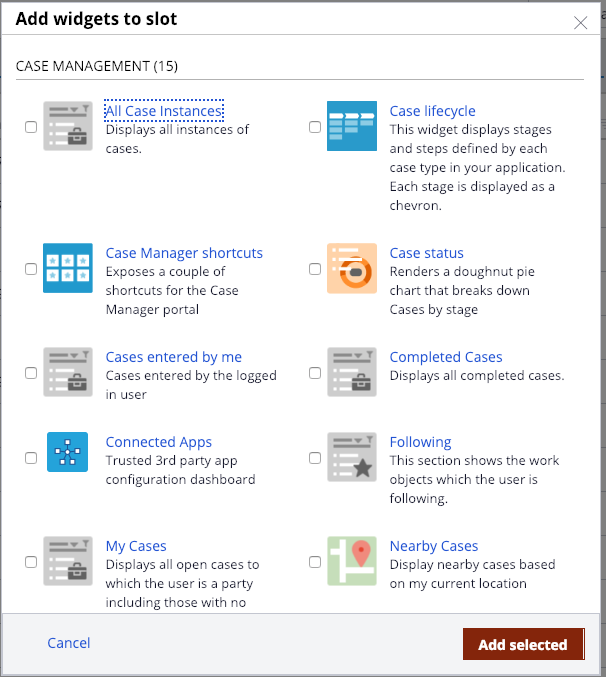
- Select that widget and click Publish.
- The widget with the Report column will display on the dashboard.

