Introduction
Welcome to this guide on how to prepare your Pega Case Type for ingestion by Pega Process Mining. This support document answers the following questions:
- How can I verify whether my Case Type and metadata are available to Pega Process Mining by using the Pega connector?
- How do I configure a Case Type for visibility in Pega Process Mining if it is not already there?
- How do I configure a field to make it visible in Pega Process Mining?
Background
Pega Process Mining can use the Pega connector to pull data from the Constellation DX APIs in Pega Platform. To make this work, each Case Type needs a "queryable data page" for Pega Process Mining to identify Case Types and retrieve Case data. Case Types created in Pega 8.1.x or later would have this configuration automatically, but watch out: if your Case is from a version earlier than 8.1.x, then it might not have this configuration.
The Pega Connector for Pega Process Mining calls the following APIs to retrieve available Case Types, metadata, and Case instance data:
- /api/application/v2/data_objects?type=case
- /api/application/v2/data_views/{dataPageId}/metadata
- /api/application/v2/data_views/{dataPageId}
- /api/application/v2/data_views/D_pyWorkHistoryList
What you will (and won’t) need
You need the following to prepare your Pega Case Type for ingestion by Pega Process Mining:
- Access to Pega Dev Studio
- The ability to enable API access
These methods do NOT require access to a Pega Process Mining environment.
How can I check if my Case Type and metadata are available to Pega Process Mining through the Pega connector?
Before making changes to Case Types, Pega recommends checking to see what is currently set up and ready to be exposed to Pega Process Mining. This section breaks down the steps to do just that. (You can also use this section to verify if your work on configuring a Case Type was successful.)
If you have not already, you must first enable API access to your source Pega environment:
- In the header of Dev Studio, click > > .
- Complete required fields, including the operator context Operator ID or Access Group.
- Click to save a text file with client credentials.
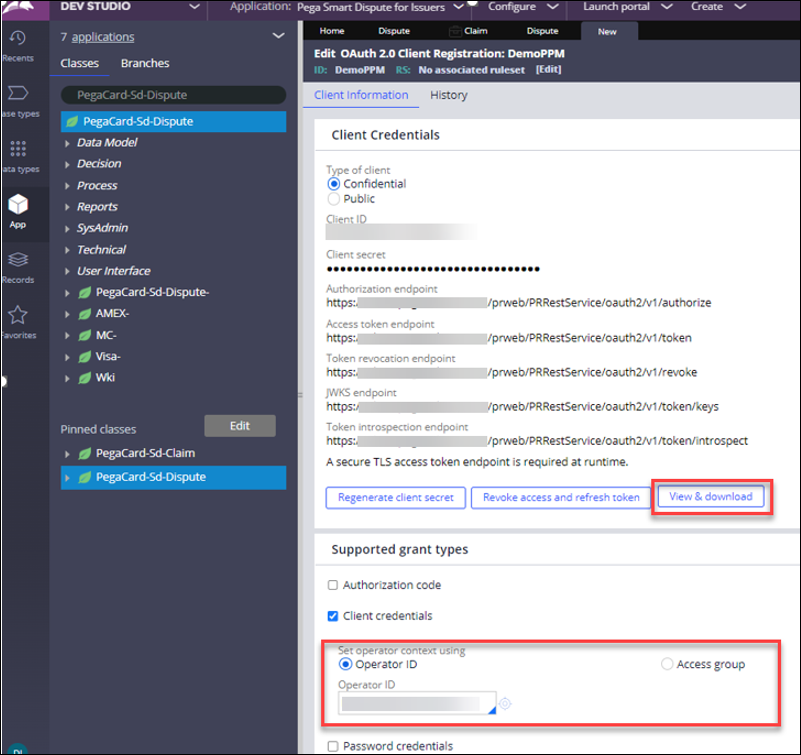
Next, manually call the APIs to determine what Case Types are visible to Process Mining:
- In the header of Dev Studio, click > .
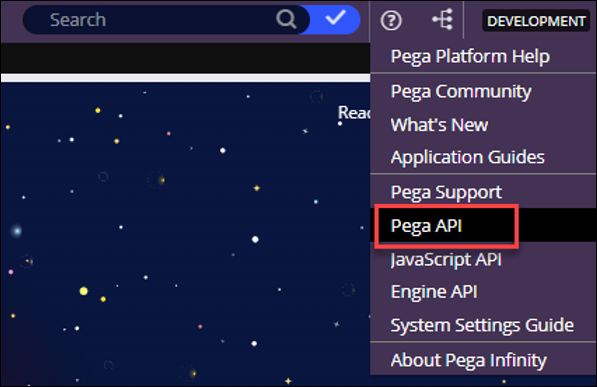
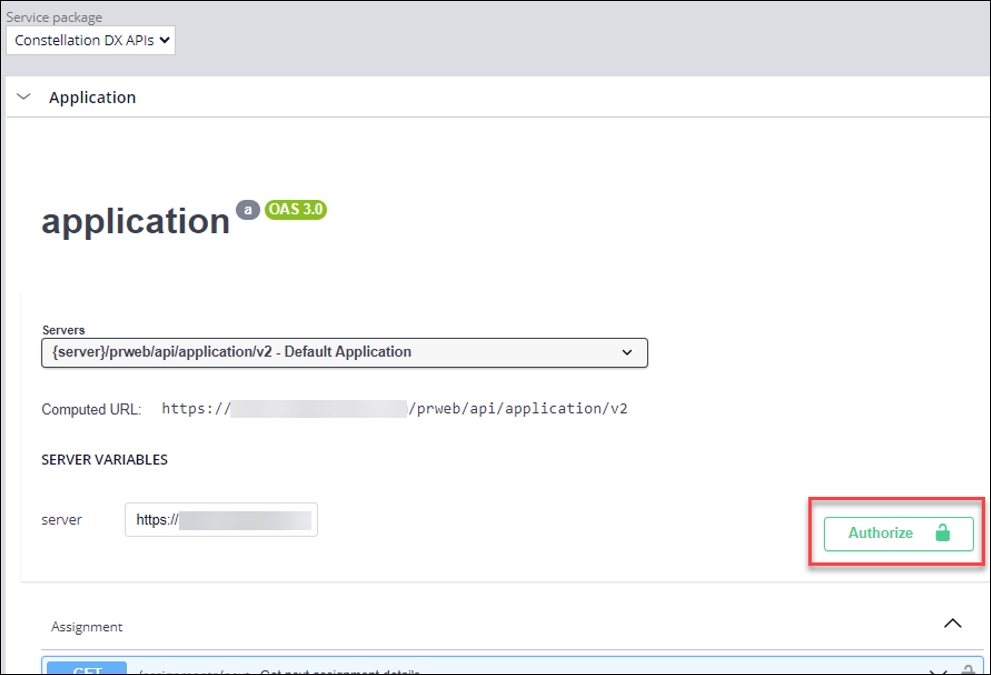
- Authorize using the client credentials that you downloaded previously:
a. In the Application section, click Authorize.
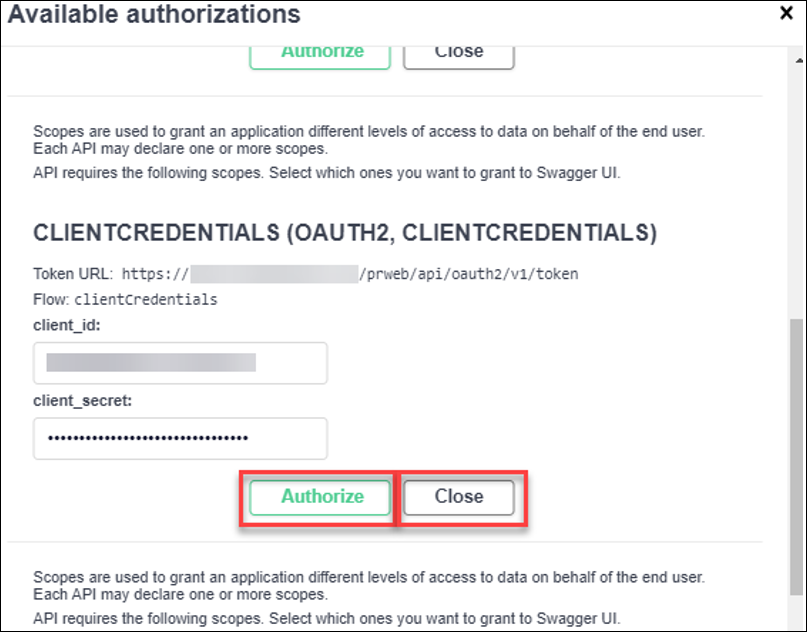
b. In the CLIENTCREDENTIALS section, complete the client_id and client_secret fields.
c. Click Authorize.
d. Click Close.
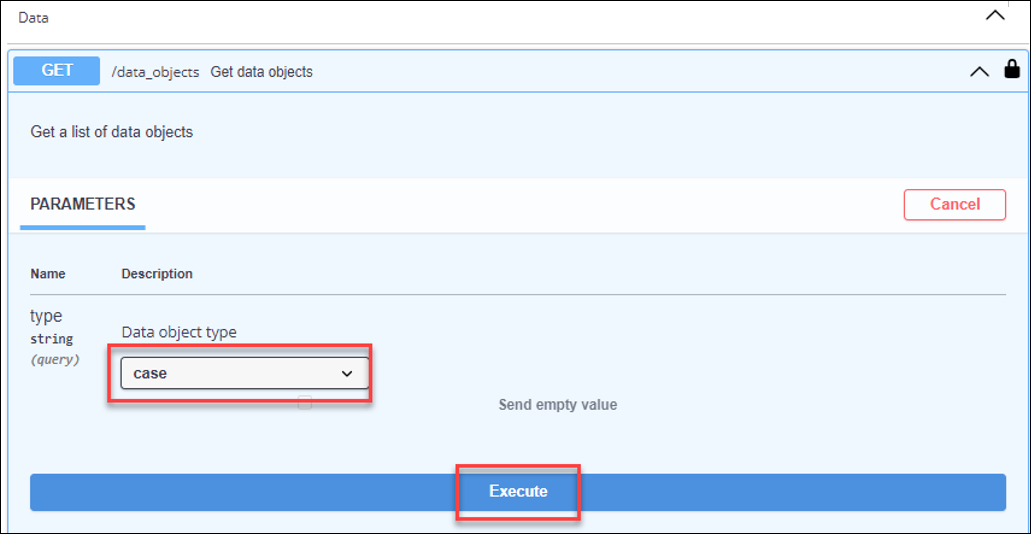
Next, run the API for /data_objects?type=case:
- Click Try it out.
- In the Data object type drop-down list, select case.
- Click Execute.
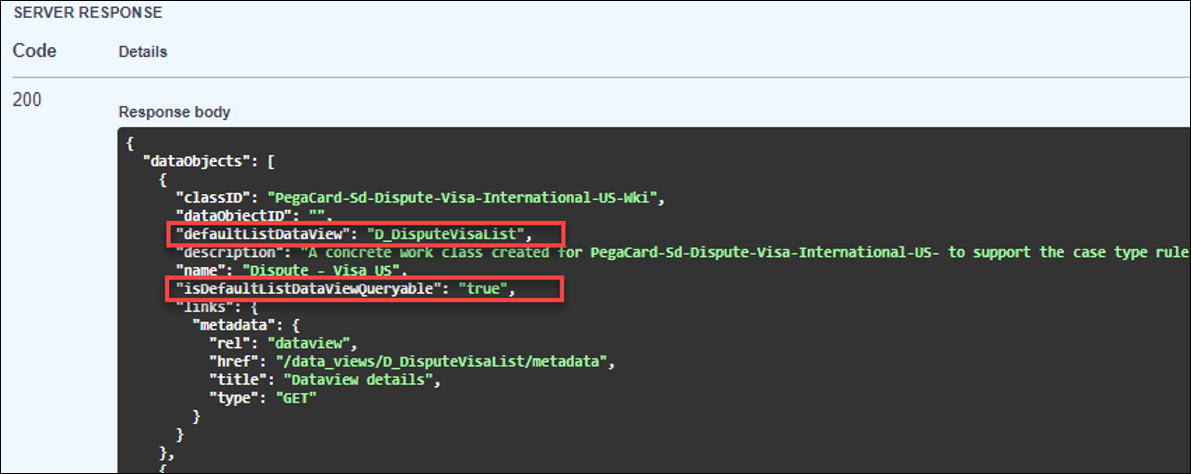
- In the results, view the Class ID and description fields in the API response to see which Case Types will be visible from Pega Process Mining.
- Verify that the Case Type has a defaultListDataView and that isDefaultListDatViewQueryable is set to true.
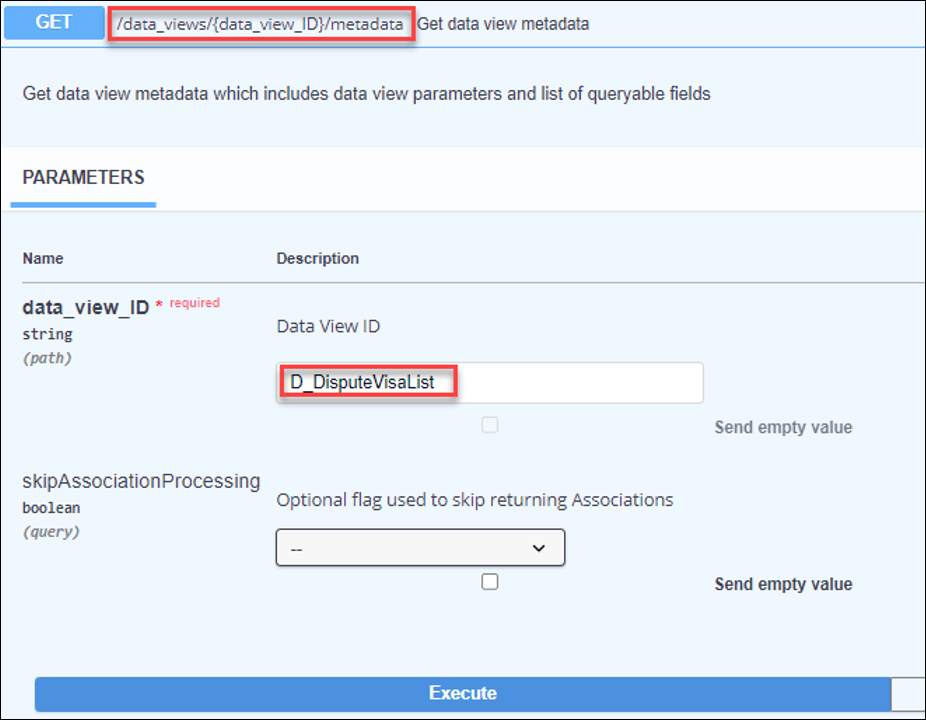
If you want to check what metadata is available for each Case Type, you can do that, too:
- Run the API /data_views/{dataPageId}/metadata with the data page identified above.
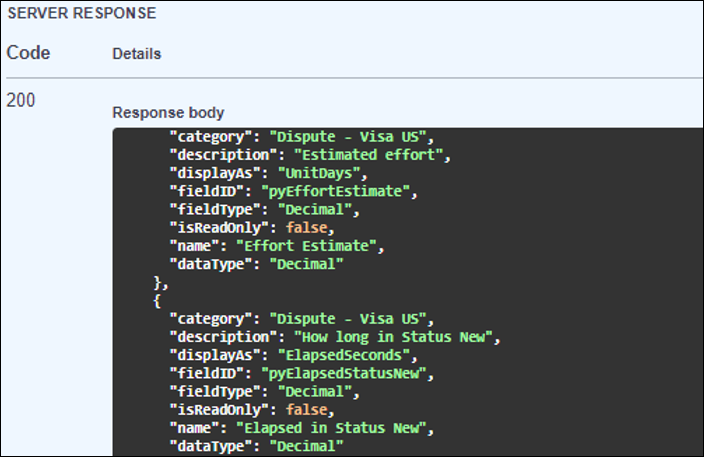
The API response lists the available metadata that can be pulled into Process Mining:
How do I configure a Case Type for visibility in Pega Process Mining if it is not already there?
What if you have completed the previous steps, but you do not see the Case Type you are interested in? No problem! The following steps take you through how to create a queryable data page and make that Case Type visible in the Process Mining Pega Connector.
The first thing that the Case needs is a new Report Definition:
- In the header of Dev Studio, click Create > > .
- Ensure that the Apply to class matches the desired Case type.
- In the tab, in the Column source field, select .pyID.
Note: The columns will be set dynamically at runtime by the DX API.
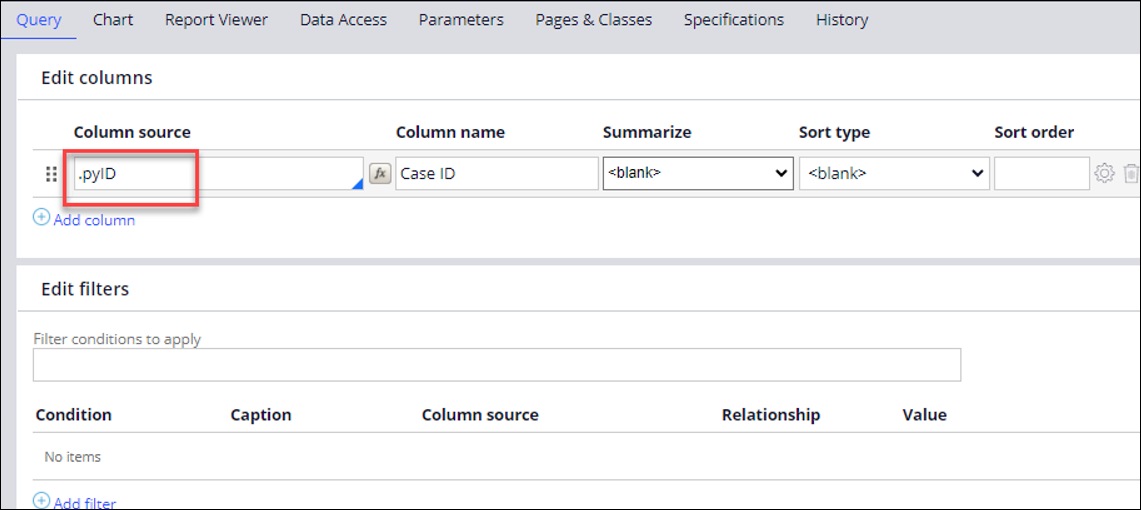
- Ensure that any values in the Filter conditions to apply field match your needs. For example, if you do not want any filters, make sure that this field is empty.
- In the Data Access tab, make sure the retrieval preference is set to Use the database.
Now, create a new queryable Data Page backed by the Report Definition that you just made:
- In the header of Dev Studio, click Create > > Data Page.
- Set or verify the following configuration settings:
Structure: List
Mode: Read-Only
Scope: Thread
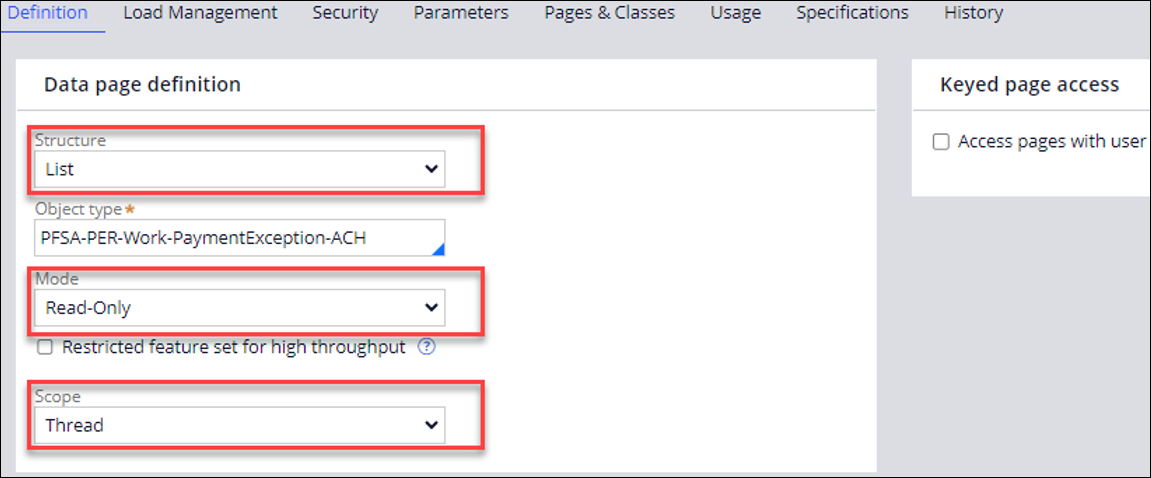
Data Source: Report definition, as created above

Allow querying any column (Pega connection only): Selected

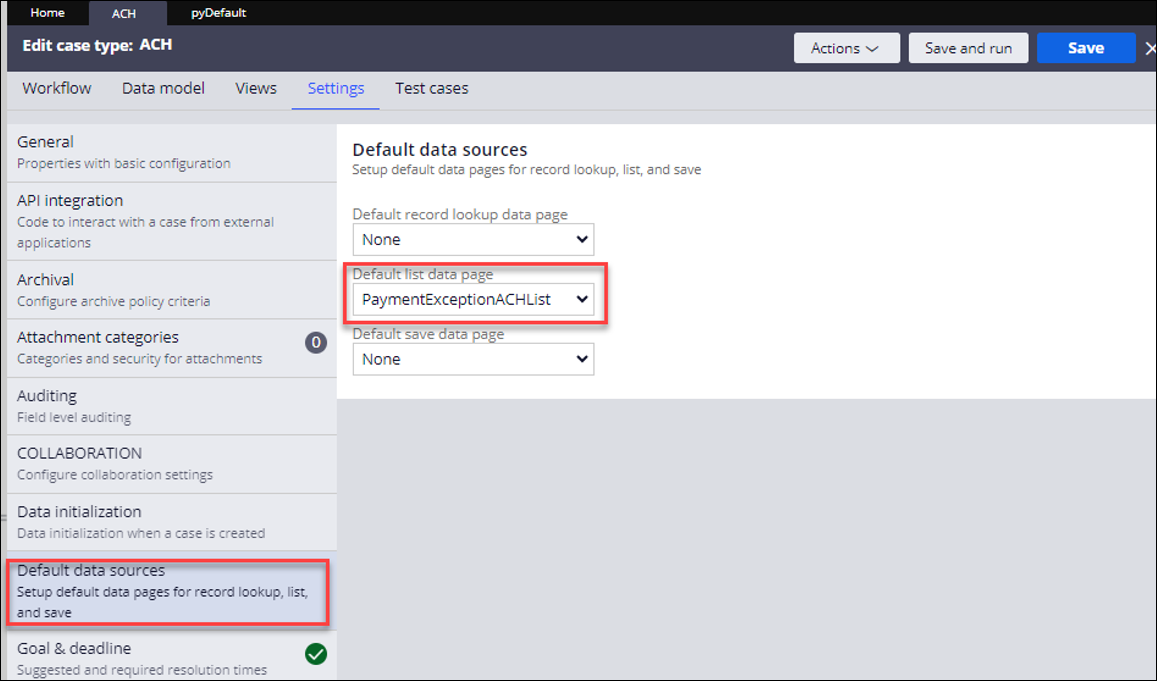
Update the default data source of the Case Type to use this queryable data page:
- In the header of Dev Studio, click Case Type > > Default data sources.
And finally, what if you have completed all steps, but now you cannot see the field you want to use as a filter for your Pega Process Mining analysis?
This last section takes care of just that!
First, make sure that the field you want is tagged as a relevant record:
- In the header of Dev Studio, click Configure > Application > Inventory > Relevant Records.
- In the Class Name field, enter the class of the Case Type you want to analyze.
Note: By default, the system only shows active relevant records for the selected class.
- Apply filter on Type to filter by Property rules for this class.
- To display all inherited relevant records, select the Show inherited relevant records for the class checkbox.
- To display all the inactive records for the specified class, select the Show inactive relevant records for the class checkbox.
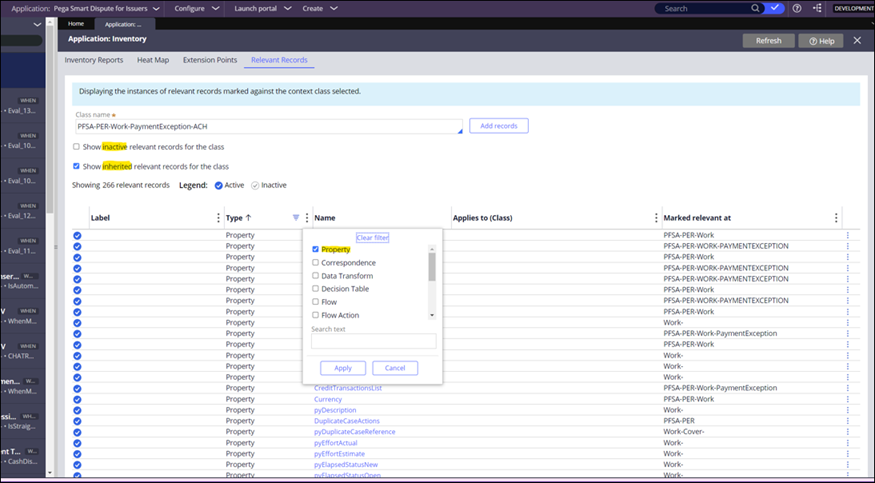
- Find the record you are interested in, and if it is inactive, click the Actions icon and then select Mark active for current class.
- If the record is missing, then click the Add records button and add the property as a relevant record.
Next, optimize the field for reporting:
- Using the Application Explorer, enter the class for the property you want to optimize and then expand the Data Model node and the Property list.
- Right-click the property name of the field you want to analyze in Process Mining and click Optimize for reporting.
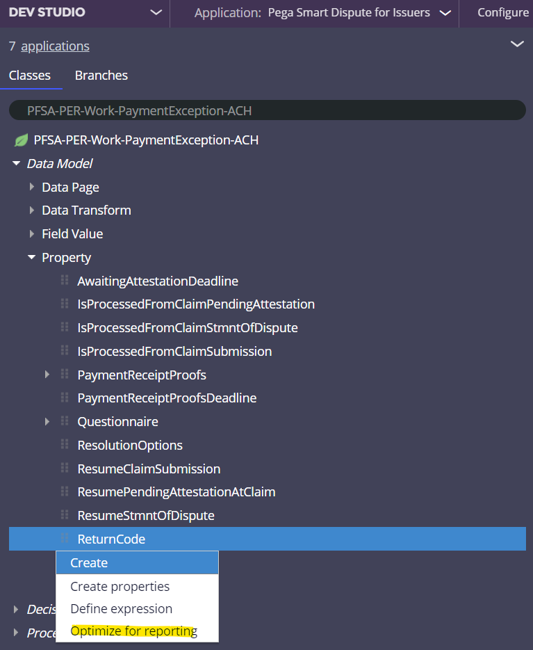
- Select the tables in which you want to create a dedicated database column for this property. You must select at least one table.
- If the property is embedded, specify the RuleSet and Version to contain the new Index- class, the properties in that class, and the Declare Index rule.
- Select whether to optimize the property now or later. If you select later, click the calendar icon to select a date within seven days of the current date to optimize the property.
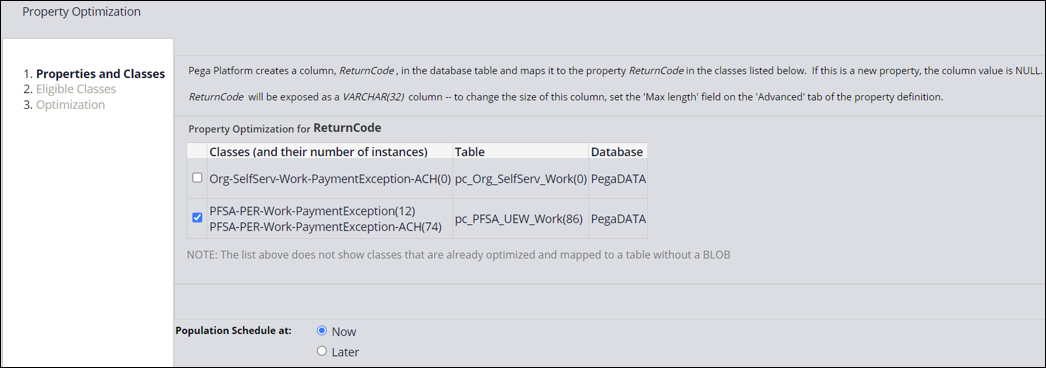
- Click Next.
- Review the tables to which the property column will be added and the classes that will be mapped to each table.
- Click Next.
- Click Finish.
And you are done! You’re now ready to pull your Case Type data into Process Mining for analysis!
