

This article guides you through configuring a custom CCaaS adapter for Pega Call built with Constellation '24.2.1 and onwards. Performing these steps implements a custom CCaaS link in your application.
You can create a custom CCaaS adapter in any code editor program. The instructions assume you use a Visual Studio Code application for presentation purposes.
- Create a custom CCaaS adapter:
-
In the navigation pane of the Visual Studio Code application, select Terminal > New Terminal.
-
On the Terminal tab, enter
npm i @pega/custom-dx-components. -
Enter
npx @pega/custom-dx components initto generate the project structure. -
Enter the details of your project:
-
For the Project name, enter
cd <folder name of the project>. -
For the Organization name, enter your organization name.
Result: The system created a project structure, as shown in the following example: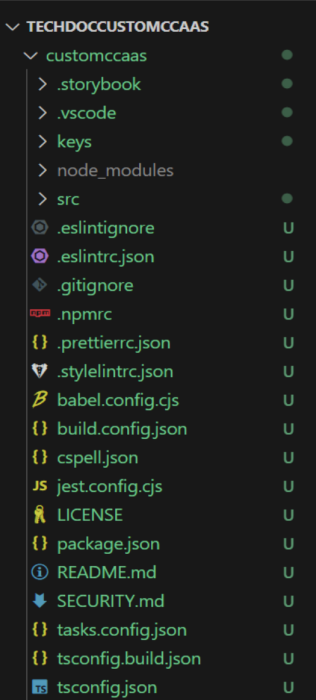
-
-
Modify the task.config.json file:
-
Open the task.config.json file.
-
Find and set the libraryModelCL to false.
-
-
Enter the following command:
cd <folder name of the project>. -
Enter
npm run createto create a sample component under src/component. -
Specify the details for the sample component:
-
For the Enter type of component, select Field.
-
For the Enter subtype of component, select Text.
-
For the Enter component name, enter the name of the CTI link.
-
For the Enter component label for display, enter the label of the CTI link.
-
For the Enter component version, enter the version of the CTI link.
-
For the Please enter the application names to be supported, click enter.
-
For Enter description for the component, enter a description of the CTI link.
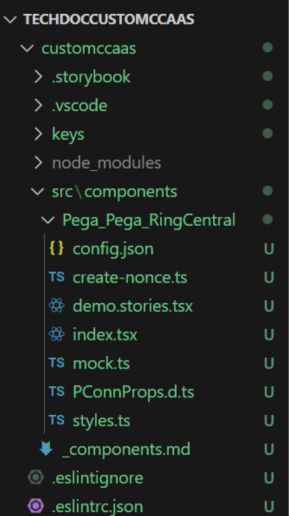
Result: The system generates the component structure under src/component, as shown in the following example:
-
-
Keep the config.json and index.tsx files inside the folder. The rest of the files can be deleted or ignored.
-
Create a new typescript file with your link name.
-
In the <CTI link name>.ts file, create a class structure with business logic.
You can base your business logic based on the CcaasCustomDX_V2.txt file that you can find in the following article: OpenCTICustomDX text file.
Check the comments in the skeleton and do not modify the code between the//Start - Do not remove or change below codeand//End - Do not remove or change above codementions.
You can add new properties and fuctions, but do not modify existing function definitions or declarations to prevent UI and custom adapter connection issues.
Always modify the event object in the skeleton to provide exact values when assigning.
For example:
const event = {
pyCallId:'call id',
pyMedia:'chat or call',
cxChannelSrc: evaluatedChannelSrc,
pyEventName: 'Offering',
pyQueue: 'queue name',
pyCallType: 'call type',
pyCCSource: 'Vendor Name',
pyANI: 'ANI',
pyOtherDN: 'otherDN',
pySiteId: '',
pyOldCallId: 'call id',
UserData
}; -
In this snipet, provide the exact value for pyCallId, pyMedia, pyQueue, pyCallType, pyCCSource, pyANI, pyOtherDN, pySitedId, pyOldCallId, User Data as recevied from the vendor. Do not pass null or constant values.
-
Create a new file typescript file called <CTI link name>.type.ts for adding types used in the RingCentral.ts file.
-
Rename the index.tsx file to index.ts.
-
In the index.ts file, remove all contents.
-
Add the following line of code:
export { default } from './<folder name of the project>';. -
Modify the config.json file as per your business requirements.
-
Resolve all lint and prettier issues.
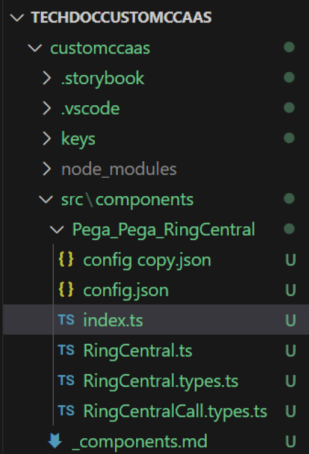
The following figure shows an example of the final structure for a Ring Central custom CTI link:
-
Build a component to validate errors:
-
In the Visual Studio Code application, on the tab, enter
npm run buildComponent. -
Select the component for building.
-
For Select component to build, select <folder name of the project>.
-
For Generate development build, select Yes.
-
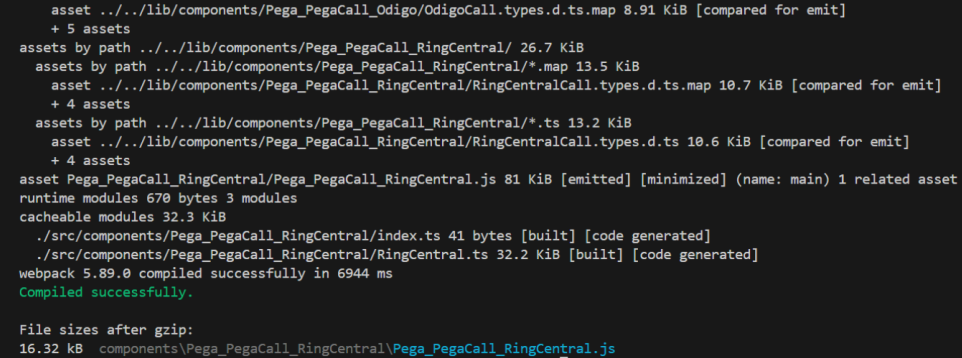
If the build is successful, the system generates the bundle as in the following example:
Authenticate the CCaaS component to publish the custom CTI link that you created in your application:
-
In the Visual Studio Code application, on the Terminal tab, enter
npm run authenticate. -
For the Pega server URL, enter your application's Pega server URL. For the authentication service alias, enter
pega. -
On the Pega authentication window, log in with your credentials.
If the authentication is successful, the system generates the following message on the Pega authentication window:
Publish the component to Pega server:
-
In the Visual Studio Code application, on the Terminal tab, enter
npm run publish. -
For the Enter component to publish, select the <CTI link folder name> folder.
-
For the Enter ruleset name, select an open ruleset of your application to which you want to publish the new CTI link.
-
For the Enter ruleset version, select the ruleset version of your application to which you want to publish the new CTI link.
-
For Generate development build, select Yes.