Build REST Connector and Display Values in Pega Case
By: Nia Christian
Date: 12/3/18
- Find an API service. Ex. “Open Weather Map”: https://openweathermap.org/api and generate an api key
- Test that your api key works with a query, i.e. http://api.openweathermap.org/data/2.5/weather?q=Washington,US&appid=your app id here
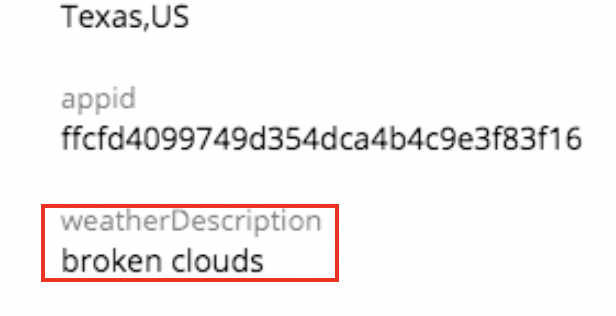
- Your query should return a result similar to the one pictured below:
 4. Next open your Pega Platform and go to Designer Studio -> Integration -> Connectors -> Create REST Integration
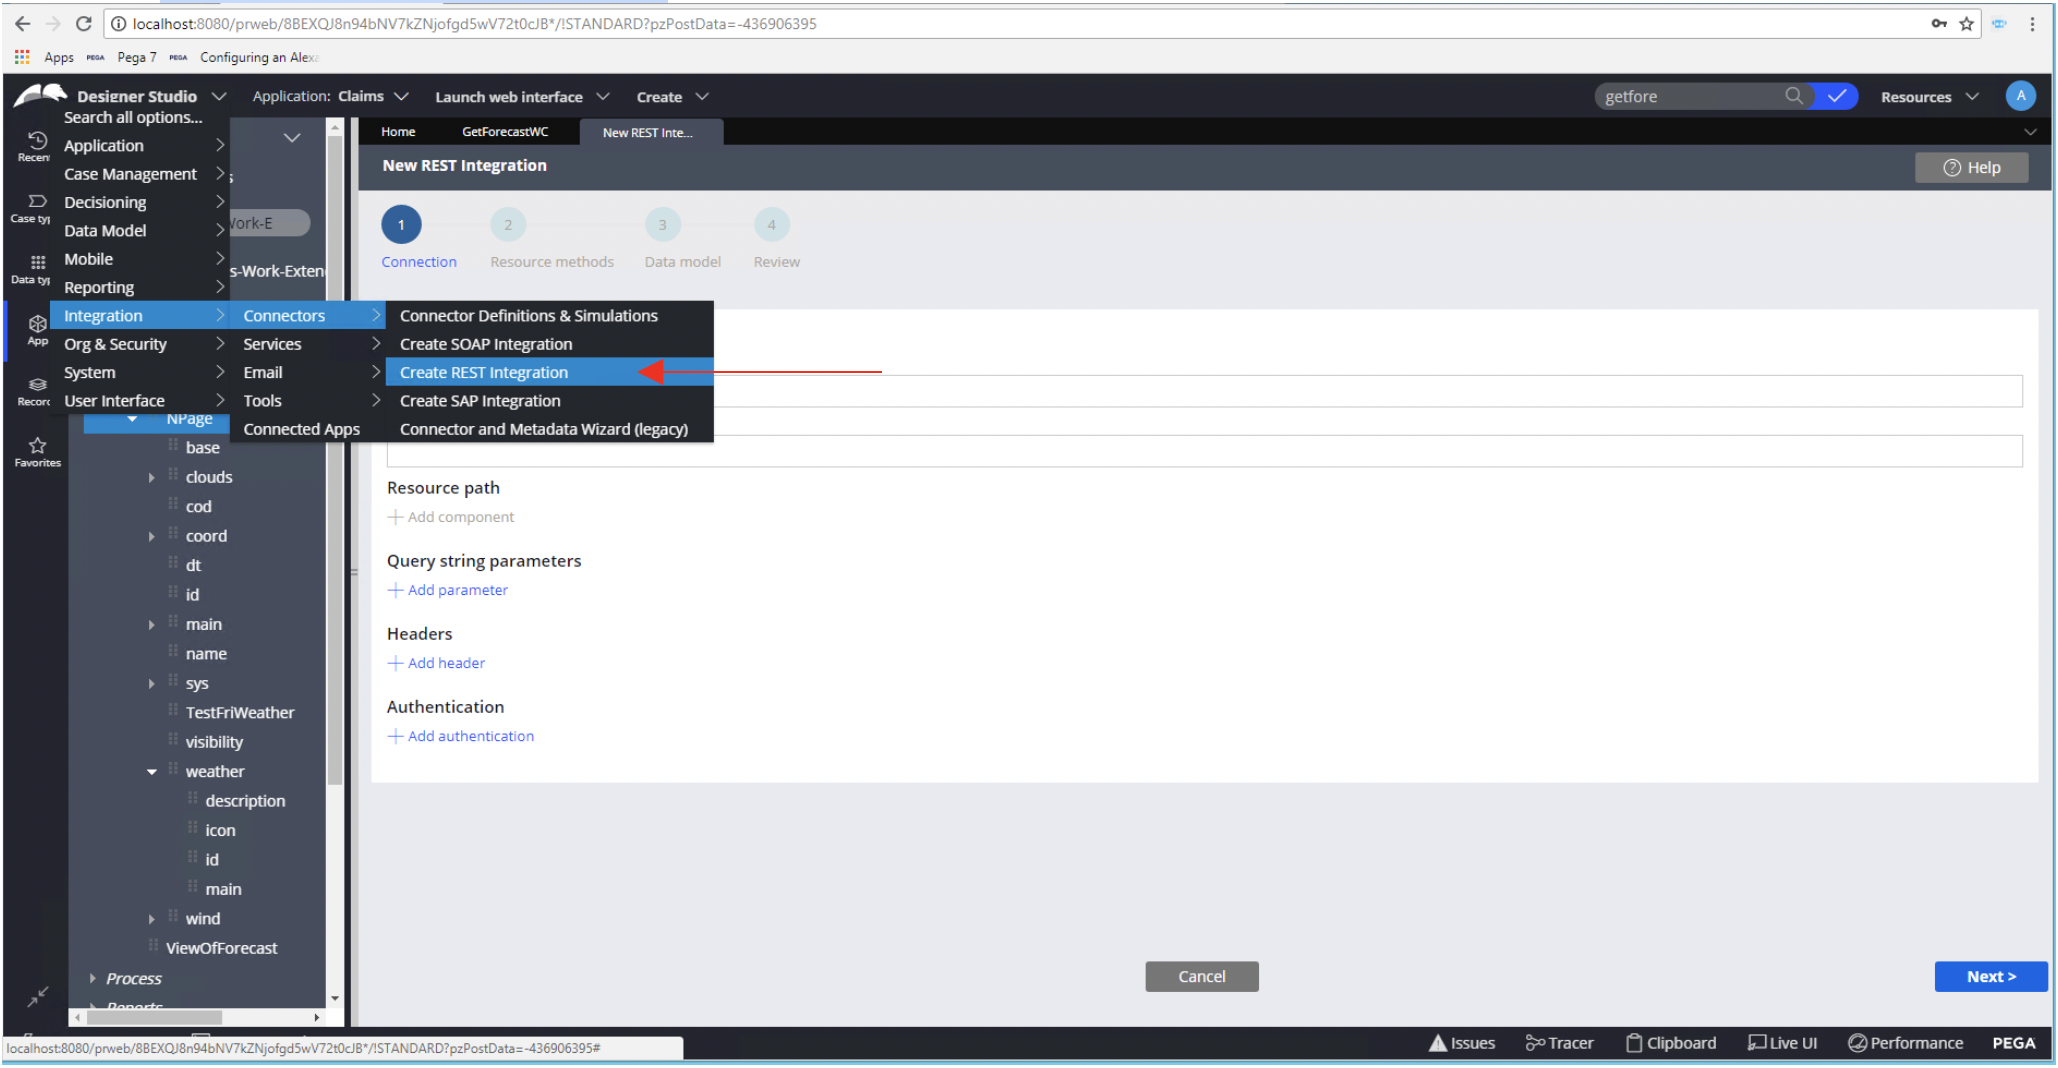
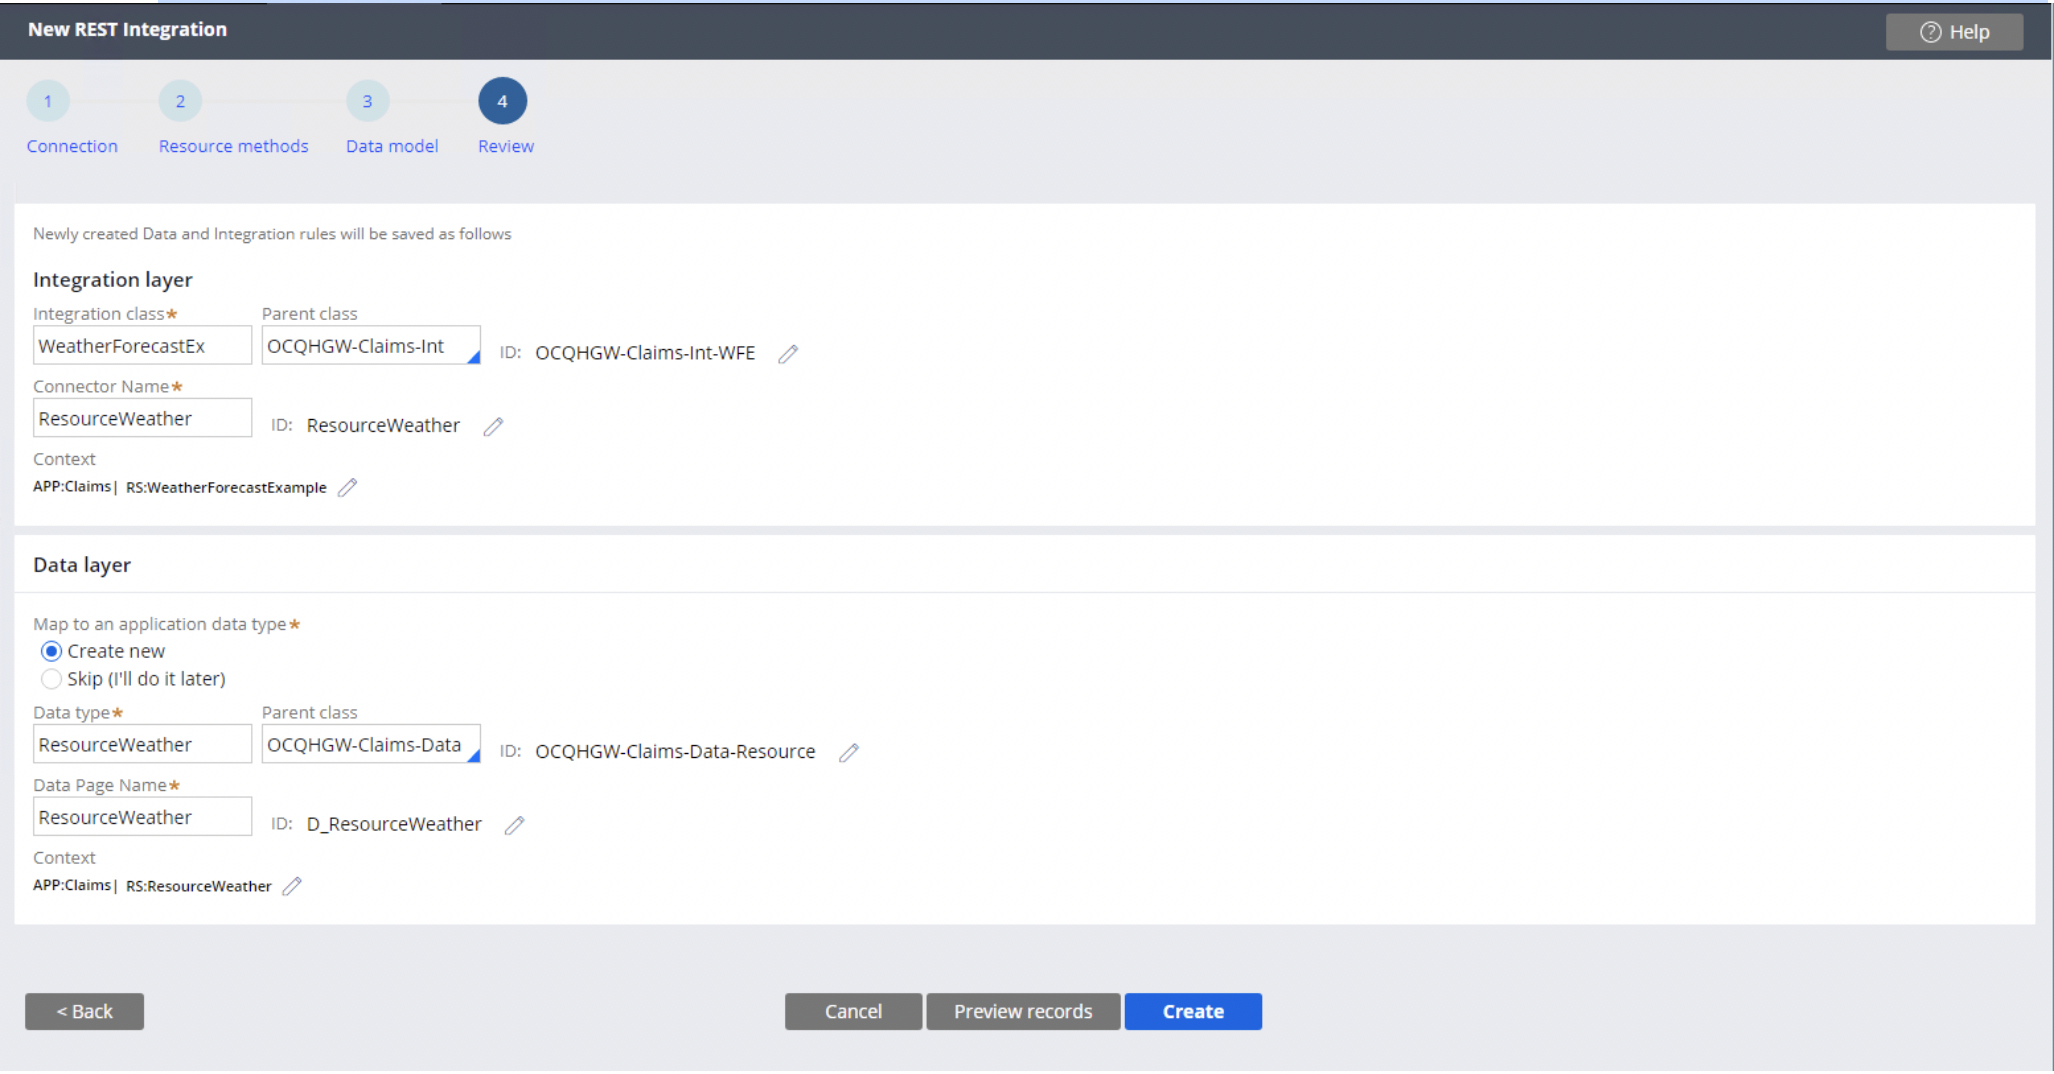
5. Next enter the details for your REST Integration.
 6. Make sure that the necessary specified parameters are included in your System details, i.e. q=”Weather location” and appid=”Specific to each user”
7. Click Next
8. Enter a name for your Resource and click next
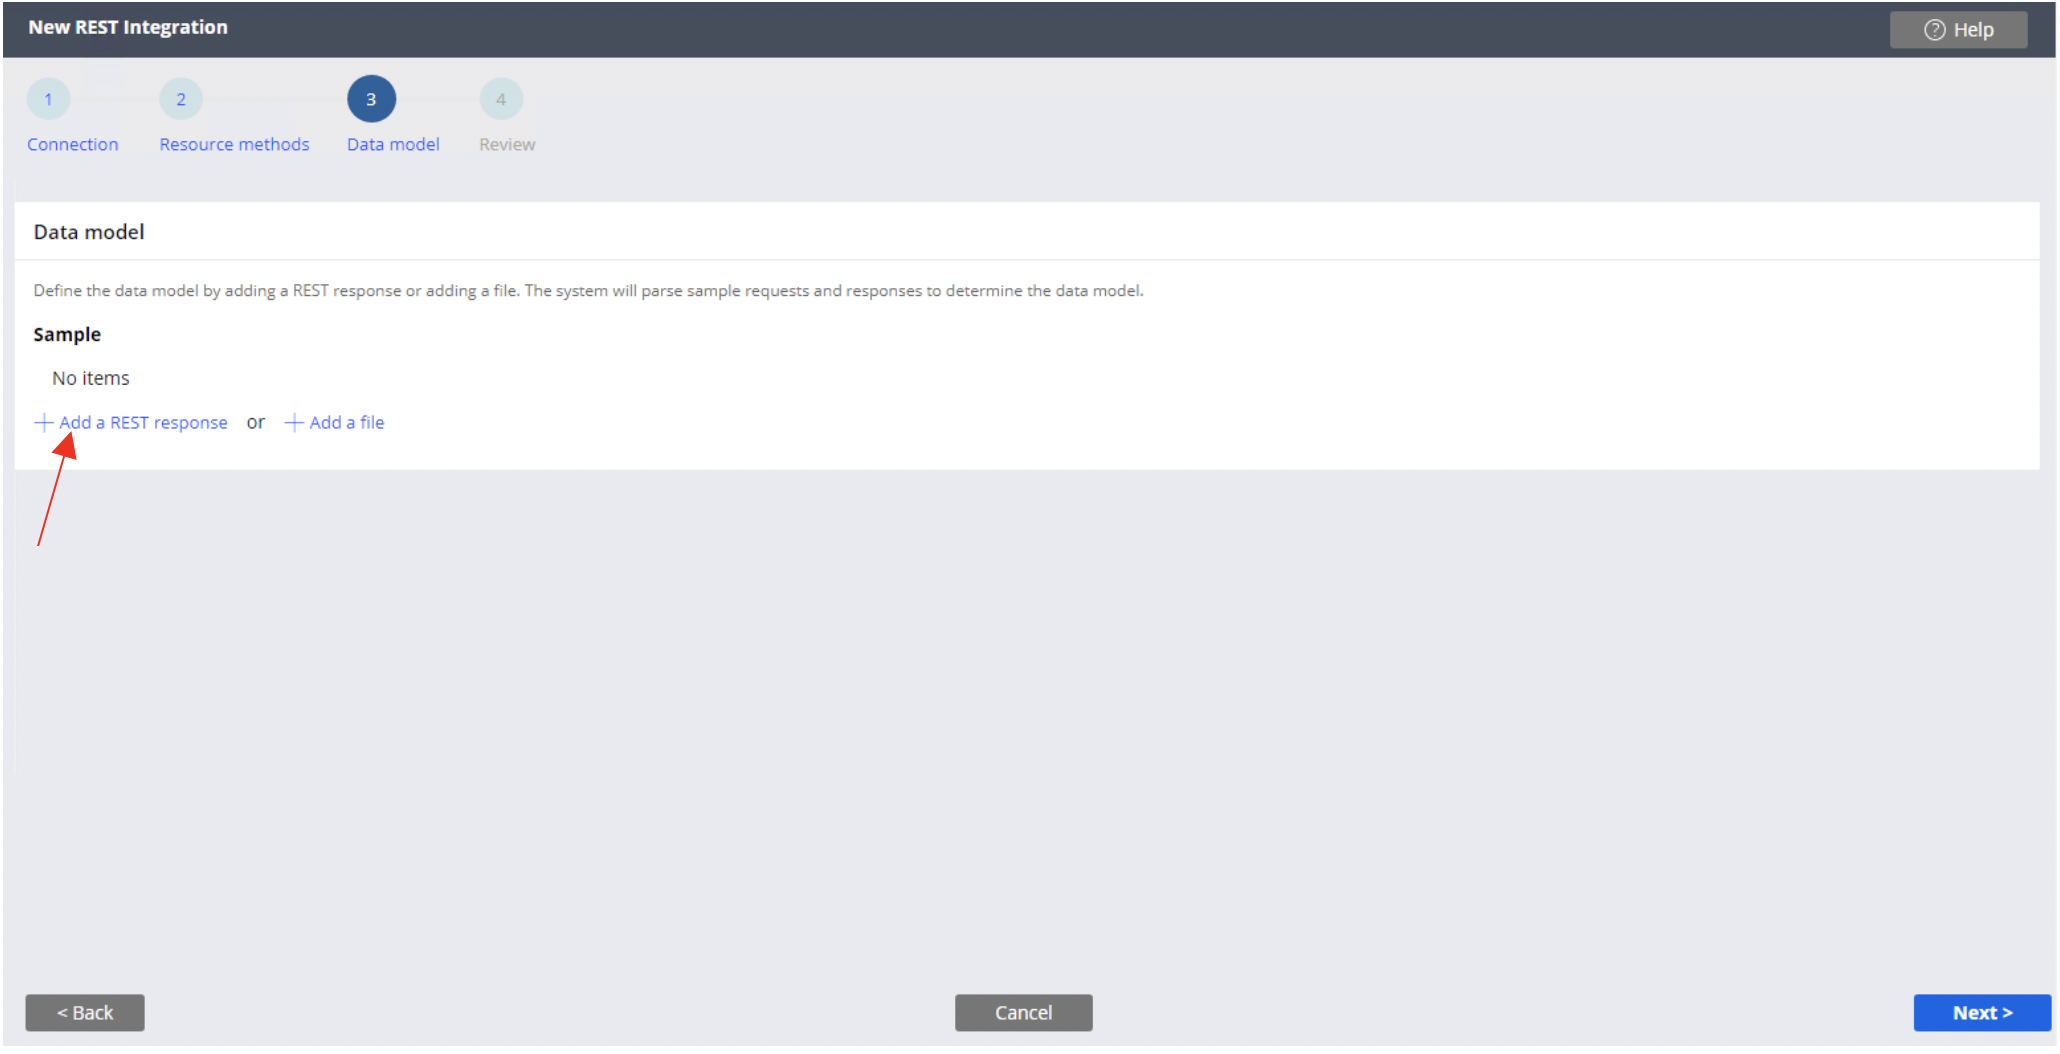
9. From the Data Model page click the link to Add a REST Response
 10. Be sure that the method is set to GET and fill the values for the parameters to ensure that your specified data is returned
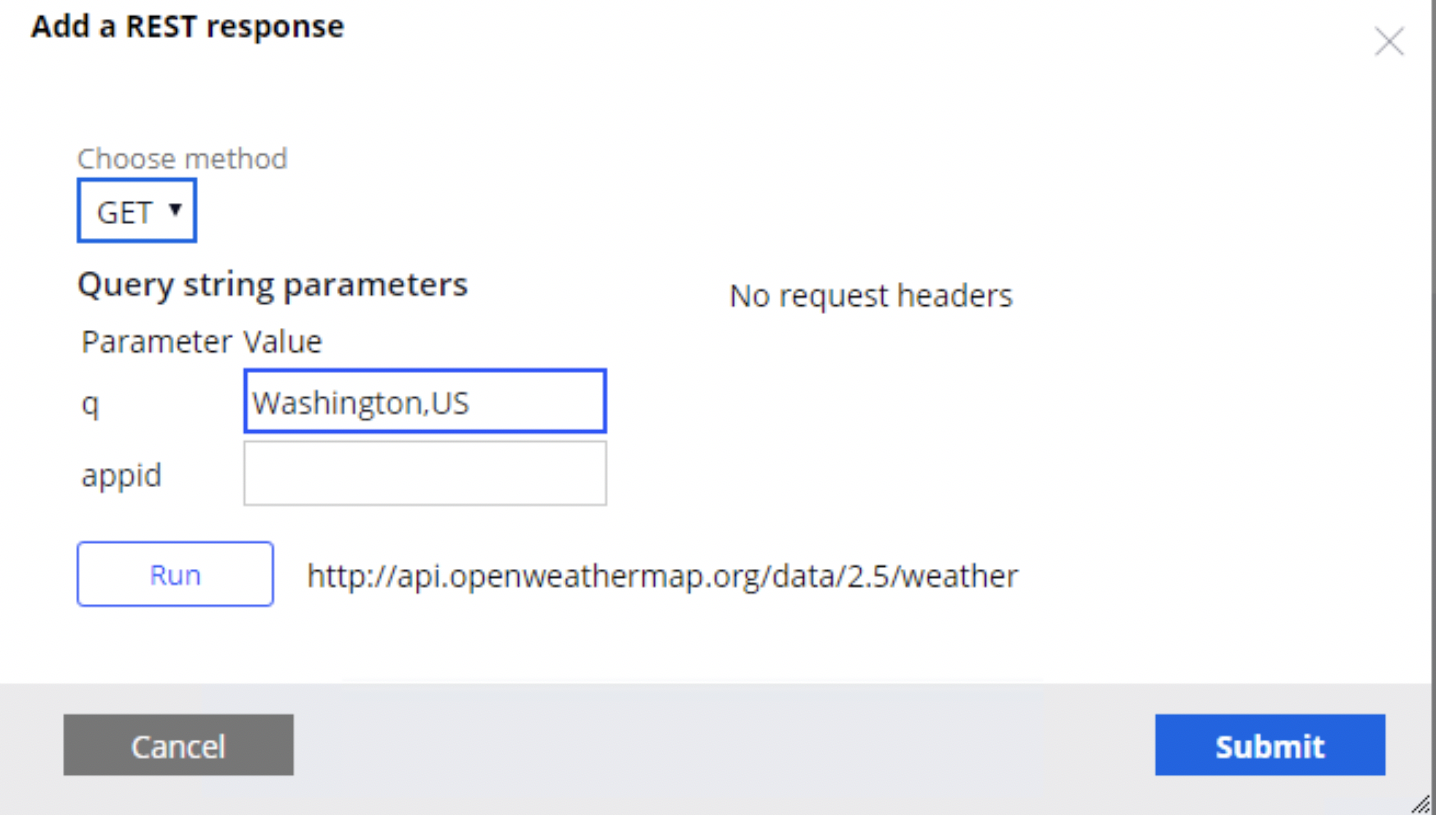 11. Click Run and you should see values returned as a response from your API query
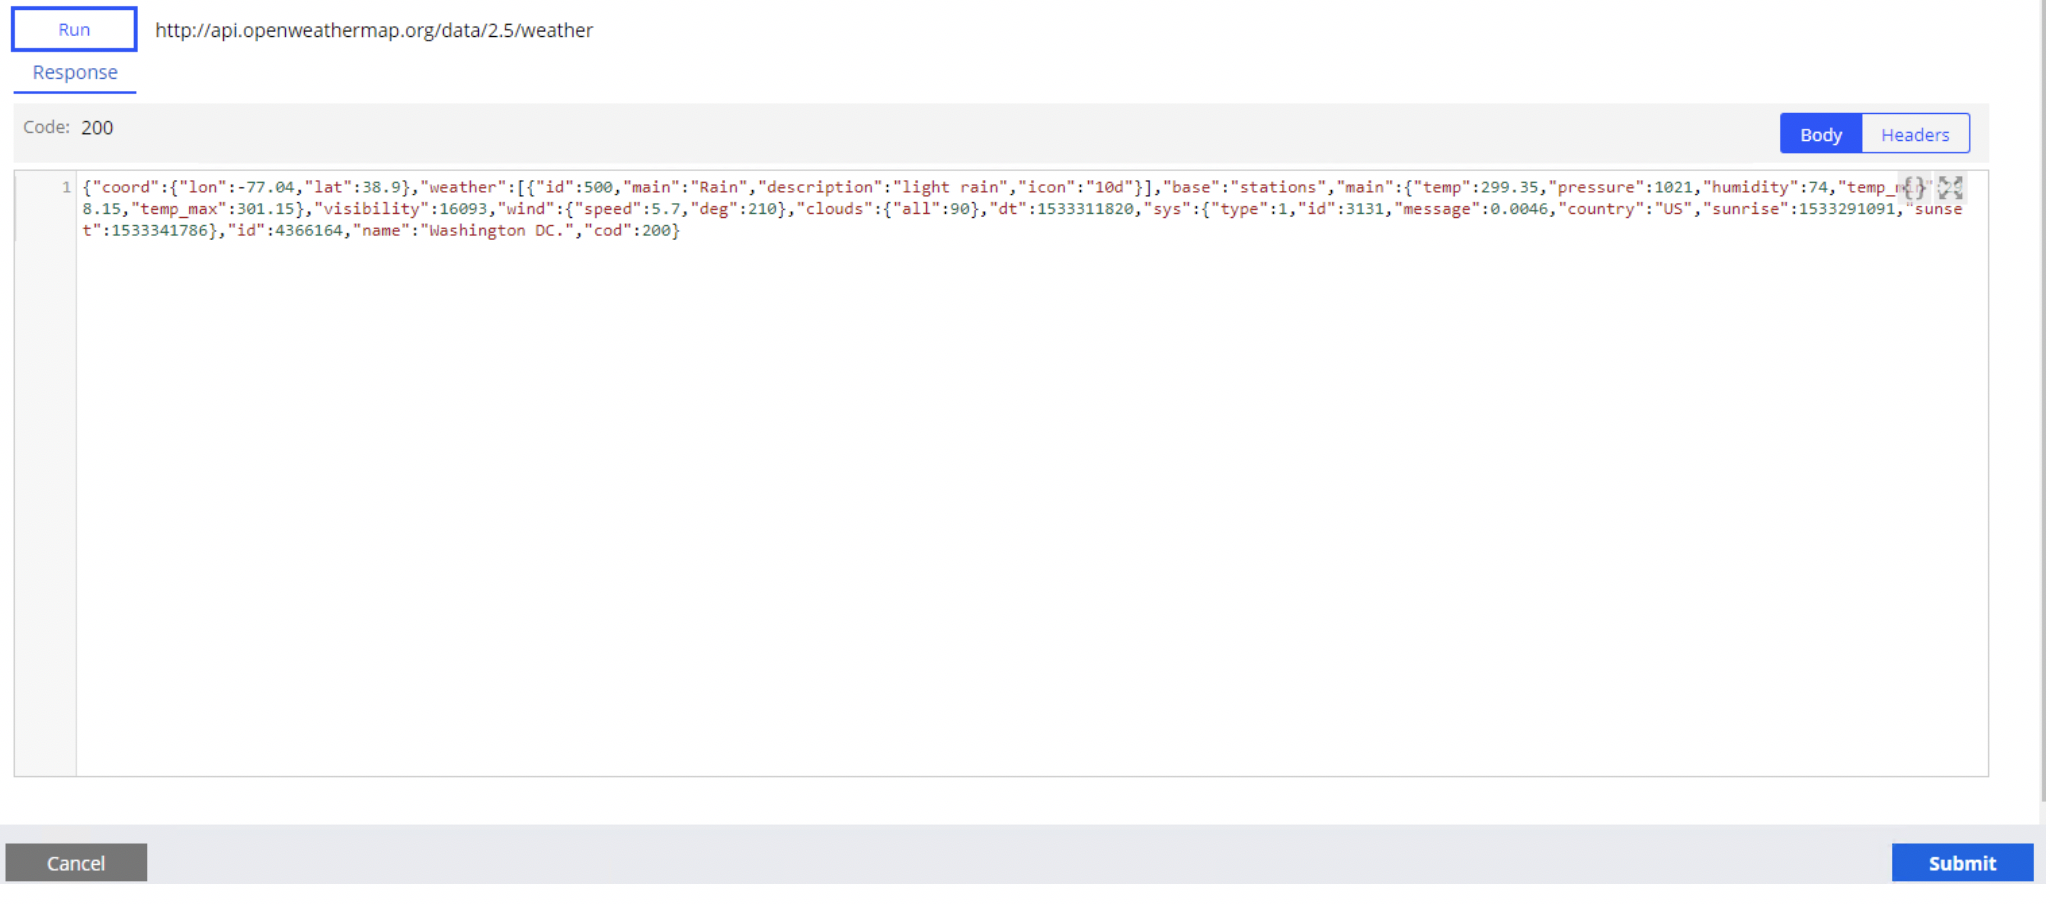
12. Click next and verify the elements on the page for your REST records that will be created
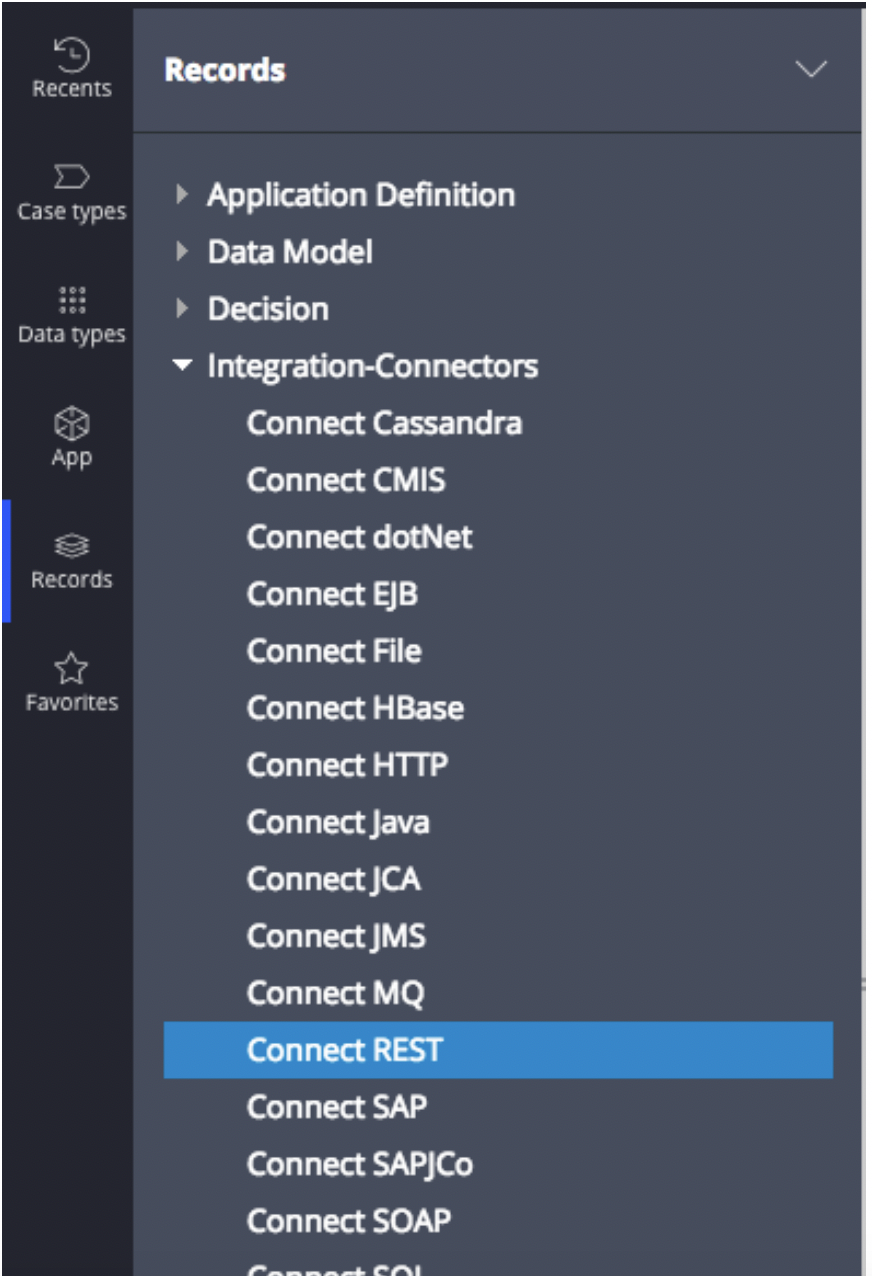
13. Once your REST Connector is built you can view the record and test the connectivity of your service by going to Records -> Integration Connectors -> Connect REST and selecting the REST Connector that you recently created


- Note you may see an error connecting because there are no set values for your query parameters, for the purposes of this case that we are building this is okay.
14. Check the Methods page of your REST service and ensure that the query string parameters are set to map from the clipboard and that the map from key values are of the type .request
 15. Next build a case and add three properties all of type text, “q”, “appid”, “Weather description”
 16. Build your case life cycle and add three steps, One assignment shape, followed by a utility shape, followed by another assignment shape. You may need to open the flow in order to add your utility shape and set the property values.

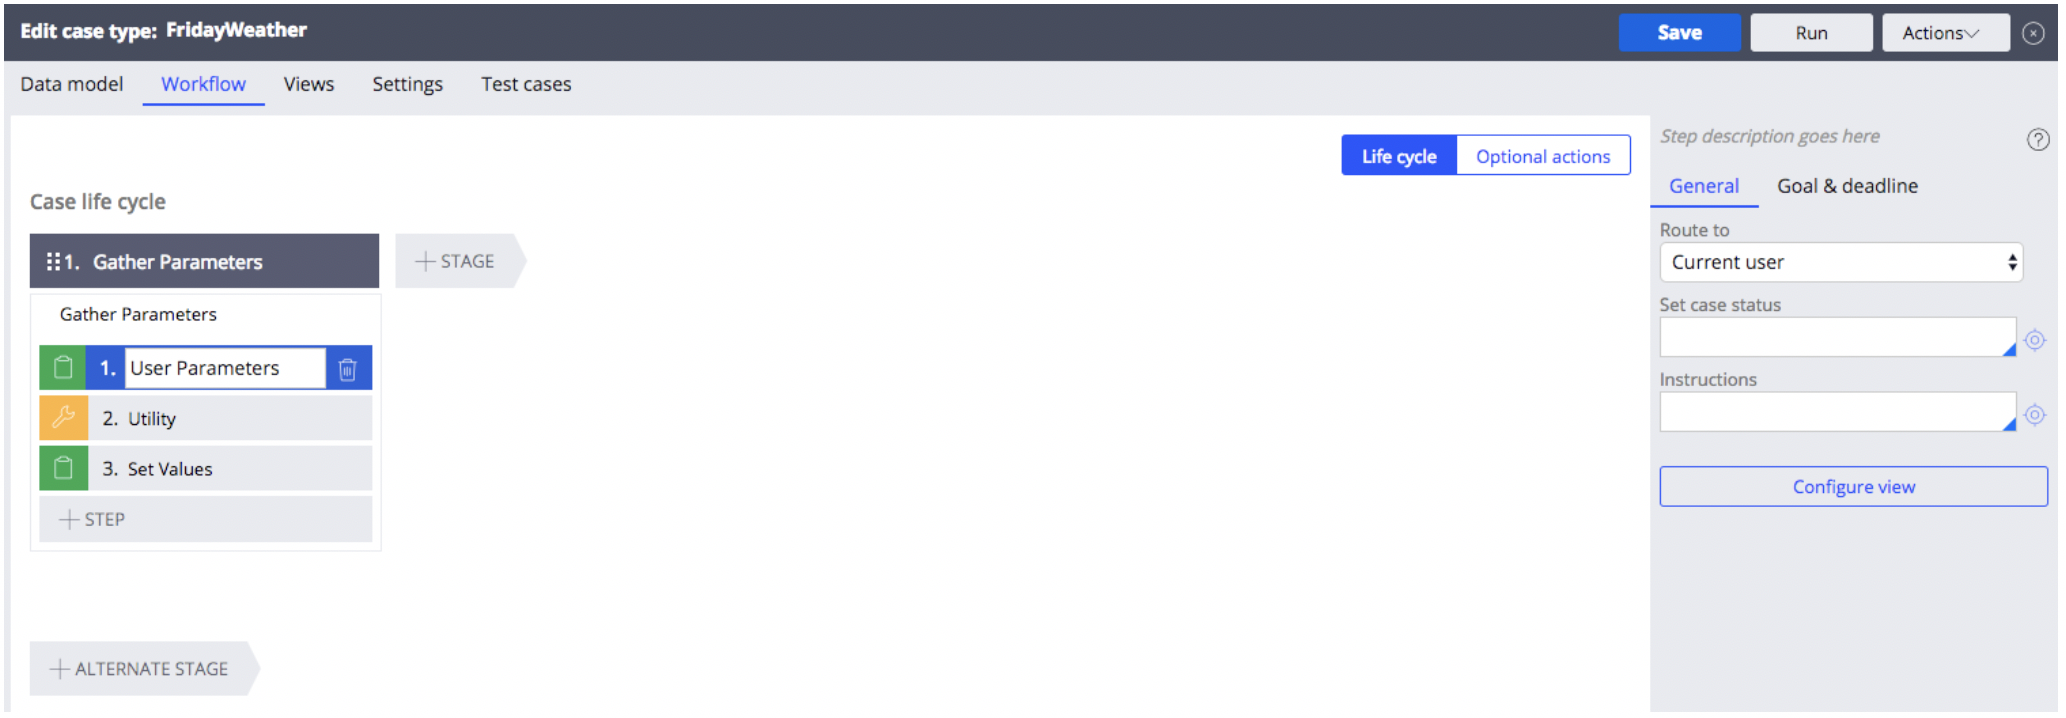
17. Open the first assignment shape and configure the view, add the fields, “appid”, “p”, and “weatherDescription”. Set appid to “read-only” and set weatherDescription to “read-only”, leave p as “optional”
 18. Click Submit and save the process. Open the process flow and double click on the Utility node. On the rule name, enter a unique rule name for an activity that you would like to create and click the target to open the new rule.
 19. Create and open the new activity and on the Pages and Classes type a unique page name and under class, search for the REST service that you created followed by the text “API”, Ex. My REST Service was named “ResourceWeather” and it is in the class “OCQHGW-Claims-Int-WFE” so the name of the class that I will be searching for is “OCQHGW-Claims-Int-WFE-ResourceWeatherAPI”
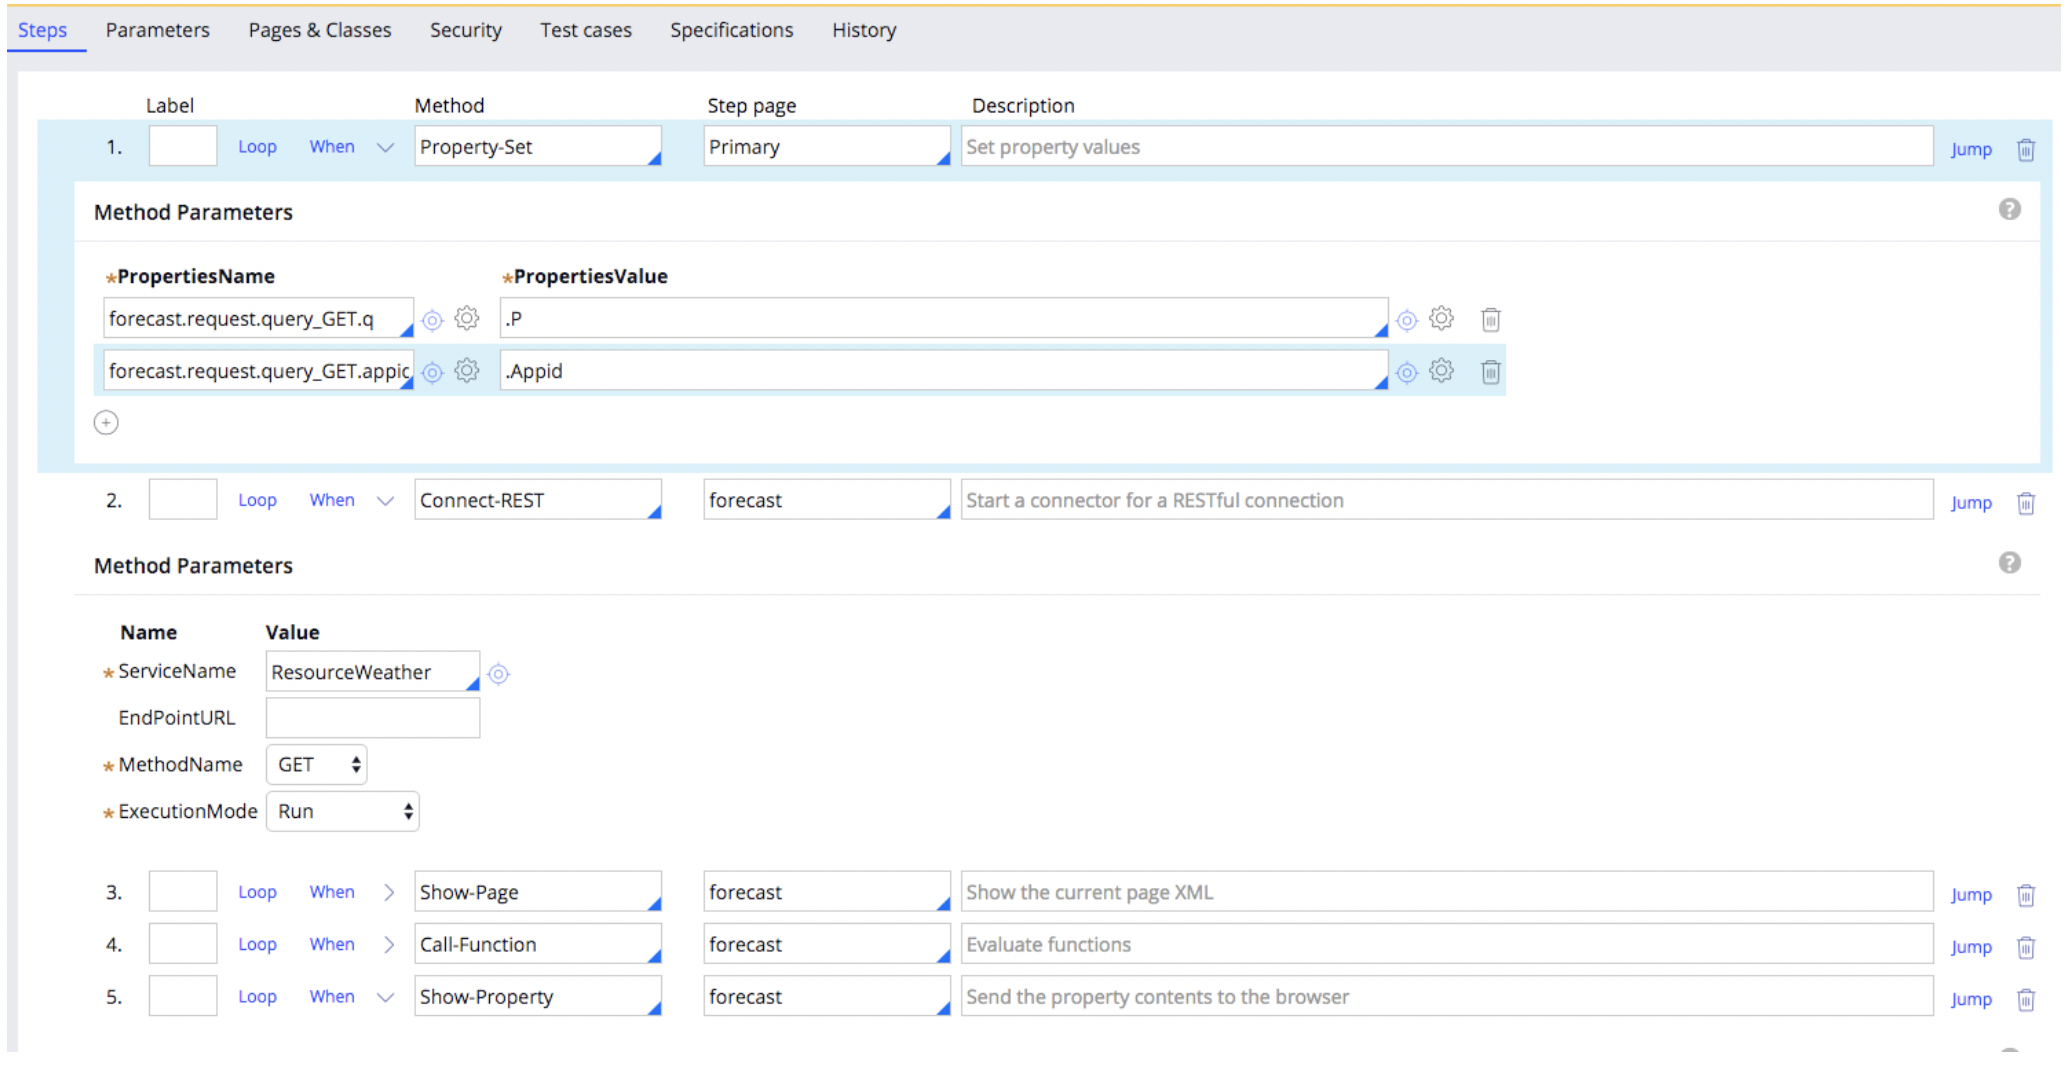
 20. We will add a total of six steps to this activity. The first step will include the Method “Property-Set”, the Step page will be “Primary”.
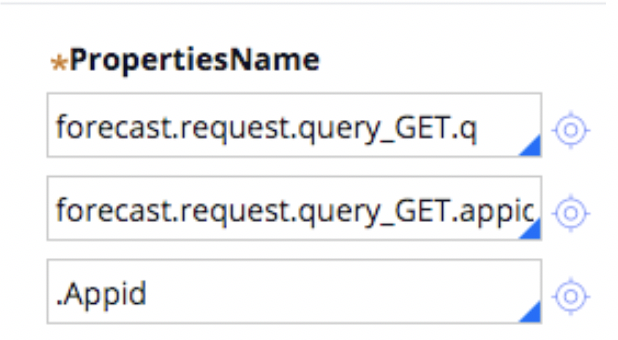
 21. Next we will set the Method Parameters, add three method parameters. The first method parameter will be, the page name that was set on the Pages & Classes tab, in my case mine was “forecast”, so your first parameter name will be forecast.request.query_GET.q, we will the PropertiesValue = .Q , your second PropertiesName will be forecast.request.query_GET.appid and the PropertiesValue will be equal to your unique appid. Your final PropertiesName will be .Appid and this will also set to your unique appid
22. For our second step the method will be set to Connect-REST and the step page will be “forecast” instead of Primary or whatever name you added on the Pages&Classes page of the activity that you are currently working in.
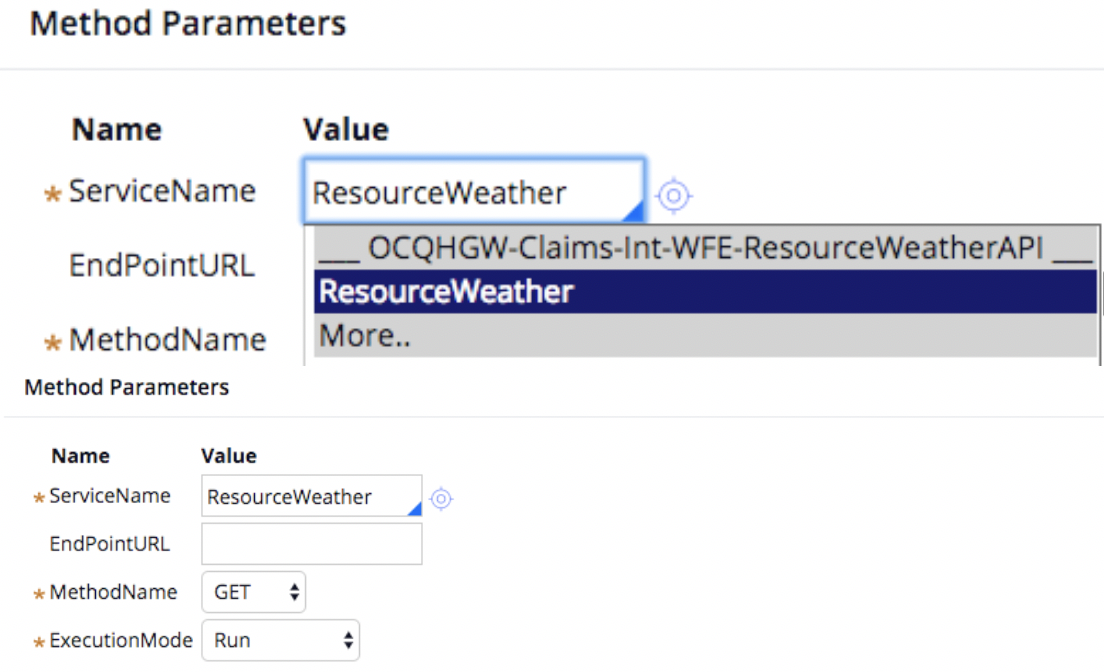
 23. Next we will set the Method Parameters for this step. The ServiceName should appear based on your REST service if you click in the box and click the dropdown arrow. Select the suggested value from the dropdown list.
 24. Set the MethodName to “GET” and set the ExecutionMode to “Run”
 25. Our third step will have the Method set to “Show-Page” the Step Page will be set to “forecast” (the name of your Page Name defined on the Pages&Classes) tab.
 26. No parameters need to be set for the third step
27. Next we will set the values for our fourth step. The Method should be set mto “Call-Function” and the Step Page will be set to “forecast” (the name of your Page Name defined on the Pages&Classes)
 28. For our Method Parameter the Function should be set to the function of your choice, in my case, “forecast.response_GET.weather(1).description and the Return value I will set to “forecast.response_GET.weather(1).description
 29. Save your activity
30. Our fifth step will have a Method set to “Show-Property” and the Step page will be set to “forecast” (the name of your Page Name defined on the Pages&Classes)
 31. In the Method Parameters we will set Property = “forecast.response_GET.weather(2).description “
 32. Save your activity
33. Our final step will have the Method set to “Property-Set” and the Step Page will be set to “Primary”
 34. Under the Method Parameters we will set the PropertiesName = “.WeatherDescription” and the PropertiesValue will be set to “forecast.response_GET.weather(1).description”
 35. Save your activity and navigate back to the case that you created. Open your second Assignment shape and configure the view
36. Add the field, “weatherDescription”
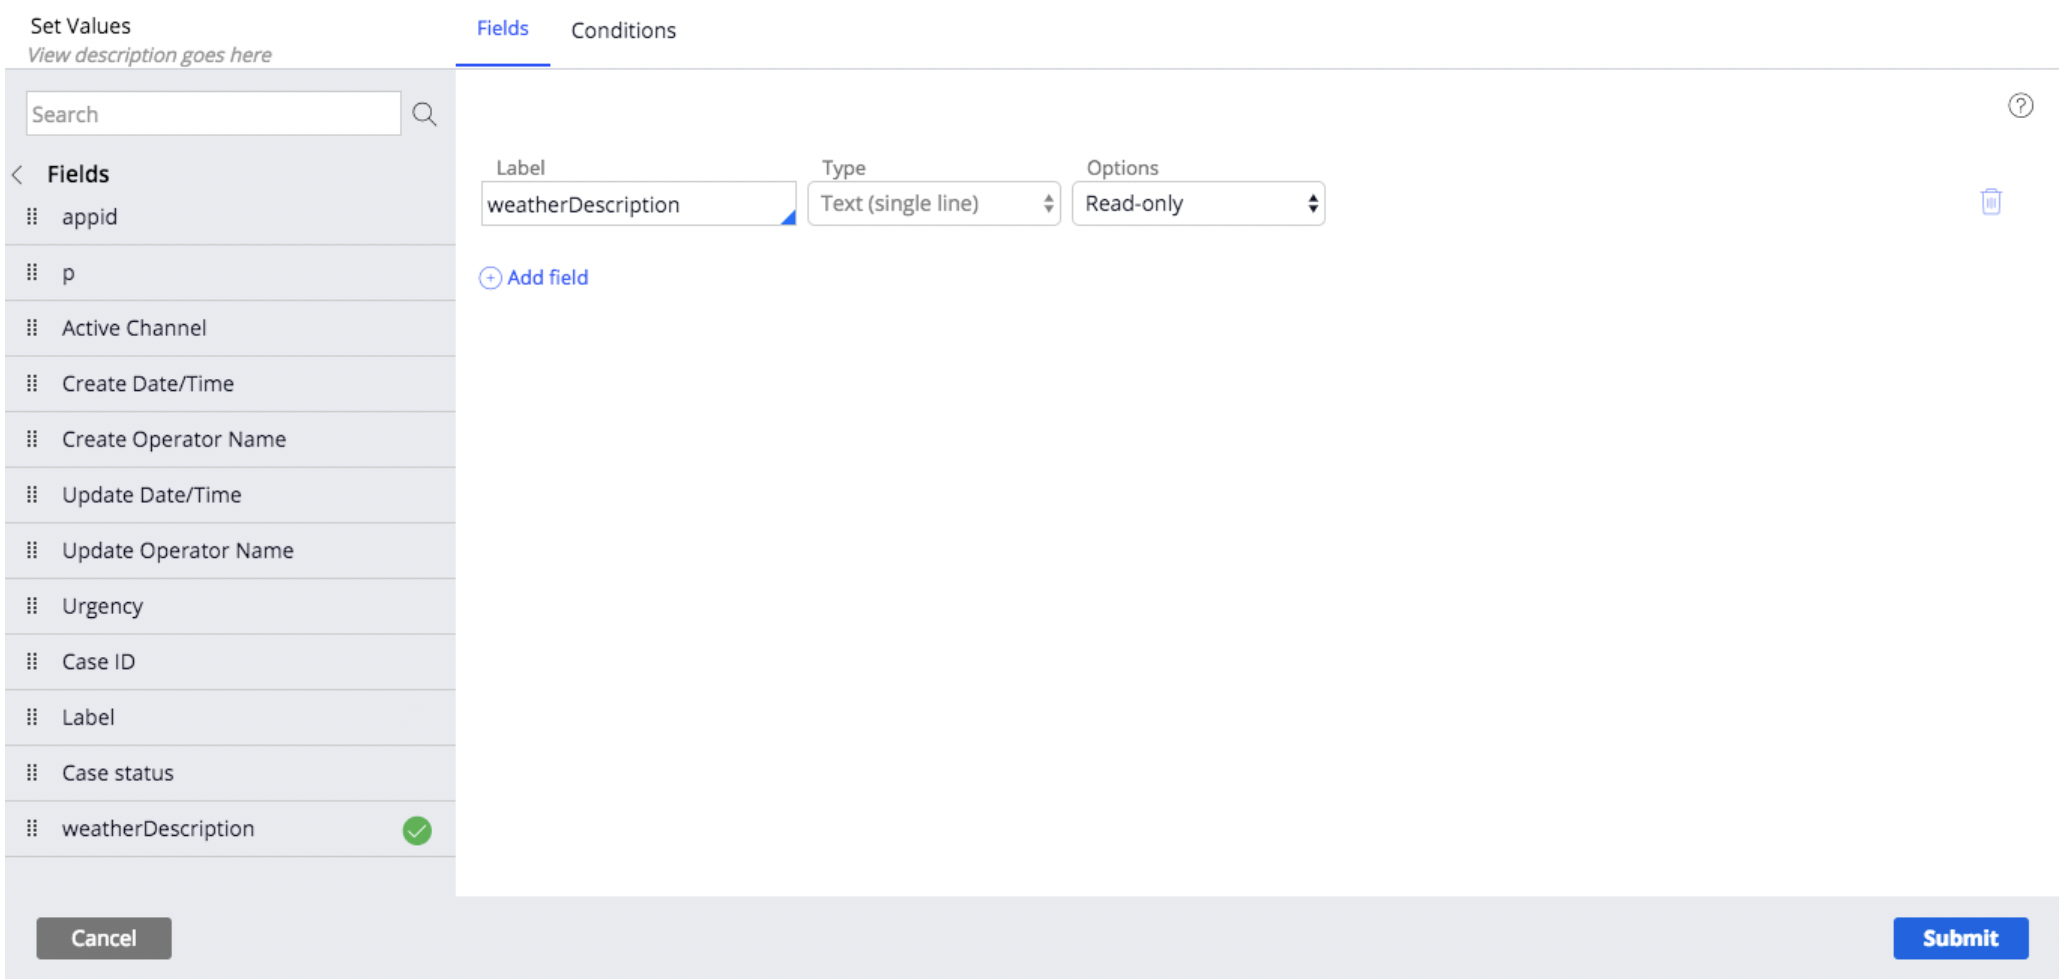 37. Click “Submit” and save your flow and click “Run”
38. Enter a value for q and Submit
 39. Based on the value that you entered for q, you should see a value populated in the “weatherDescription” field
