SAML Authentication: Part 1, Authentication Service Record Configuration
This is the first of a two-part blog on my journey with configuring the SAML SSO Authentication Service record. This was the first time doing it with Pega so as usual things that seem simple now were not in the beginning.
The topics to be discussed are:
- SAML Authentication: Part 1, Authentication Service Record Configuration
- SAML Authentication: Part 2, Adapter Design Pattern Use Case: Data-SAMLAssertion Attribute Mapping
Part 1 dives into configuring of the Authentication Service record with a focus on filling in some of the gaps discovered in the existing documentation. Part 2 is about retrieving the data returned from the Identity Provider during SSO and mapping it to a data page to meet the client's application requirements. However, an adapter pattern was used that has applicability for any data mapping scenario.
Scenario
Platform: Pega Cloud 8.4.2
A Pega CRM/CS application requires SSO authentication using the client's Microsoft ADFS Identity Provider. Users logging onto application belong to one of three access groups: Employees, Case Workers, and Case Managers. All users will have their Pega Operator IDs automatically provisioned the first time they log on with SSO.
Solution
When a user authenticates for the first time via SSO their Operator ID is automatically provisioned using an SSO Model Operator which has the Employees access group. Since a relatively small subset of users are Case Workers/Case Managers their Operator IDs are manually updated to have correct access group, work group, skills, etc. NOTE: These users could also be automatically provisioned with the correct access group, etc., but additional attributes from IdP (and post-authentication logic) would be necessary which was not possible for the client to send.
Figure 1 shows the basic steps involved with SAML Authentication.
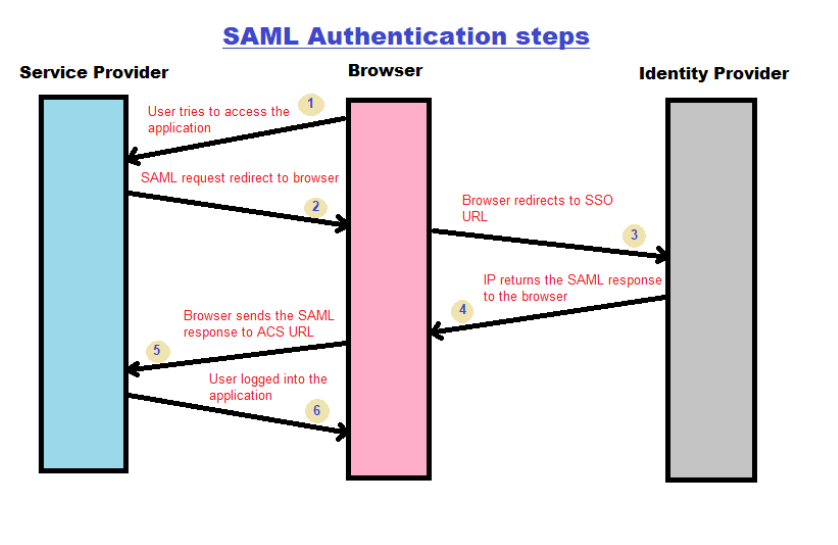
Figure 1: SAML Authentication workflow
Step 1: User enters the application URL, i.e., Pega SSO URL.
Step 2: The service provider or the Pega application redirects the request for IdP via the browser.
Step 3: Browsers sends the request to IdP SSO URL. IdP verifies if the user is already authenticated in the system (This means the user might have already identified via another application login). If No, the IdP challenge the user to provide the login credentials
Step 4: The IdP returns the SAML response to the browser
Step 5: The browser sends the SAML response to the Assertion Consumer Service (ACS) URL.
Step 6: Finally, the user gets logged into the application from the browser.
For this scenario the client's Pega CS application is the Service Provider in Fig. 1 and the client's Microsoft ADFS is the Identity Provider. The Pega SAML SSO URL in Step 1 above is created by configuring a SAML Authentication Service record. Below is a breakdown of the configurations required:
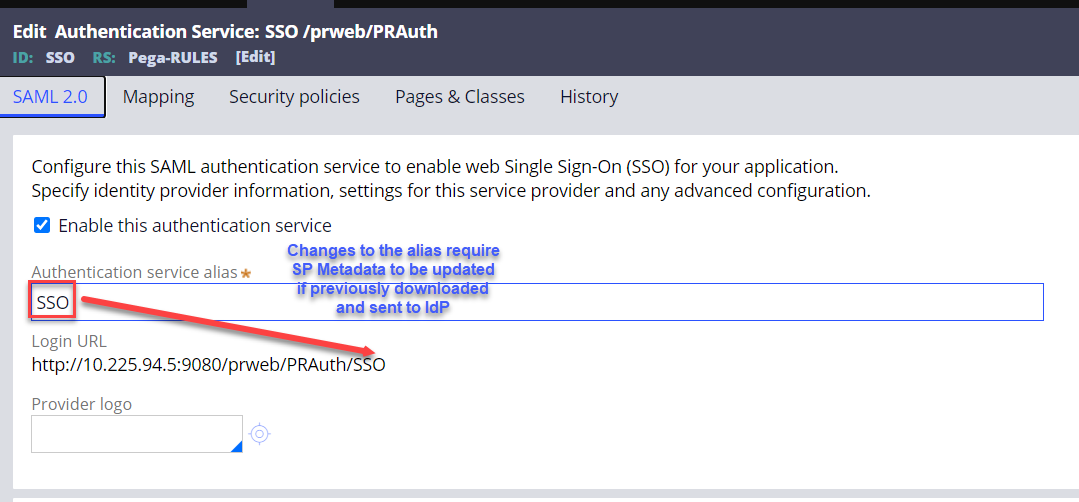
1. Alias completes the login URL for SAML SSO
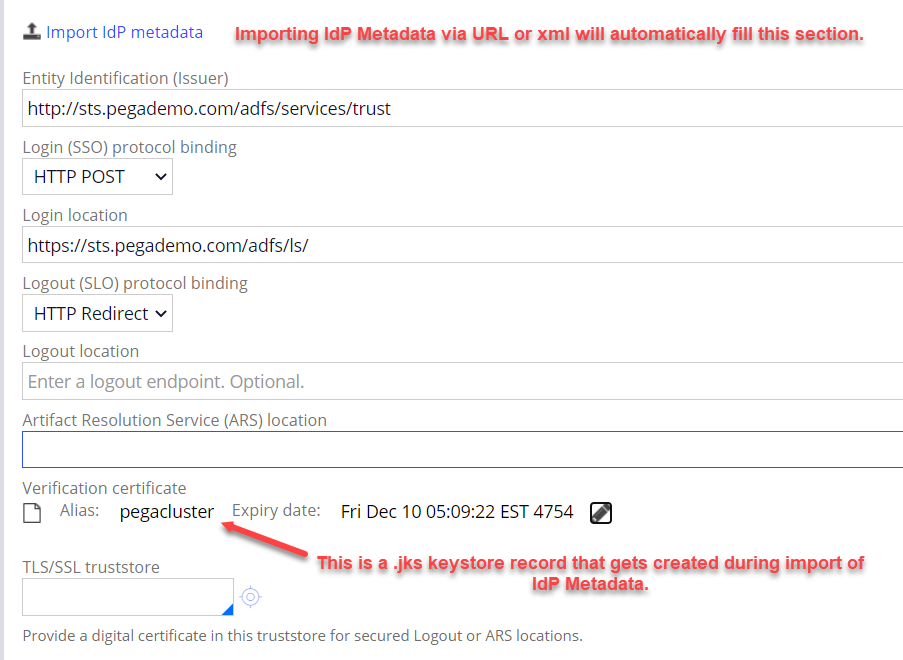
2. AD provider provides URL or XML file to import IdP metadata. The 'Import IdP Metadata' icon above allows both options. All fields are automatically filled in. Note that the 'Logout location' is optional but will get filled in by the same URL as the Login location during import.
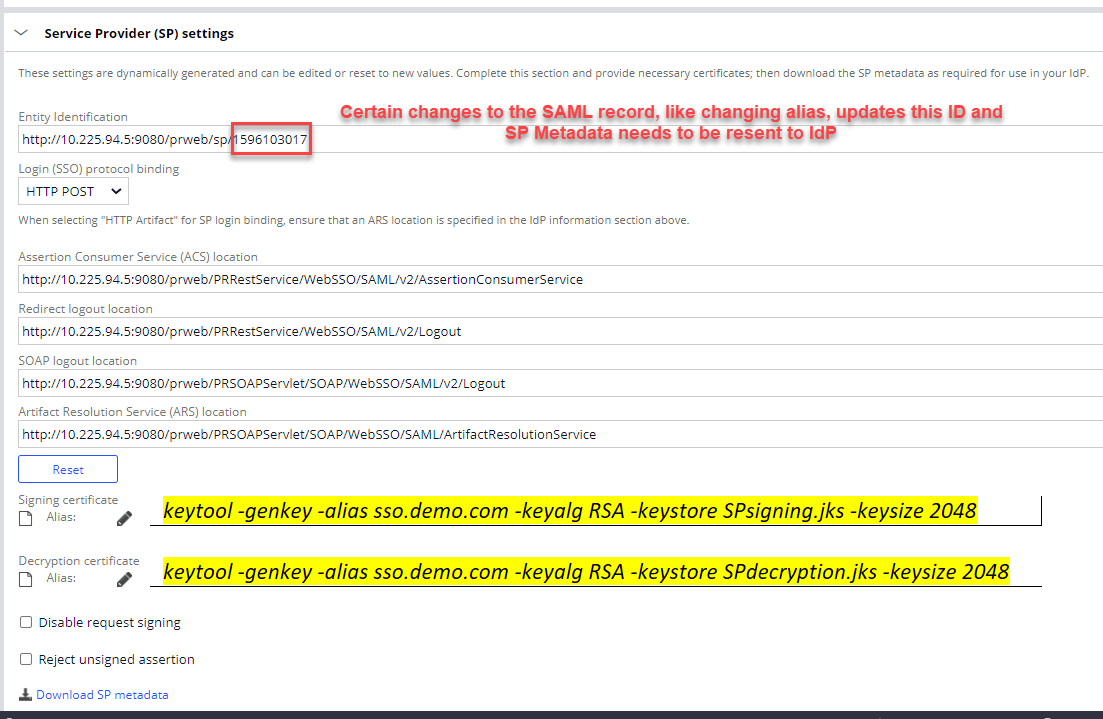
3. This section also gets filled out automatically with the exception of the Signing/Decryption keys. To add those which is required unless 'Disable request signing' is checked create a jks file for each and the corresponding Pega Keystore record. Once the keystore records are created they can be added in the above section. To create the jks files, using the following keytool command is one option. Note there is also a flag that can be used to set when the key expires. The client should own this process.
keytool -genkey -alias sso.demo.com -keyalg RSA -keystore SPsigning.jks -keysize 2048
keytool -genkey -alias sso.demo.com -keyalg RSA -keystore SPdecryption.jks -keysize 2048
Once generated create the Pega keystore record by uploading the keys generated. Be sure to remember/record the passwords you set when executing the above keytool command!

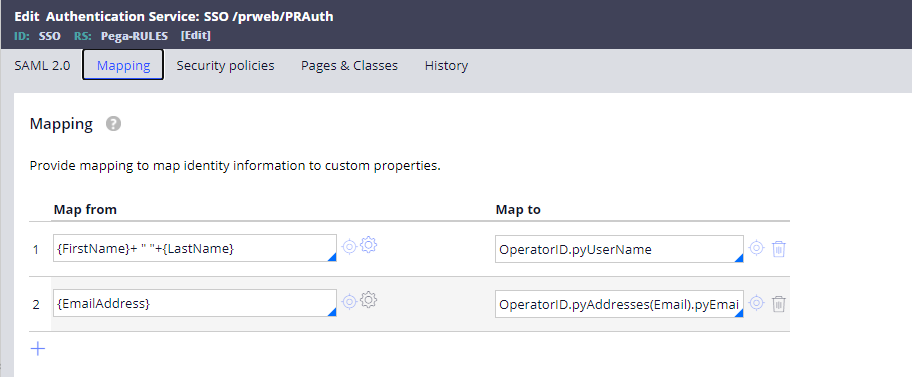
4. If a Pega Operator ID does not exist in the application that matches one of the criteria provided by "Map operator Id from" then Pega can automatically create an operator Id if 'Enable operator provisioning using model operator' is selected. Various options exist for looking up this model operator Id record. The example above looks for a Pega Operator ID called "SSO Model Operator" and uses all the details in that record to create the new operator Id. Furthermore, any of the mapping configured in the Mapping tab will be applied during Operator provisioning. Please see the References below for additional examples for provisioning operators.
The {attrName} convention used in the 'Map from' refers to the name of the attribute that is returned in the XML response from the AD provider. It is worth mentioning that this data is used to update the persisted Operator ID record not only during first time provisioning but also during all subsequent SSO logins. Therefore, when attributes for a user are updated in the AD provider they will automatically be updated in the Pega Operator ID record if mapped as above.
Another tip is that {attrName}'s can be string concatenated as in line 1 of the example above.
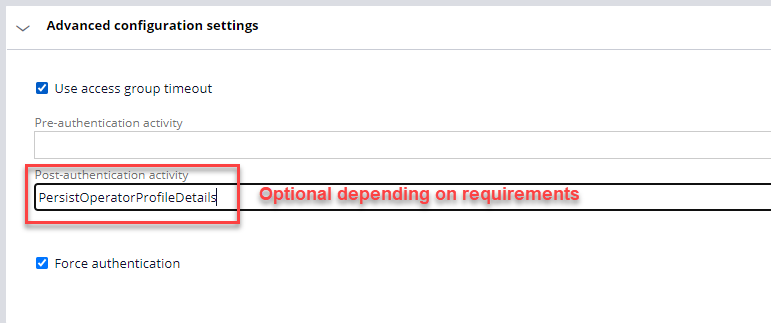
5. This section is also optional. Selecting 'Use access group timeout' will use the timeout of the default access group of the Operator Id for the user that logged in via SSO.
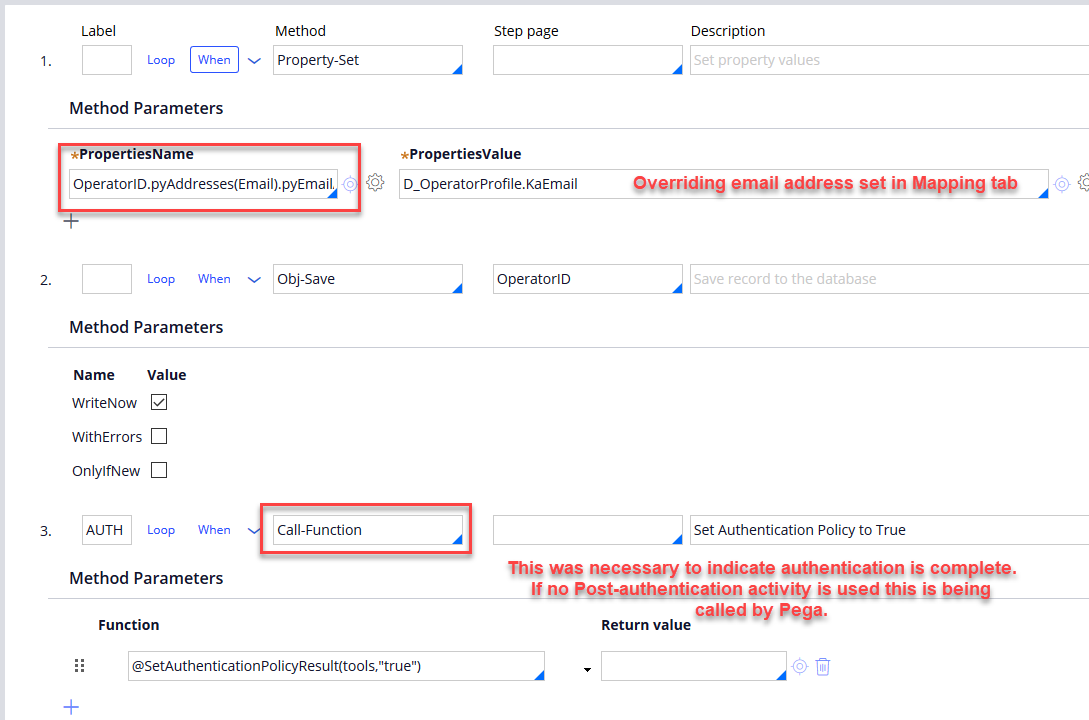
Several attributes about the user logging in via SSO are returned from the AD provider. For the attributes that could not be mapped to the Data-Admin-Operator-Id properties, i.e., on the Mapping tab above, a Datapage was created and used elsewhere in the application. (Part 2 of this series goes into more details on this topic.) However, there were some Data-Admin-Operator-Id properties that were controlled by decision logic (embedded in the When of step one below). To set these values accurately and persist them to the Operator Id record a Post-authentication activity was used, namely PersistOperatorProfileDetails. This activity rule must be in class Code-Security and in a ruleset available to the operator that has just logged in via SSO.
PersistOperatorProfileDetails:
Final observations
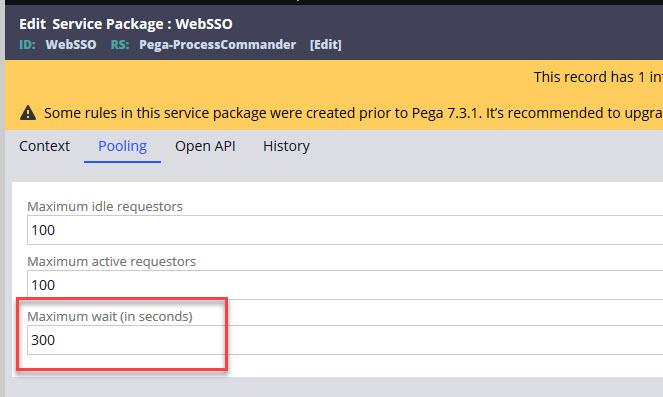
When a user accesses the SSO URL and is redirected to the IdP as in Step 3 of Fig. 1 there is a timeout configuration in Pega that controls where the user is redirected after successfully authenticating. Before this timeout the user is redirected to the application portal they expect to be signing into. After this timeout period, however, the user will be redirected to the Pega login page which presents both the standard Pega login option and the option to log on via SSO. Selecting the SSO option does then take them to the application portal, but as discovered with this client the additional logon page that leads to confusion. To avoid this the WEBSSO service package's maximum wait time can be adjusted:
References
https://community.pega.com/knowledgebase/articles/provisioning-operator-using-data-transform
