How to set BOX as Repository
Storing case attachments, etc. contents in a repository instead of directly in the Pega database is recommended as described here: https://support.pega.com/discussion/how-set-repository
However, our customer requested to use BOX as the repository. While BOX can be configured as a "web storage provider" from the same location as the other repository types described in the above link, if you configure it with "client credentials", "authorization code", etc. you will be redirected to BOX to enter login credentials.
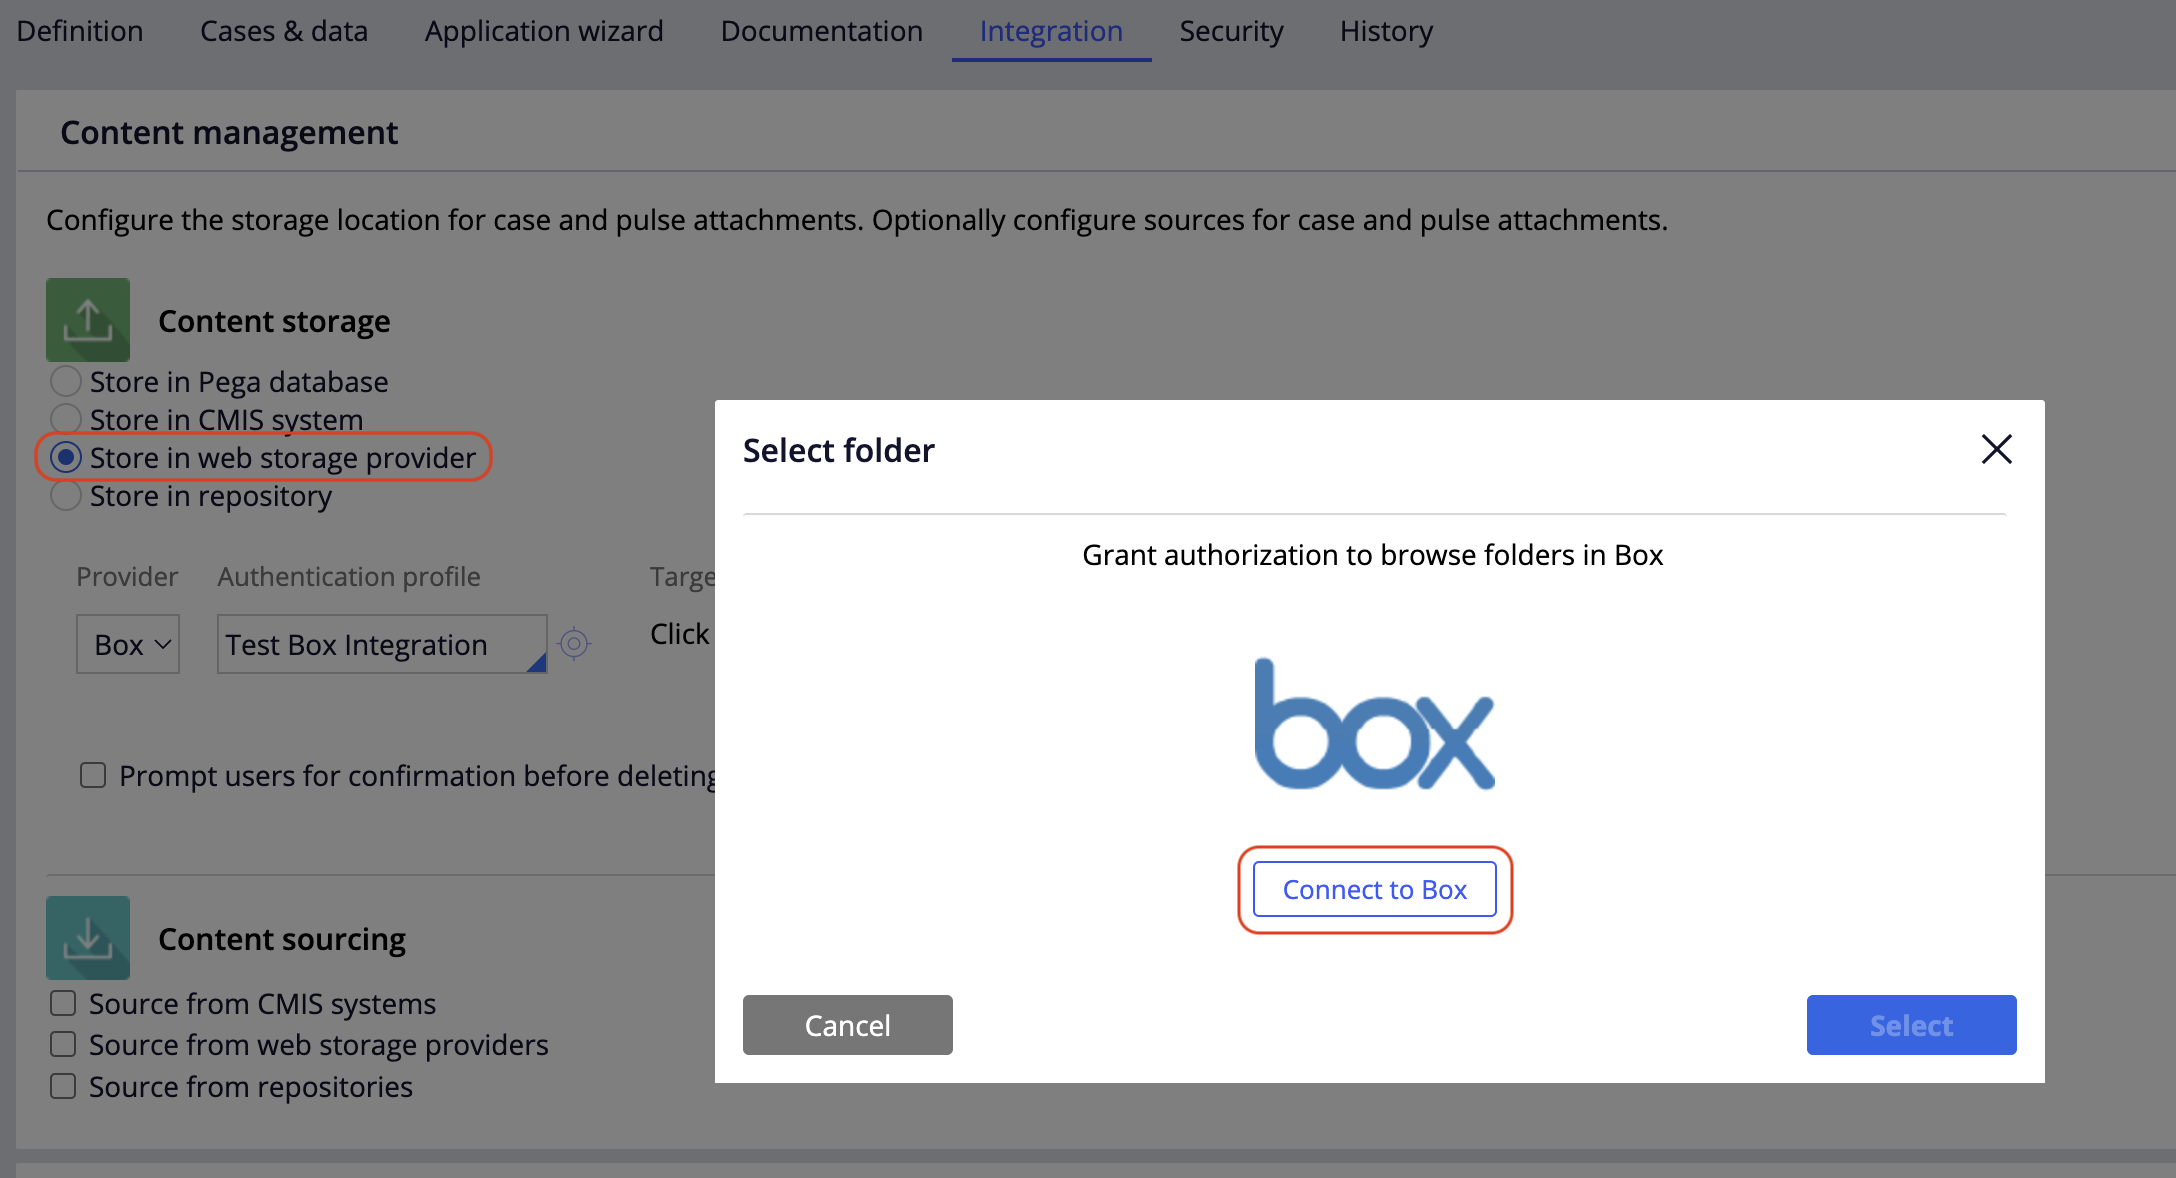
This prompt will also appear for end users each time they log in, rendering it useless as a repository.
In order to configure the web storage provider to use a common system BOX account and be transparent to the end user, one needs to configure OAuth 2.0 with JWT bearer. The steps are outlined here:
- From the Application rule > Integration tab, select "Store in web storage provider" and select "Box" as the provider (same as shown above)
- In Authentication profile, either chose the Authentication profile name or create it by clicking the target and/or following the steps described in part A below
- Click on Browse to select the Target Folder within the BOX application to be used as repository location (an authorized BOX application and the folder must both be created and the folder associated with the application. BOX setup steps are skipped because if the client is requesting BOX integration assumedly they already understand BOX configuration).
A. Configuring the Authentication Profile
- Either from 'Create > Security > Authentication Profile' or from the target in 2 above, create a new Authentication Profile and choose "OAuth 2.0" as the Type
- In the "Client configuration" section, choose OAuth 2.0 Provider "Box", Grant Type "JWT Bearer"; enter the "Client Identifier" and "Client Secret" obtained from your BOX application Configuration tab.
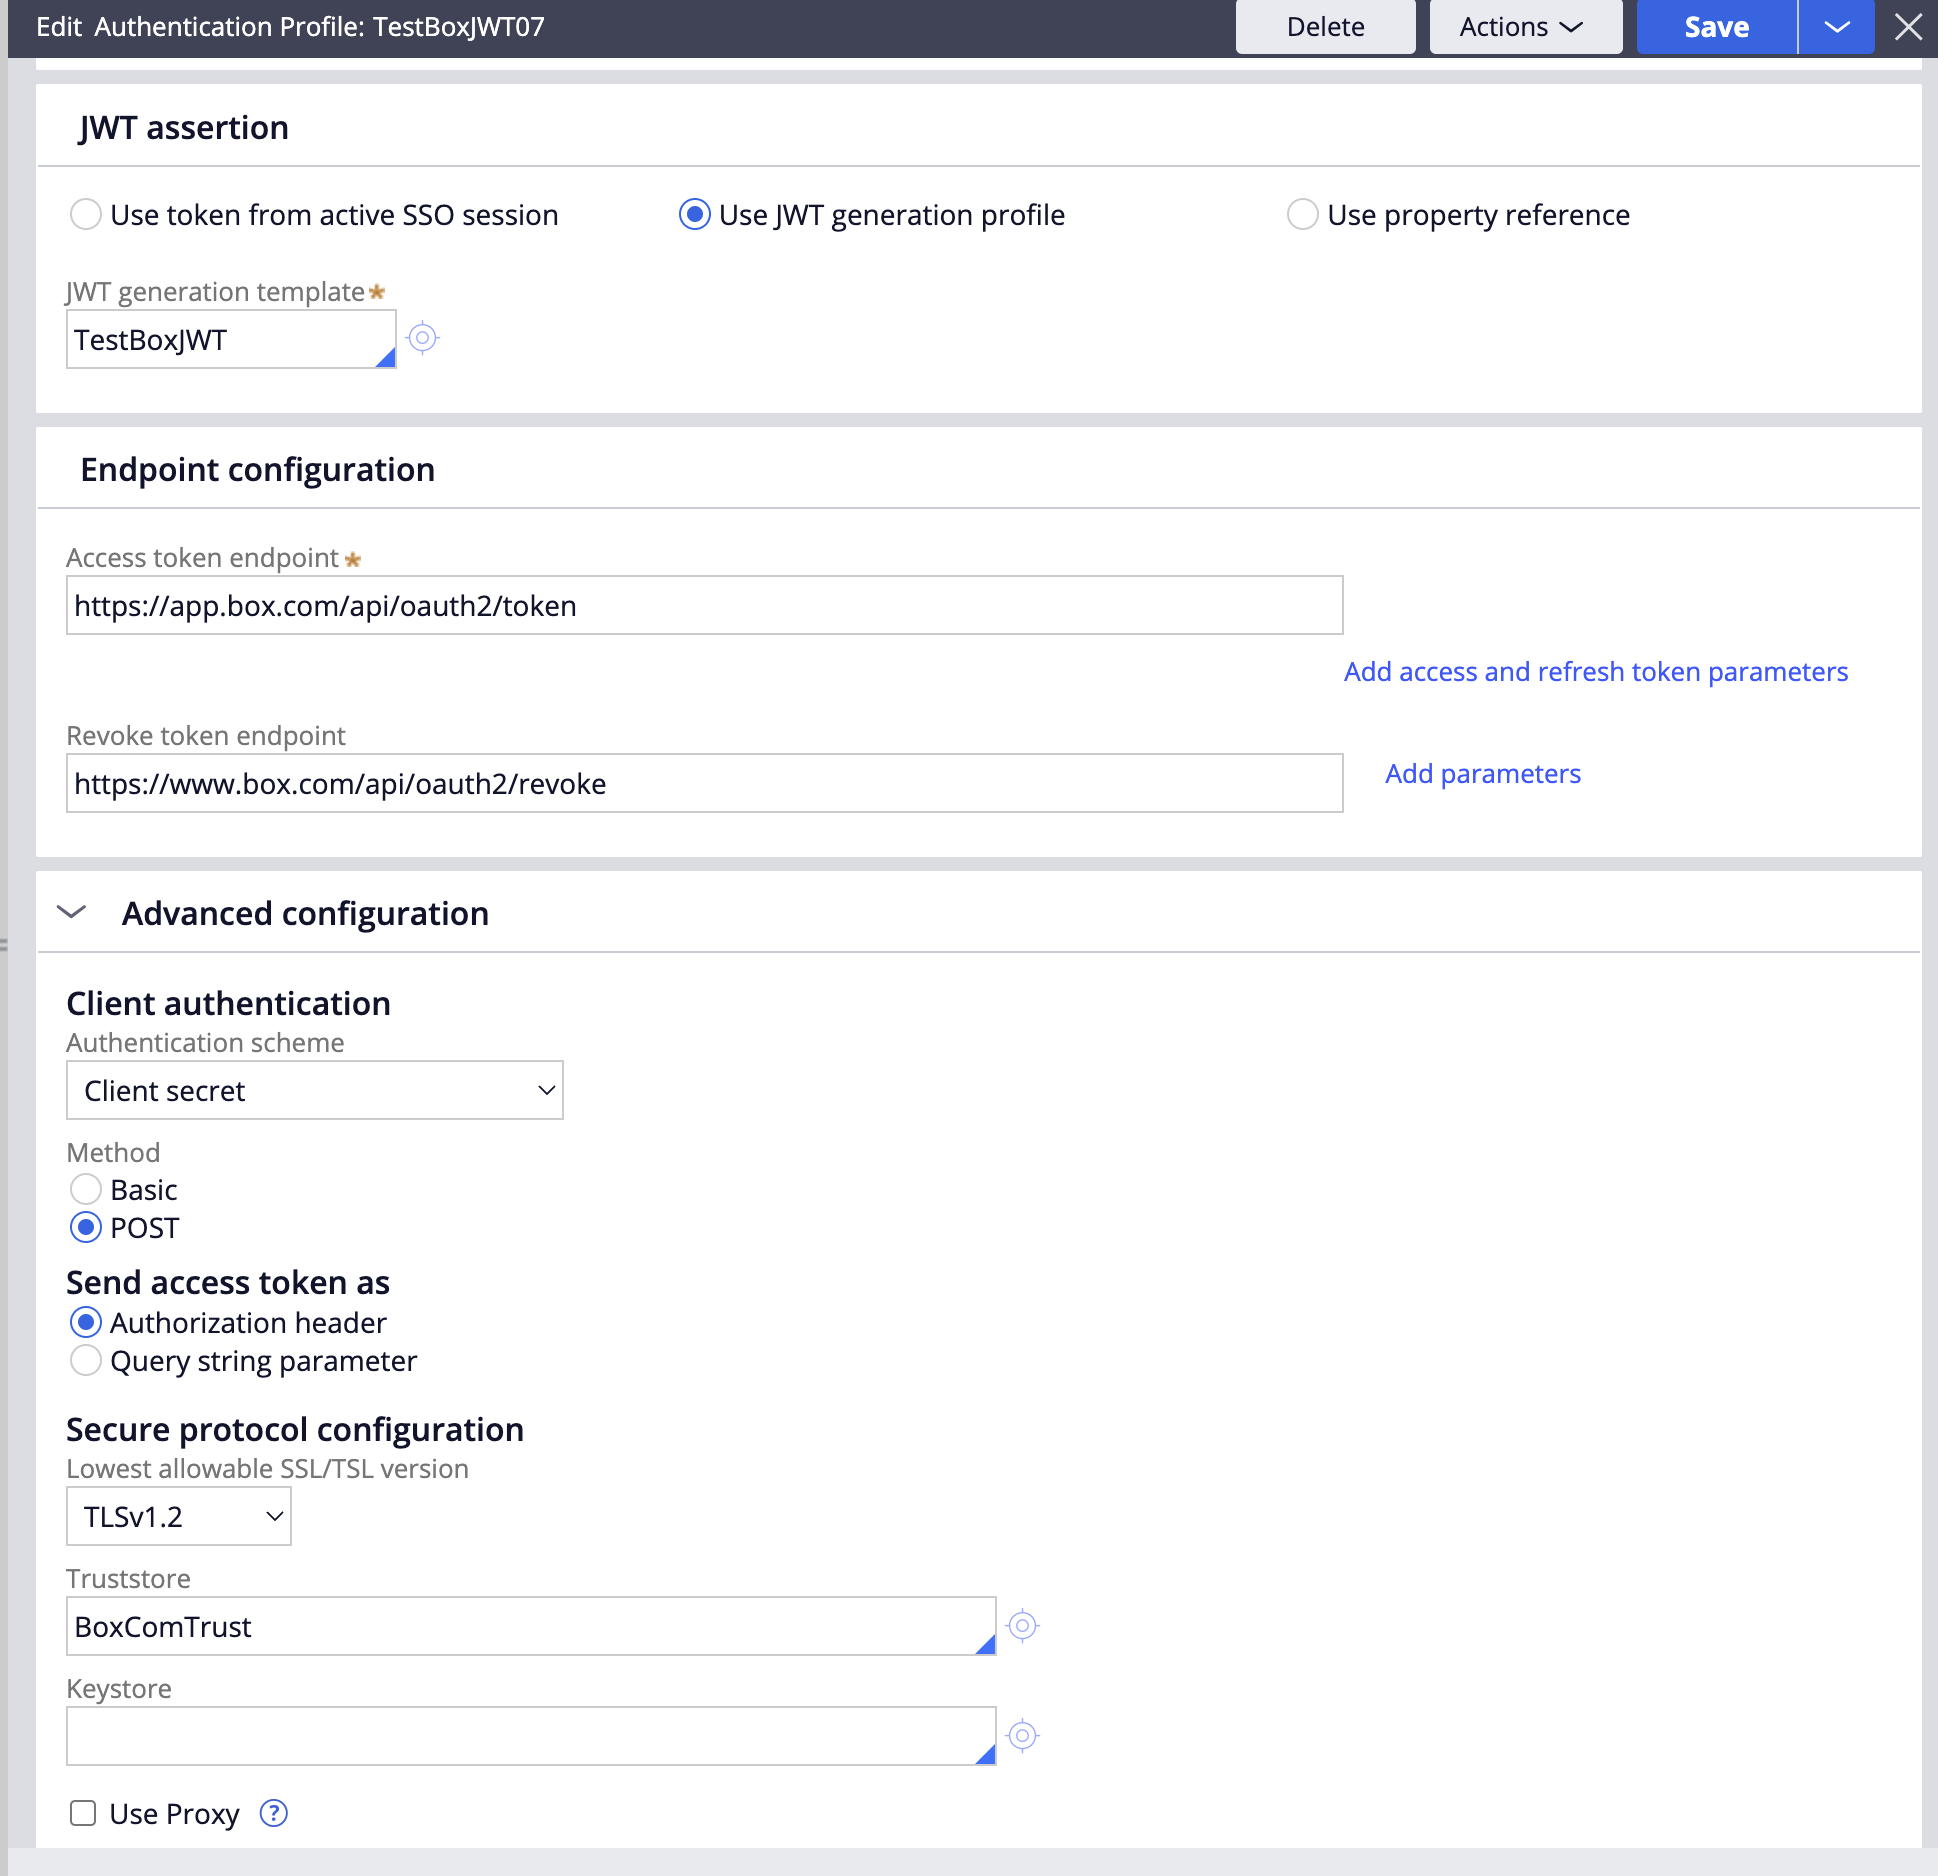
- In the "JWT assertion" section, choose "Use JWT generation profile" and either choose a Token Profile or create one as described in part B below.
- In the "Endpoint configuration" section enter "https://app.box.com/api/oauth2/token" for the Access token endpoint and "https://www.box.com/api/oauth2/revoke" for the Revoke token endpoint.
- In the "Advanced configuration" section, choose Authentication scheme "Client secret", Method "POST", Send access token as "Authorization header" and Truststore "BoxComTrust".
B. Creating the Token Profile
- Either from 'Create > Security > Token Profile' or from the target in A.4 above, create a new Token Profile for Generation
- No "Headers" need to be added
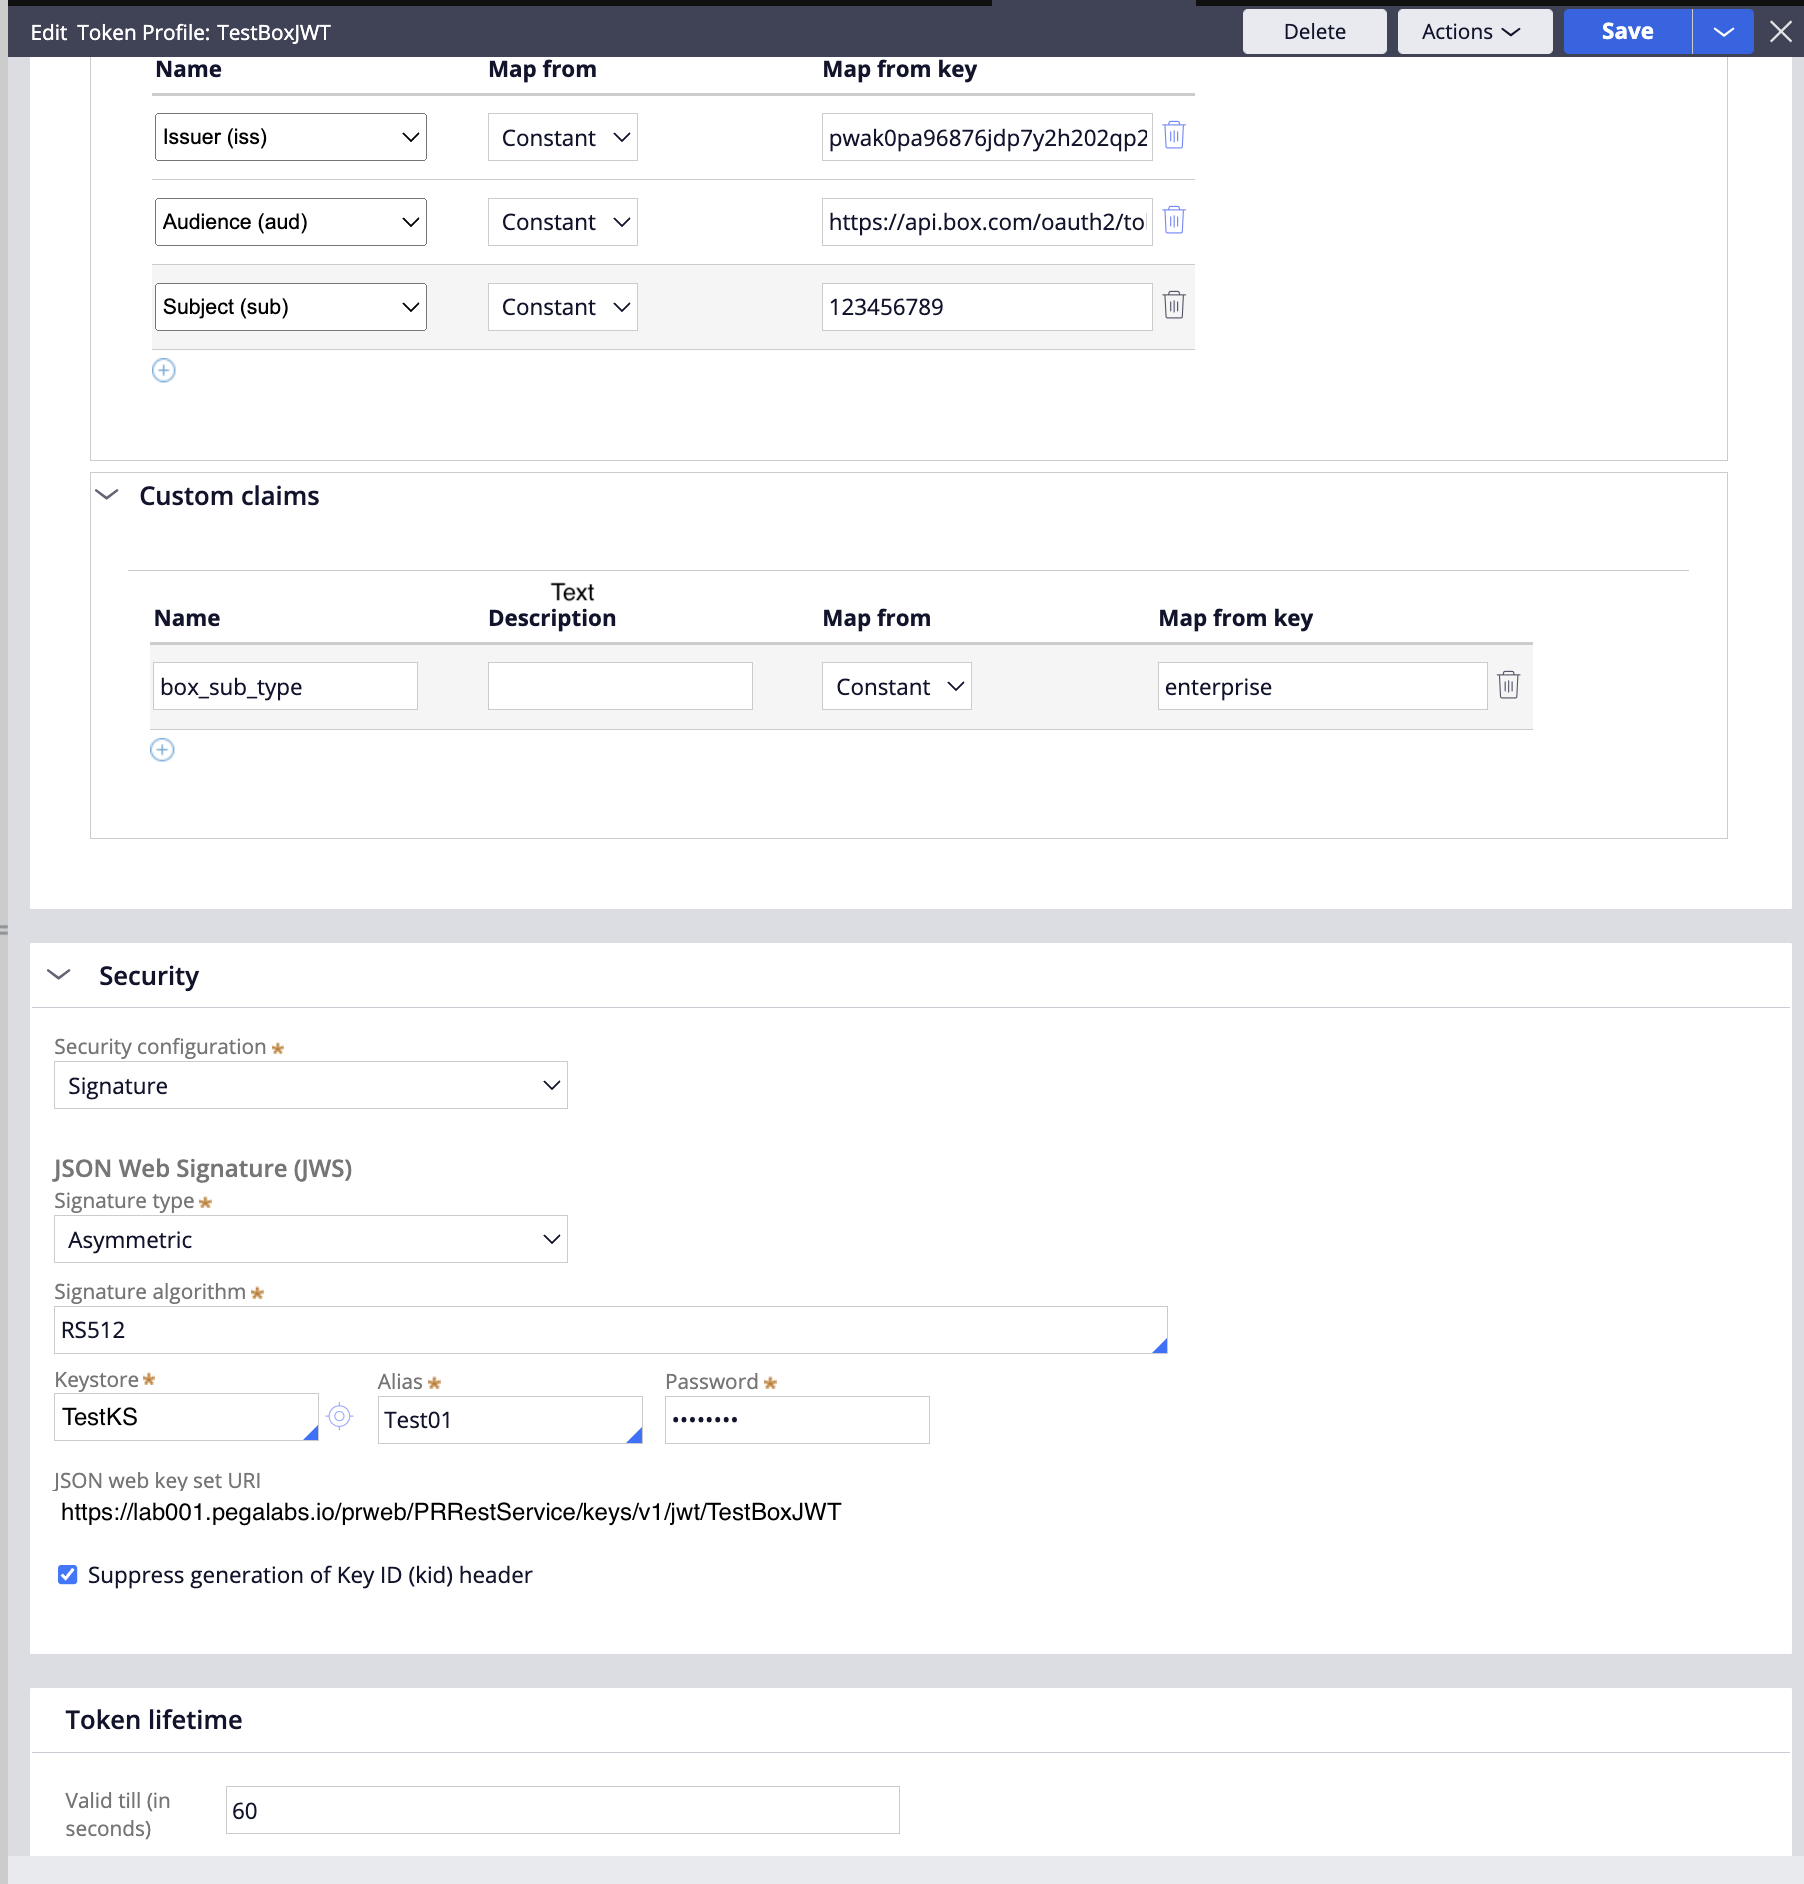
- In the "Claims" section, add the following Registered Claims:
- Issuer (iss): Map from Constant, key = the Box application's Client ID as in A.2 above
- Audience (aud): Map from Constant, key = 'https://api.box.com/oauth2/token'
- Subject (sub): Map from Constant, key = the Box Enterprise ID of the Box application. This is available in the App Info section on the General Settings tab of your Box App
- In the same section, add the following Custom Claims:
- box_sub_type: Map from Constant: key = "enterprise" (while "user" is also possible this is not addressed here)
- In the "Security" section, choose Security configuration "Signature", Signature type "Asymmetric", and check "Suppress generation of Key ID (kid) header". In Keystore either choose a Keystore or create one as described in part C below. In Signature algorithm choose the algorithm used to generate the key pair certificates, and in Alias/Password enter the alias credentials created, when creating the JKS file (refer to part D below)
- In "Token Lifetime" set Valid till (in seconds) to 60 or less
C. Creating to Keystore
- Either from 'Create > Security > Keystore' or from the target in B.5 above, create a new Keystore
- In "Keystore Location" choose "Upload file"
- Click on "Upload file" and upload the JKS file (refer to D below).
- In Keystore type enter "JKS", and in Keystore password enter the password for the JKS file (refer to D below)
D. Creating the key store file
The keystore file (C.2) containing the generated key pairs is external to PRPC and usually obtained from the client's security team, along with the alias credentials (B.5) and keystore file credentials (C.3). However, not all clients use keystores and might need guidance. We prototyped with KeyStore Explorer (https://keystore-explorer.org/downloads.html) and shared the steps with them. Here are some points to note:
- Create a new keystore of type JKS
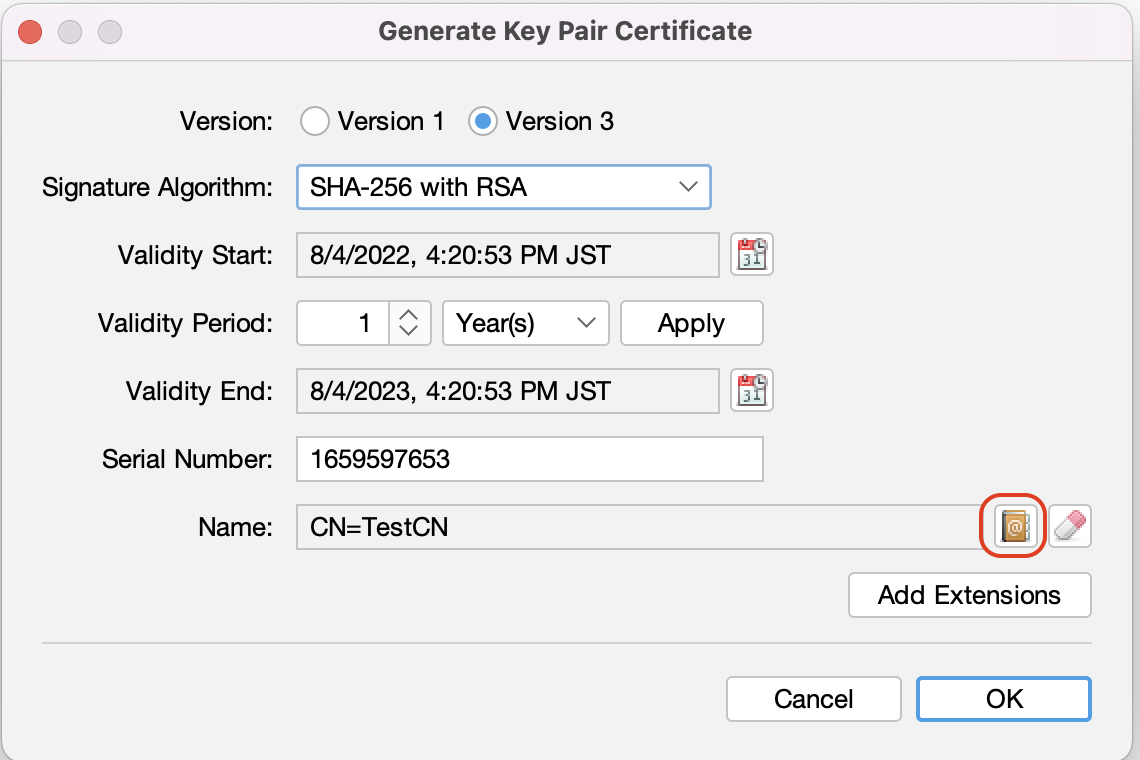
- When performing Generate Key Pair certificate, PRPC in principle supports any combination of algorithm (RSA/DSA/EC) and key size, so choose that as determined by your organisation's security policy. However, in practice it must match that selected in "Signature algorithm" in B5 above (shown below)

- Choose validity period as determined by your organisation's security poiicy. None of the Name components (red box below) are relevant when using for JWT, but CN is required for the keystore to save so enter any dummy string.
- The Key Pair Entry Alias and Password is required in step B.5 above
- The KeyStore Password is required in step C.4 above
- Once the keystore is created, right click to view Public Key Details. Click "PEM" to obtain the key in PEM format and export it from here to add it to BOX (via "Add a Public Key" on the Configuration tab of the Box application).
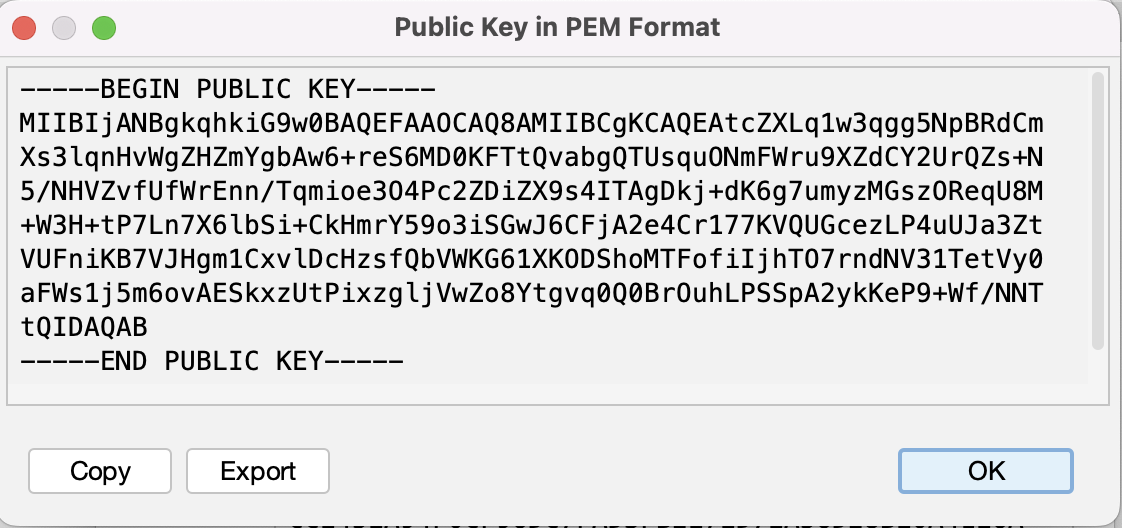
- The keystore file itself must be added in step C.2 above
P.S.: if you found this useful please indicate and click "Like" so we can gauge if this page is worth maintaining/extending.
