Discussion
Pegasystems Inc.
JP
Last activity: 1 Feb 2022 8:01 EST
How to change the background color in the text and input field of a form
Hi,
In this post, I will share a couple of approaches to change the background color in the text and input field of a form, as shown below.
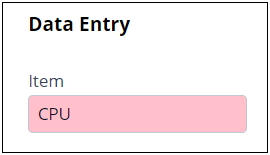
1. Skin rule - update the default Field
This approach can be taken if you are okay that all fields are affected.
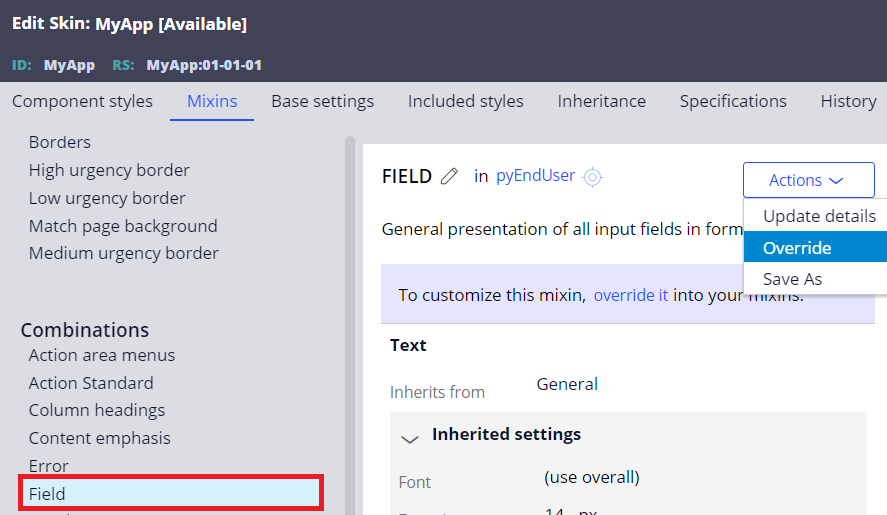
1-1. Open up a Skin rule. From Mixins tab, locate Field in Combinations and override it.
1-2. Enter your preferred color code in Background Color. In this example, I entered "#FFC0CB".
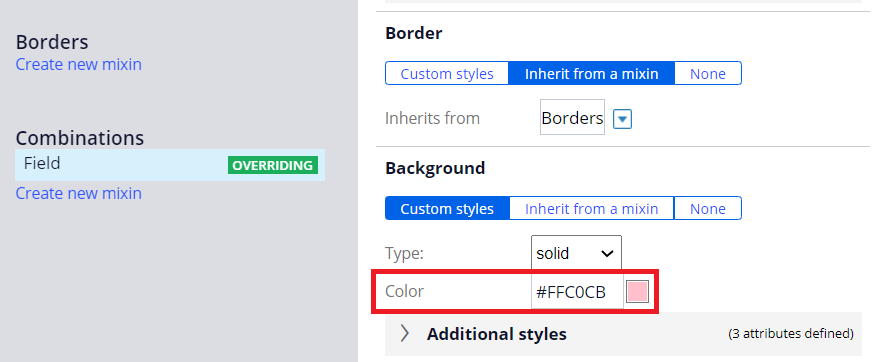
1-3. That's it. This modification is applied to all fields.

2. Skin rule - create a new control format
You may want to selectively change the background color rather than all fields. In that case approach #1 can't be taken. You'll need to create your own control format.
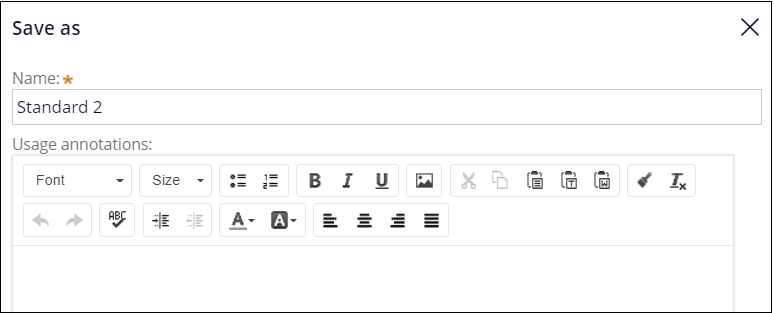
2-1. Open up a Skin rule. From Component styles tab, click Text inputs & Formatted Text. Do "Save As" Standard to define a new one.
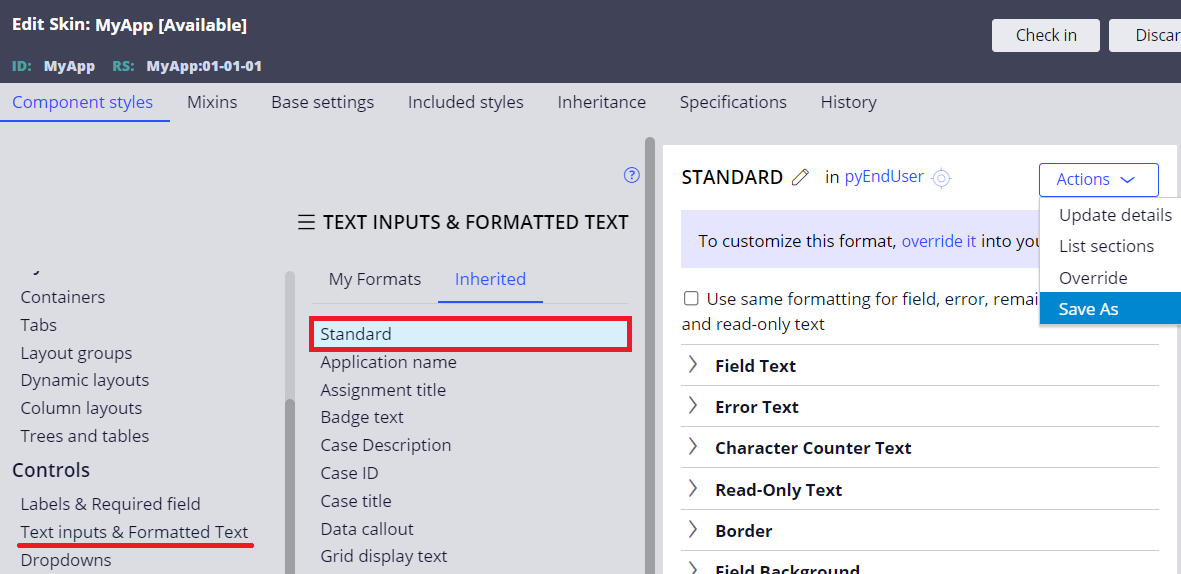
2-2. Give a preferred name. In this example, I named it "Standard 2".
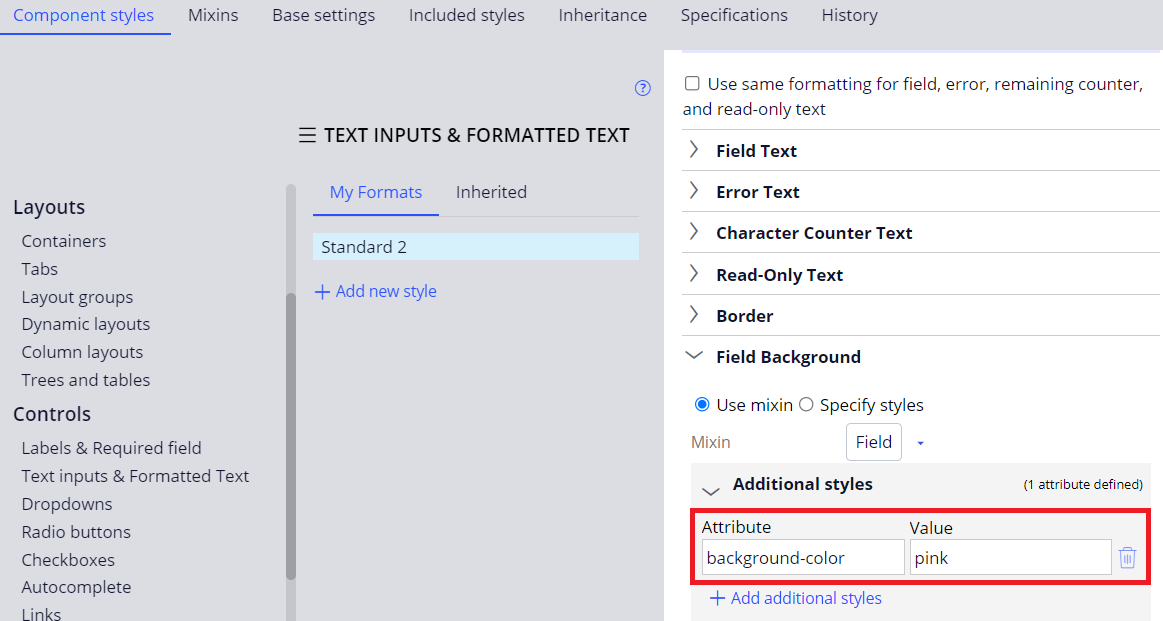
2-3. From Field Background, add additional styles. In this example, I entered pink for background-color.
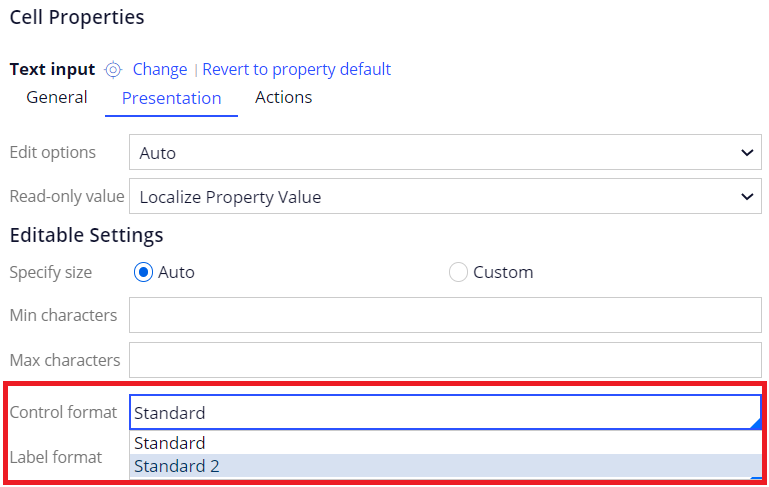
2-4. With this approach, you can select which field to apply this control format. Specify "Standard 2" in the cell properties.
2-5. The only configured field is affected.

3. JavaScript - using DevTools
Skin rule is okay as long as the fields you want to change is fixed. If you want to conditionally apply the change, Skin rule approach can't be taken. In that case, JavaScript is the only solution at moment.
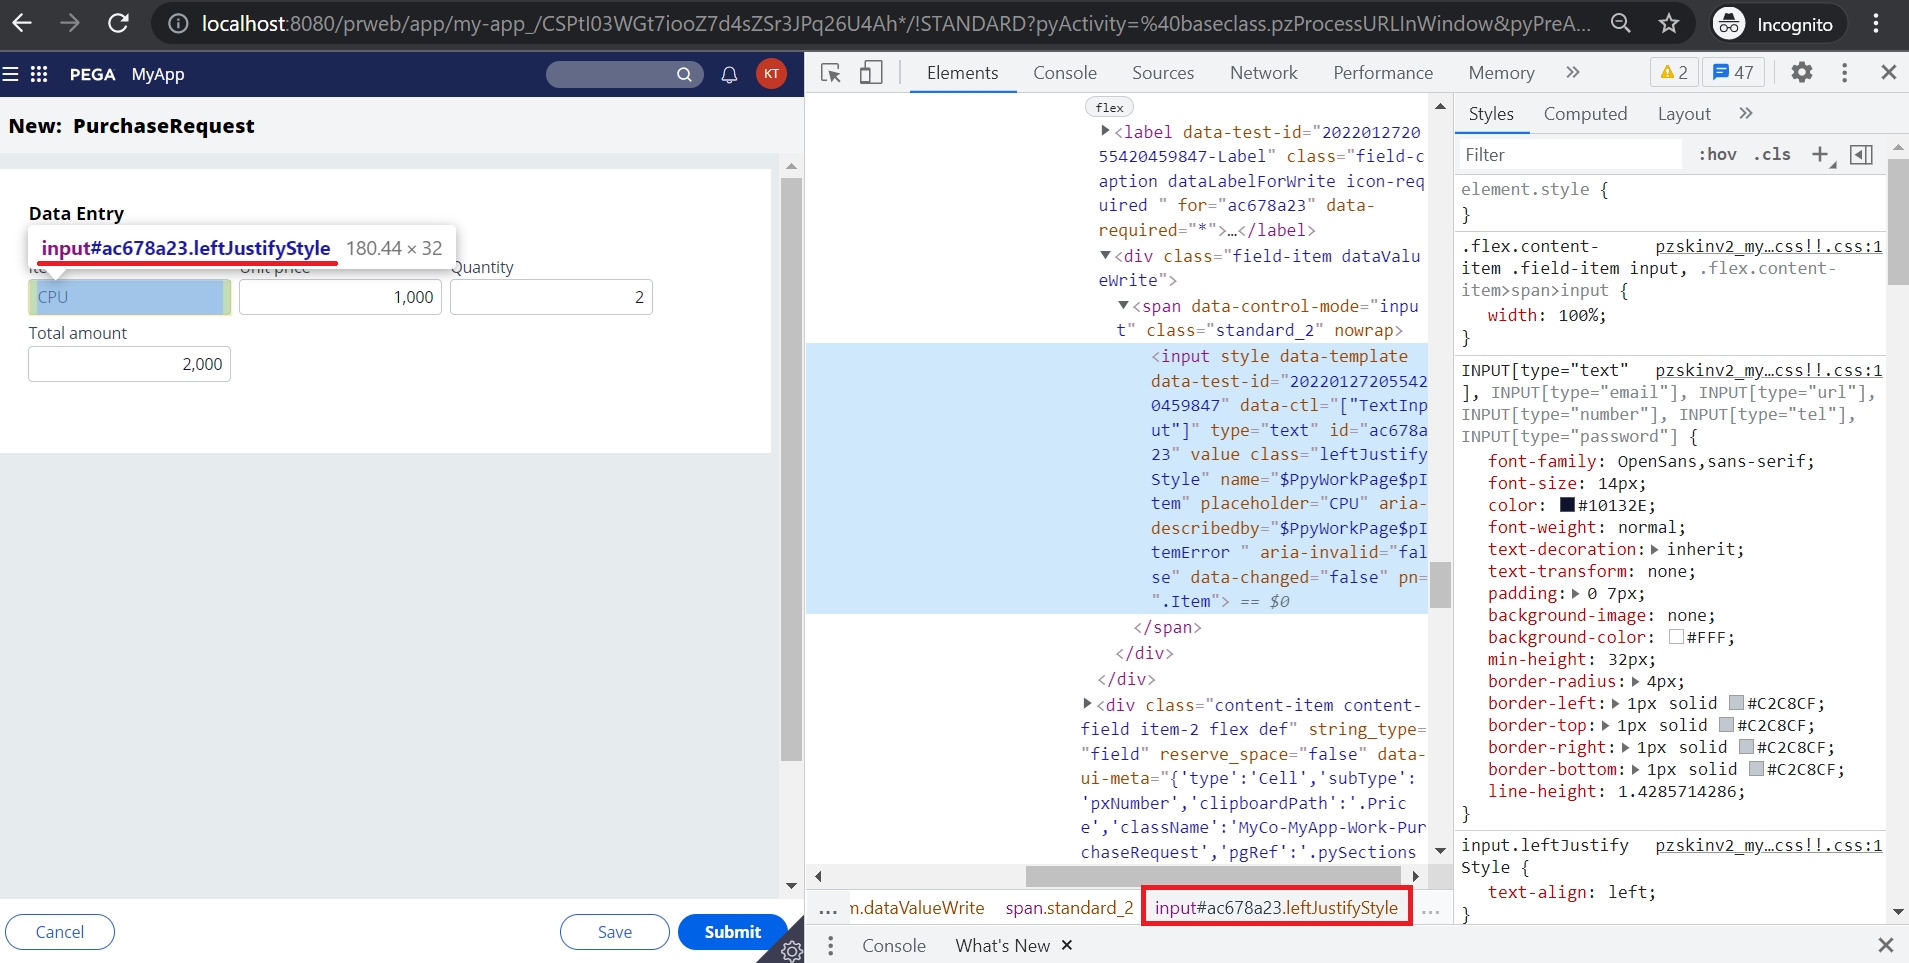
3-1. Launch DevTools and inspect the element. You'll find a string that looks similar to input#ac678a23.leftJustifyStyle. Take a note of that text.
3-2. Create a section rule. Turn off Auto-generated HTML checkbox so you can write your own code.
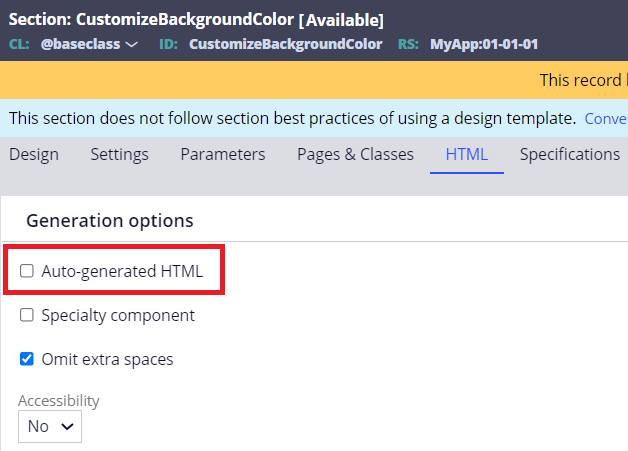
3-3. Write below script in the HTML source. Replace the text input#ac678a23.leftJustifyStyle with yours. Alternatively, you can write the code into UserWorkForm instead of a custom section rule. Either approach is fine.
<style>
  input#ac678a23.leftJustifyStyle { background-color: pink; }
</style>
3-4. Include this section rule to where you want to apply changes.

3-5. At this moment, the change should take effect. Make sure it works.

3-6. Now, let's conditionize it. Include <pega:when> and </pega:when> as below. You also need to specify your own When rule. You can also use "Always" (always true) and "Never" (always false) for a quick testing.
<style>
  <pega:when name="MyWhenRule">
  input#ac678a23.leftJustifyStyle { background-color: pink; }
  </pega:when>
</style>
3-7. Configure the field cell properties. For "Change" event, add "Refresh section" action so every time end users enter the field and move the focus away, the When rule above gets evaluated.
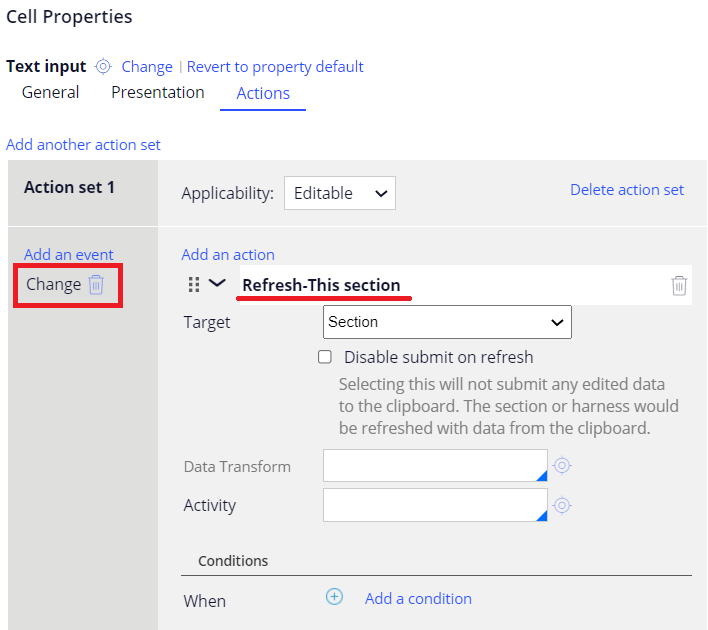
3-8. That's it. Now only if your When rule is evaluated true, the background color should change.
4. JavaScript - using custom class
Approach #3 requires work for each field. By using custom class, you can simplify your work.
3-1. In the cell properties, define a custom class. The text is arbitrary. In this example, I entered "pinkfield".

3-2. In the HTML source, specify custom class as below. Replace the text pinkfield with yours. Other syntax stays the same.
<style>
  <pega:when name="MyWhenRule">
  .pinkfield input { background-color: pink; }
  </pega:when>
</style>
3-3. That's it. If you want to apply the change to other field, the only thing you need to do is to enter the same class name in the cell properties.
Hope this helps.
Thanks,
