Authenticating to Pega with Auth0 using SAML protocol
This article describes how to integrate Pega Platform with Auth0, such that Pega operators are authenticated with Auth0 using SAML protocol. In this setup, Pega Platform acts as the Service Provider and Auth0 serves as the Identity Provider.
Step One: Create Authentication Service in Pega
Login to Dev Studio of your Pega Platform and click Configure > Org & Security > Authentication > Create Authentication Service. Choose “SAML2” as the authentication type, fill in other fields and click “Create and open”.
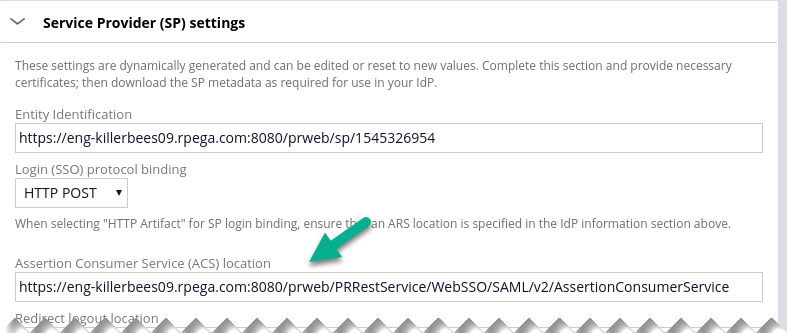
Specify the Authentication service alias, then go to the Service Provider section of the page and find the ACS URL in the field named "Assertion Consumer Service (ACS) location". You will need this value of in the next step.
Step Two: Create application in Auth0 with the SAML2 Addon
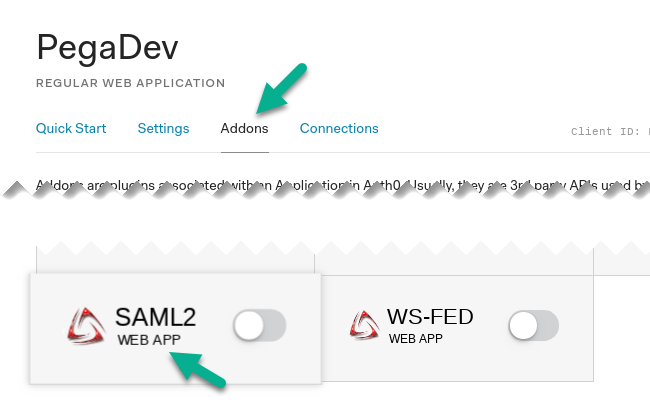
Login to your Auth0 management console at https://manage.auth0.com. Create a new Application, which will represent the integration with Pega Platform. Choose a name, for example "PegaDev" and "Regular web application" as the application type. Click "Create".
On the application screen go to the "Addons" tab and click "SAML2 Web App" addon.
This will open the Addon configuration page. Enter the ACS URL from the previous step into the "Application Callback URL" field
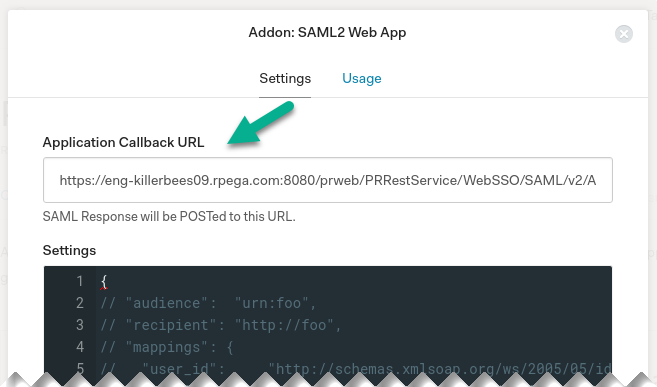
Save the Addon by clicking “Save” at the bottom of the "Settings" tab, and switch to the "Usage" tab on the same screen. Find the "Identity Provider Metadata" link and download it to a local file.
Step Three: Configure Authentication Service in Pega
Go back to Authentication Service configuration in Pega Dev Studio and use the "Import IdP metadata" option to import the metadata file downloaded from Auth0 in the previous step. This will take care of filling in the Identity Provider section of the service configuration.
In the Service Provider section either configure the keystore for request signing or check the "Disable request signing" checkbox. Refer to the Pega documentation for details, as this is not specific to Auth0.
Finally you need to configure how operators are mapped between Auth0 and Pega. The default option in Pega is to use the NameID from the Subject of the SAML Assertion. This is not a convenient option when using Auth0 as the Identity Provider, because by default Auth0 uses NameIDs in the following format: auth0|5c1a46e22ec04e65a3cc9a57
It is more convenient to use the option of mapping operators based on attributes, such as email address. In SAML protocol, attributes are identified by Unified Resource Identifiers (URIs). Attributes most appropriate for operator mapping have the following URIs:
- email address: http://schemas.xmlsoap.org/ws/2005/05/identity/claims/emailaddress
- name: http://schemas.xmlsoap.org/ws/2005/05/identity/claims/name
- user principal name (UPN): http://schemas.xmlsoap.org/ws/2005/05/identity/claims/upn
The example below shows configuration of mapping operators by the email address attribute.

Remember, that the URI representing the attribute must be specified in curly braces. Do not use any quotation marks, just specify the URI between { and } characters.
Save the Authentication Service configuration.
Step Four: Verify the browser experience
Make sure you have a user in Auth0 which can be mapped to an operator in Pega using the mapping you defined in the previous step. The operator must have "Use external authentication" checkbox ticked.
Now find the Login URL for your Authentication Service at the top of the service configuration.
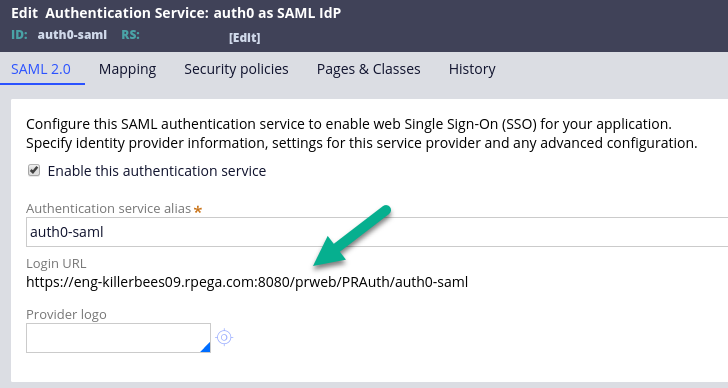
Open a new incognito window of your browser (to ensure that you are not logged in) and point it to this Login URL. You will be redirected to the Auth0 login screen. Login as the aforementioned user. After successful verification of credentials, you will be redirected back to Pega application, logged in as the mapped operator.
Step Five: Verify the mobile app experience
In your Pega Dev Studio, go to Channels and Interfaces and create a new mobile interface, or choose an existing one to modify. In the Security section of the "Configuration" tab choose your Authentication Service alias.

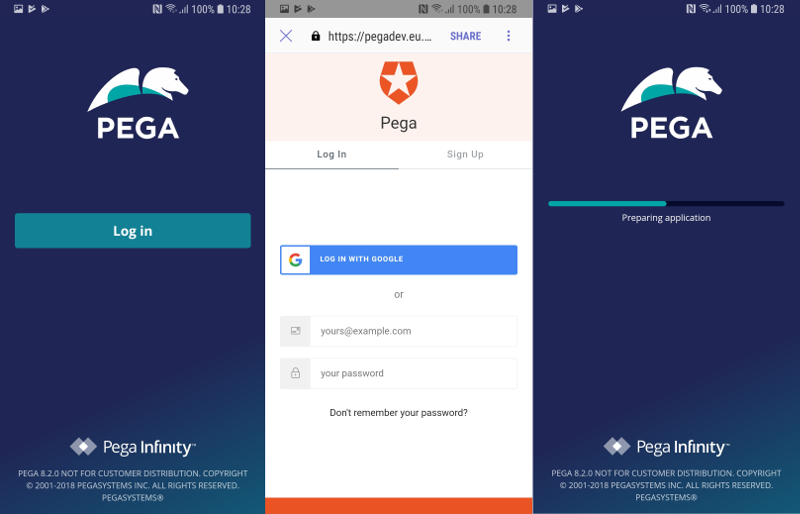
Build the mobile app and install it on a device. When you run the app for the first time, it will show the screen with "Log in" button. Tapping "Log in" will open an external web browser and load the Auth0 login page. After successful authentication, you will be brought back to your mobile app, which will proceed to prepare and run your Pega application.
Troubleshooting
In case of problems, the first step is to look into the Pega Platform logs. In order to get all the messages relevant to SAML authentication, you should adjust the logging level. In Pega Dev Studio, go to Configure > System > Operations > Logs and click "Logging level settings". Find the logger corresponding to SAMLResponseHandler and set the log level to "ALL".
Appendix: software versions
The solution has been tested with:
- Pega Platform 8.2
- Pega Mobile Client 7.41
- Pega Infinity Mobile Client 8.2
